Scamp front window replacement tips - Fiberglass RV
Journey with Confidence RV GPS App RV Trip Planner RV LIFE Campground Reviews RV Maintenance Take a Speed Test Free 7 Day Trial ×


Reply
 
Thread Tools Search this Thread Display Modes
 
Old 08-29-2015, 11:15 AM   #1
Member
 
Name: Steve in NY
Trailer: Scamp
New York
Posts: 83
Scamp front window replacement tips

I made a perfect replacement by using a trim router and the same thickness plexiglass. I bought the lock strip from scamp. I know it should go back together, but I can't figure it out. Seal on window first ? Seal on opening? I've about worn out my patience just getting any of it started. BTW, I will admit the lock strip is very stiff.

The old window had the lock strip on the outside. Is that normal?

Please help!

Steve
Steve in NY is offline   Reply With Quote
Old 08-30-2015, 11:37 PM   #2
Junior Member
 
Name: B
Trailer: Scamp
California
Posts: 1
Hi Steve,

Here's a good thread on the topic:

http://www.fiberglassrv.com/forums/f...amp-37263.html

I'm just finishing a full restoration on a 1990 Scamp 13. I've replaced many, many things, including the front window gasket. The front window gasket was, by far, the most frustrating and difficult task in the entire restoration. The way that worked for me (after quitting twice in frustration) was:

1. Tools: bike tire pullers or other flat non-scratching devices to guide lockstrip, a lockstrip tool (I tried it first without this, it was pretty much impossible without it), a warm bucket of water and a hairdryer to keep the lockstrip warm and pliable, and a can of silicon lubricant to get the bead into the lock.
2. Place the lockstrip around the window opening, leaving some extra material at the seam for overlap (the lockstrip will constrict as you place the window, potentially leaving a gap in the lockstrip).
3. Drop the bottom of the window into the bottom of the lockstrip, wedging the window into the window slot. When you work your way out to the edges, that's the worst part. Just use whatever tools you can to work the windows in at the corners. Bike tire pullers and the hair dryer were the things that saved me. Use tape to hold down the window after you get it in there so that it doesn't pop back out.
4. After hours of swearing, hopefully you've jammed the window into the window slot in the lockstrip all the way around. Use the lockstrip tool and the silicon spray to guide the bead into the lockstrip. It's terrible!

My window had the bead on the outside too, that's how the factory places them. I put the bead on the interior, which gives the exterior lockstrip a slightly cleaner look.

Good luck!
bbscamp is offline   Reply With Quote
Old 08-31-2015, 05:50 AM   #3
Commercial Member
 
Ian G.'s Avatar
 
Name: Ian
Trailer: 1974 Boler 1300 - 2014 Escape 19'
Alberta
Posts: 1,380
Registry
First and foremost the lockstrip MUST be on the OUTSIDE!!! The video showing the lockstrip on the inside is WRONG. The seal is designed to seal with the lockstip on the outside, I have helped many owners who their windows either leak or in a number of cases have acutally blown out while driving on the highway all had the seal installed backwards. The seal is not strong enough nor designed to be installed installed backwards and you risk major problems. I also recommend that you use a new seal, the original is probably getting hard and will not only be difficult to work with but it will probably leak after you go to all the work of replacing the window.

If you want a cleaner look use a one piece locking seal rather than the original two piece .

This is a one piece seal installed the correct way with the lock on the outside
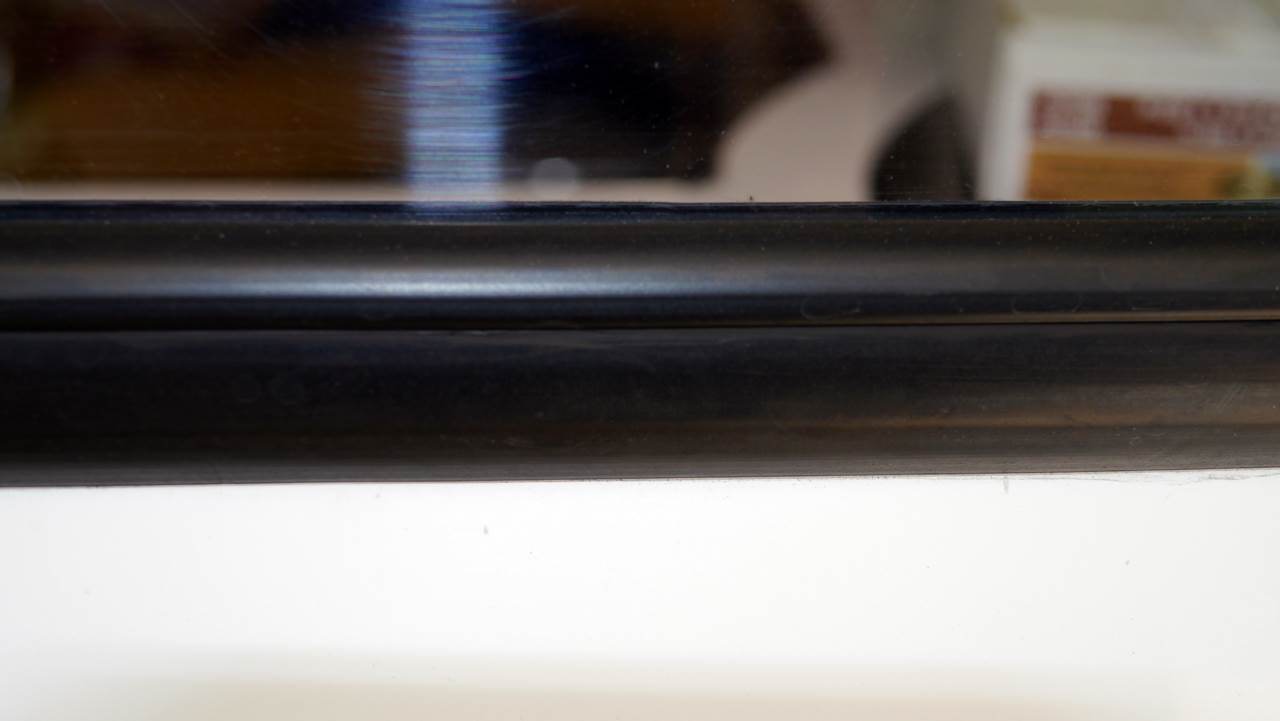


The following info and more is on my website Boler Front & Rear Windows

When replacing the windows the rubber molding is first placed around the opening, I like to start on the top, holding the molding in the center (so you have 6′ on each side of your hand) and start working the molding over the fiberglass lip. As you progress use a rubber mallet to pound the seal onto the body making sure it is fully seated. Work the molding around the corners, again using the rubber mallet to make sure it is fully seated THIS IS CRITICAL!!. Continue working your way around, alternating side to side. When you reach the bottom trim one end so it will be in the middle of the opening and seat that side. Take the final side mark the end so you have the 3/4″ overlap, glue the two ends together then seat the final section. Finally go around the molding one more time with the mallet making sure it is fully seated, then you are ready to start the window install. The best tool to cut the molding is a pair of garden pruning shears.

Mix up a soapy water solution and generously apply around the molding and window edges, place the window in the lower groove then slowly work the molding lip over the edge of the window. Be careful not to scratch the acrylic, I made simple plastic tools for this out of some scrap acrylic. They look like a letter opener with a slightly rounded point and beveled edges to a rounded edge (don’t need anything sharp).

Continue pressing the window into the molding while at the same time gently prying the molding over the glass, also continued to apply more soapy water, I used a spray bottle, applying every minute or so. The job is not hard but it can be frustrating at times as the window may want to pop out at times, an extra set of hands is useful. the final little section the window will “pop” into place.

You’re not finished yet, now the lock strip or the locking tab depending if you used one or two piece molding. Continue to use lots of soapy water and work the seal into place, special tools are available to install the locks, but I find various sized blade screwdrivers (preferably ones that you have eased the sharp corners). Again work your way around the window, gently spreading the molding, pushing on the lock until it slowly snaps into position all the way around.
Ian G. is offline   Reply With Quote
Old 08-31-2015, 09:25 AM   #4
Senior Member
 
Keaner's Avatar
 
Name: Joe
Trailer: 1973 13' Boler
Ontario
Posts: 182
Ahhh... the window and lockstrip torture test. I had a heck of a time like you. Ensure your plexi is not too thick. 4.5mil max. Check your local glass shops. I found my local Speedy Autoglass technician had a lockstrip tool in his toolbox. Drop the lockstrip and moulding in a bucket of hot water for 15min prior to loosen it up. Patience. A fridge with cold beer. Close the garage door so no one can hear your swearing.
Keaner is offline   Reply With Quote
Old 08-31-2015, 10:53 AM   #5
Member
 
Name: Steve in NY
Trailer: Scamp
New York
Posts: 83
Thank you for the tips. So far I got the window in. No lock-strip yet. I spent aver two hours with three helpers to coax the window in place. Now the gap the lock-strip goes in is totally closed and hard to spread open. If I had known this was going to be such a big deal I would have lived with the scratches.
Steve in NY is offline   Reply With Quote
Old 08-31-2015, 10:57 AM   #6
Senior Member
 
Keaner's Avatar
 
Name: Joe
Trailer: 1973 13' Boler
Ontario
Posts: 182
Do you have a lock strip tool? Mine was closed as well. The tool opens it and threads it in place at the same time. There's some YouTube video that shows how it works.
Keaner is offline   Reply With Quote
Old 09-02-2015, 10:17 AM   #7
Member
 
Name: Steve in NY
Trailer: Scamp
New York
Posts: 83
Being the cheapskate I am, I tried without the tool. I failed. Tool is on the way. I'll let you all know how it goes.

Take Care,
Steve
Steve in NY is offline   Reply With Quote
Old 09-02-2015, 11:11 AM   #8
Senior Member
 
Trailer: Scamp 19 ft 5th Wheel
Posts: 1,861
Steve another tool to have in your tool box is a cotter pin extractor tool.It helps to get the window in the seal and it opens up the seal for the lock strip tool. I put in a window last week with a Scamp seal. It seemed the seal was harder, more of a plastic material. The tail end of the other seals I have are softer, more like rubber.
Eddie
Craftsman - 4319 - Cotter Key Extractor | Sears Outlet
Eddie Longest is offline   Reply With Quote
Old 06-18-2021, 04:35 PM   #9
Junior Member
 
Name: David
Trailer: Scamp
BC
Posts: 6
Registry
83' Scamp fifth wheel front window

I don't see why the front window can't be the same as rear window, i.e. sliding glass. With the gravel shield in place should be plenty protected?
Vanisle is offline   Reply With Quote
Old 06-18-2021, 04:47 PM   #10
Senior Member
 
Donna D.'s Avatar
 
Trailer: 1988 16 ft Scamp Deluxe
Posts: 25,709
Quote:
Originally Posted by Vanisle View Post
I don't see why the front window can't be the same as rear window, i.e. sliding glass. With the gravel shield in place should be plenty protected?
It's because the front of the trailer isn't flat. The glass and frame won't bend to the compound curve.
__________________
Donna D.
Ten Forward - 2014 Escape 5.0 TA
Double Yolk - 1988 16' Scamp Deluxe
Donna D. is offline   Reply With Quote
Old 06-18-2021, 06:12 PM   #11
Junior Member
 
Name: David
Trailer: Scamp
BC
Posts: 6
Registry
Seems to be flat on my fifth wheel?
Vanisle is offline   Reply With Quote
Old 06-18-2021, 07:46 PM   #12
Senior Member
 
Donna D.'s Avatar
 
Trailer: 1988 16 ft Scamp Deluxe
Posts: 25,709
Quote:
Originally Posted by Vanisle View Post
Seems to be flat on my fifth wheel?
And THAT depends on the year of your 5th wheel. Early Scamp 19s had a flat nose for the optional non-opening window. When Eveland's remade the molds, after the fire in 2006, the nose was rounded and there is no longer a front window option.

Be very aware, the front window was done away with as it was a major leak point... and it didn't open!

Scamp hasn't had a front opening window since the mid-1970s, because they leaked. When towing and it rains... the rain is driven into the channels.
__________________
Donna D.
Ten Forward - 2014 Escape 5.0 TA
Double Yolk - 1988 16' Scamp Deluxe
Donna D. is offline   Reply With Quote
Old 06-20-2021, 10:05 AM   #13
Junior Member
 
Name: David
Trailer: Scamp
BC
Posts: 6
Registry
Thanks, Yes I'm very aware. Just replaced entire front floor as well as the the lower front due to this. Previous owner did not notice leak I assume and the entire front floor was rotted out.
Vanisle is offline   Reply With Quote
Reply

Tags
scamp


Currently Active Users Viewing This Thread: 1 (0 members and 1 guests)
 

Posting Rules
You may not post new threads
You may not post replies
You may not post attachments
You may not edit your posts

BB code is On
Smilies are On
[IMG] code is On
HTML code is Off
Trackbacks are Off
Pingbacks are Off
Refbacks are Off


Similar Threads
Thread Thread Starter Forum Replies Last Post
Scamp front window replacement alidbond Modifications, Alterations and Updates 24 08-15-2022 11:35 AM
'84 Scamp front window replacement? paint? HollyB Problem Solving | Owners Helping Owners 2 08-22-2012 06:00 AM
1986 Cadet Fiberglass front window replacement. Lois currie Care and Feeding of Molded Fiberglass Trailers 13 08-17-2011 08:44 AM
Front and Rear window replacement on 71Boler Shelley Bordeleau Problem Solving | Owners Helping Owners 5 12-02-2008 01:31 AM
Front window replacement Frank Bland Care and Feeding of Molded Fiberglass Trailers 1 05-02-2008 08:08 AM

» Trailer Showcase

familyboler

mat

521

Tom H. AZ
» Upcoming Events
No events scheduled in
the next 465 days.
» Featured Campgrounds

Reviews provided by


All times are GMT -6. The time now is 03:53 PM.


Powered by vBulletin® Version 3.8.11
Copyright ©2000 - 2024, vBulletin Solutions Inc.