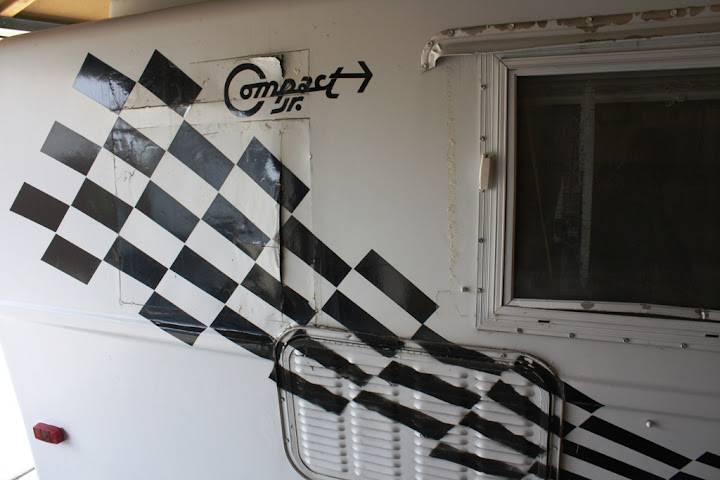
I knew, the moment I saw the ad on Craig's List, that this Compact Jr would be part of the family. I also knew that it would get a complete make-over before it's first use. Now, if this were a trailer that I would use myself, I might have dealt with the decor for a while, but this little guy was purchased for my Mother, who started taking road trips with me in Jan 2011. It turns out that she loves the road trips, but hates to drive, so towing her behind my van was the perfect idea... which leads me to this 1972 Compact Jr.

When I bought it, it looked great in pictures, but only "OK" through a real set of eyes. The bed was fold-out, which made for a difficult time unfolding it in such a small space. All the paneling was hanging on by either a single nail, or Elmer's glue from 1978. By the time I towed it home, many of the woodwork was sitting in the isle-way. The swivel chair was out of place, taking up half the interior for a single seat. The previous owner installed an AC which fed outside air through a large hole cut in the side of the trailer (ARRRGH!!!). They also attempted to build a shower stall for any travelers shorter than 5' and skinnier than 18 inches. Needless to say, it all had to go...

It was at this point (day-2 of ownership) that I realized how shoddy everything was in there, including all the wiring and the
fiberglass patches done by the previous owner (basically they bondo'd in some paneling which was now warped and ready for a stiff wind to rip it apart). The holes were in need of repair; the smallest being 4X18 (top), the largest being 18x18 (middle), and the hardest one roughly 14x20 and right on that horizontal bulge (metal grate)... what where they thinking?!?
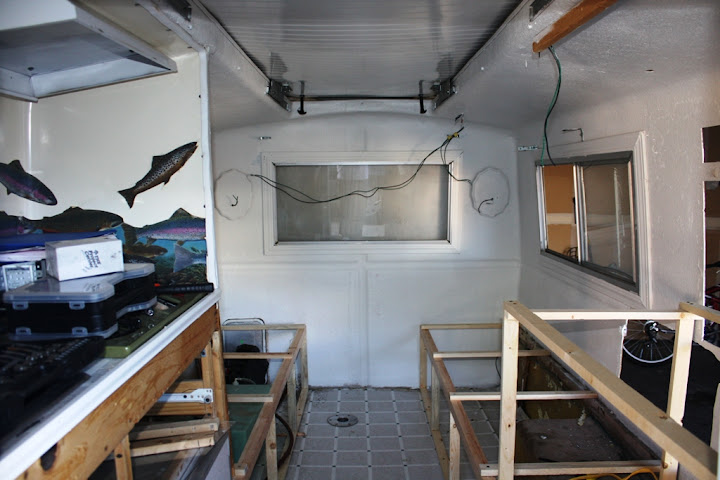
By day-3, I had the wiring completely overhauled, both 120v and 12v. I'm not sure why the previous owner wired in 8 different wall sockets into this small of a trailer but he/she did... and I removed half (two on each side) and split them on the fuse panel so that the exposed wall sockets consumed one 10A fuse and the AC & battery-charger will sit on another. I had to do a bit of reading online to figure this fuse box out. As it turns out, the previous owner wired both the neutral and ground lines together which doesn't work in the real world. After fixing that, I found that the 12v/12v converter that was installed would not go back to 12v if I unplugged the power cord... so that was removed all together (saves weight), with the decision that all 12v appliances will run off the
battery, not a converter.
After the wiring repair I set off with a couple coats in interior semi-gloss latex
paint just to freshen up the drab interior. Now you can see those holes in the
fiberglass on the right side...

I had some learning to do before I tackled the massive
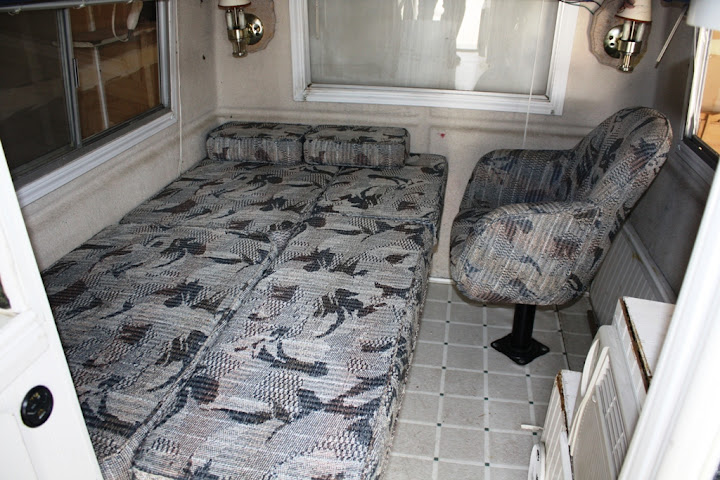
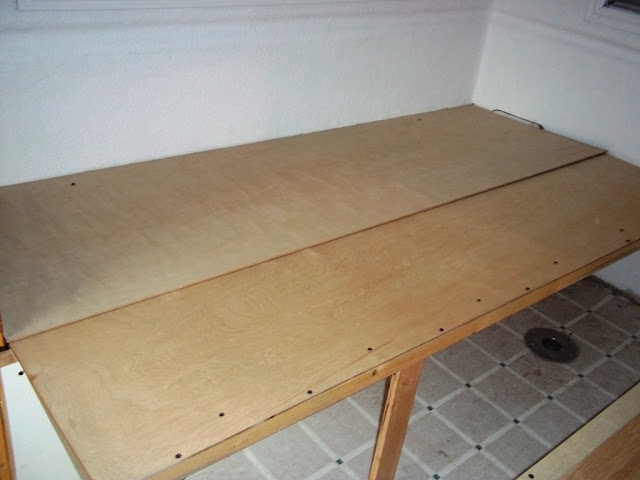
fiberglass repair, so while I was reading up and watching videos online, I also built the framework on the two bench-couches/pull-out-beds. Both would be 6 feet long and pull out to a 35" wide bed. If both are pulled out, it would form one large 6 ft X 5'10" bed that can comfortably sleep two adults.
By day-4 I could not go any further until I fixed the holes in the wall, so I bought all the supplies (ended up having to buy twice as much the next day) and got to work on the smallest hole first.
First I thought about just fiber-wrapping a pre-cut panel, inserting it in place with a little more fiberglass, and bondo'ing the outside... this in hopes of using less fiberglass to keep my costs down. This failed miserably so I went back to the standard way of laying large pieces of fiberglass over each hole (from the inside) while from the outside I used plastic sheeting and paneling screwed in place to keep the limp fiberglass in place until it dried. This worked out OK for my first delving into fiberglass repair.


As you can see, it isn't pretty, but from the outside things are coming together real well. This image above is after the first day of bondo work (also my first time dealing with bondo). The top hole has 3 coats of bondo, each getting smoother and smoother after a lot of sanding. The 2nd hole has it's first layer of bondo. And the 3rd hole had just finished up the fiberglass.
Since this image I have completely finished the top hole, including 3 coats of white
paint. Basically, unless you were locking specifically for the hole at nose-lengths away, you can not see the repair. The 2nd hole is on it's final (of four) layers of bondo and is getting it's first coat of
paint tonight. You won't be able to find this one either... I'm real happy with how they came out. The 3rd hole now has two coats of bondo and is looking good, although it will not be perfect due to the difficulty with that bulge at the top of it.
I will post some more images of the couch/pull-out-bed as requested and the final images of the fiberglass repair in the coming days.


 Compact Jr


 1970 Trails West Campster
 2011 Escape 15A

 Linear Mode


