 |
|
 07-24-2016, 04:41 PM
|
#121
|
|
Senior Member
Name: Kelly
Trailer: Trails West
Oregon
Posts: 3,046
|
Quote:
Originally Posted by shaggydoink

Thanks Walt. I must admit that I'm still somewhat nervous about how well this camper will do in the rain, I guess time will tell!
Jonathan
|
My friend said we should build fiberglass troughs with drains to the exterior under each window. Now there is a concept ")
|

|

|
|
07-24-2016, 05:02 PM
|
#122
|
|
Senior Member
Trailer: Escape 17 ft
Posts: 8,317
|
Escape: "In the event of a water leak or condensation build-up, there are areas in the bottom shell designed to channel water through the drain holes to the outside".
__________________
What happens to the hole when the cheese is gone?
- Bertolt Brecht
|
|
|
|
|
07-24-2016, 06:03 PM
|
#123
|
|
Senior Member
Name: Patricia
Trailer: 1975 Ventura
Ontario
Posts: 353
|
Drainage wells for water
K. Corbin, I don't know if you were joking but, in my determination to not have my trailer succumb to water damage, I have decided to rebuild it with just such safeguards. The Ventura has wells slanting down from the back wall to the wheel. I have put a drainage hole with a plug at the lowest point in each one of these wells and have put Reflectix in the wells and over the wheels. For frame strength, I have had to put flooring over part of the well but have left a foot at the front,where the plug is, open. Once I have finished reframing the trailer I am going to make a 6" hole above the well on each side of the trailer by the back wall so I will be able to see if water has infiltrated.
This area will be under the dinette seats and I am not going to finish the inside of the boxes but will put in polystyrene insulation against the walls and maybe paint it, if possible.
At the front driver's side there is a similar well and I have treated it the same way and again I will not be covering the framing behind the cabinets there with wall covering, just insulation. The sink, water containers, pump etc will all be located there and there will be a hatch door to the outside and no wood flooring.
In fact, all the back walls of the enclosed spaces will be only covered with polystyrene so I will be able to see the state of a good portion of the framing when I do regular maintenance.
This may seem like extreme paranoia and overkill but I just decided that not having to deal with a musty, mouldy trailer was worth a little thought and effort.
As well, I am a fall, spring camper and maybe winter in the south so the added insulation should help to keep me warmer.
Pic 1- driver's side well Pic 2 - well at back wall
|
|
|
|
|
07-24-2016, 06:48 PM
|
#124
|
|
Commercial Member
Name: Mike
Trailer: Boler13/trillium4500/buro13
Ontario
Posts: 1,138
|
Quote:
Originally Posted by k corbin
My friend said we should build fiberglass troughs with drains to the exterior under each window. Now there is a concept |
Trillium did do that in some of there trailers ,my 1300 has troughs and drains in the four corners
|
|
|
|
|
07-25-2016, 10:48 AM
|
#125
|
|
Senior Member
Name: Jonathan
Trailer: 1991 16' Casita
North Carolina
Posts: 178
|
Yesterday was another one of those days where I bounced around between a random collection of tiny tasks which all add up to forward progress albeit far less noticeable than some of the higher impact items I've done thus far.
One of said tasks was working on the door. I cut a 1/2" thick block to size which was my estimate on the gap but quickly discovered that this created a gap back in the opposite direction (not tight enough)... what the?!! I was puzzled for a couple minutes as to why I was having trouble getting things to line up period, then it dawned on me that the original alignment almost certainly factored in the thickness of the carpet and pad which I've since removed. My next step will be to cut some strips from some 1/8" aluminum I have and add two or three layers which theoretically should get the door snugged up where it needs to be.
Another task was temporarily sealing some of the holes in the shell which I'll need once I get to reinstalling some of the interior structural pieces. For this I decided to use some Nashua waterproofing repair tape which has aluminum on the outside, and a thin layer of butyl on the inside which sounded like a good bet:

I got some bright white duct tape which I had planned on layering over top of this to make the patches look a little less funky, although after stripping some more paint I came to the conclusion that the poor camper would likely be an aesthetic nightmare until I'm able to paint it so I may not bother... yep, it's getting worse! 
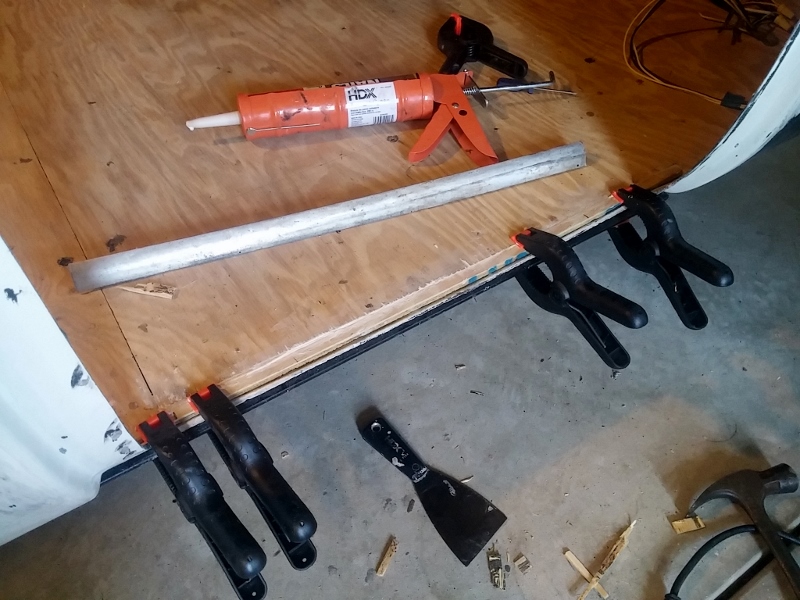
Another tiny, yet time consuming project was working on the threshold for the door... which needed to be installed to get a tight seal around the bottom... which to install needed to have the floor extended... which required a special cut to get the width and height just right... which took forever, but I finally got done:
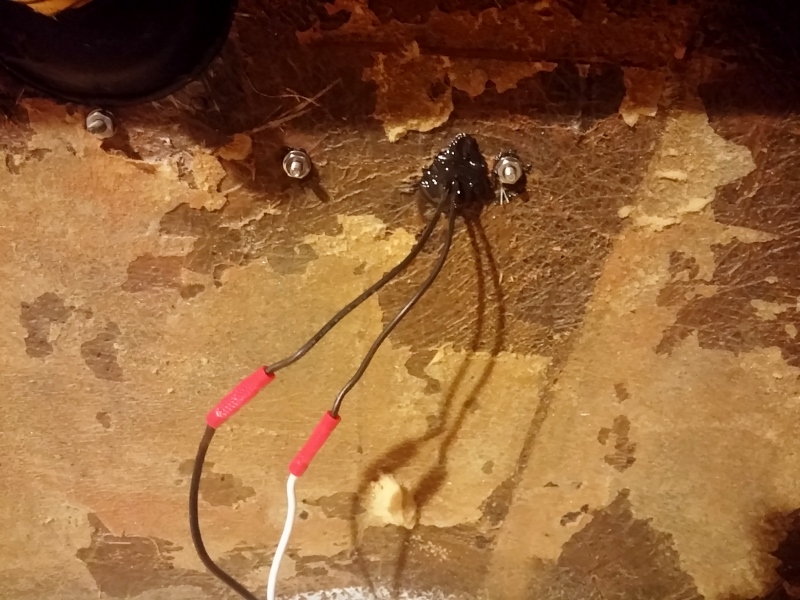
The last project for the day was to go back around and get the side running lights installed in a more permanent fashion. As I was doing this I was trying to remember the logic behind *not* doing this in the first place, but in the end I got all four lights installed with butyl tape seals on the exterior, sealant on the interior and the wire nuts replaced with crimped wire connectors:
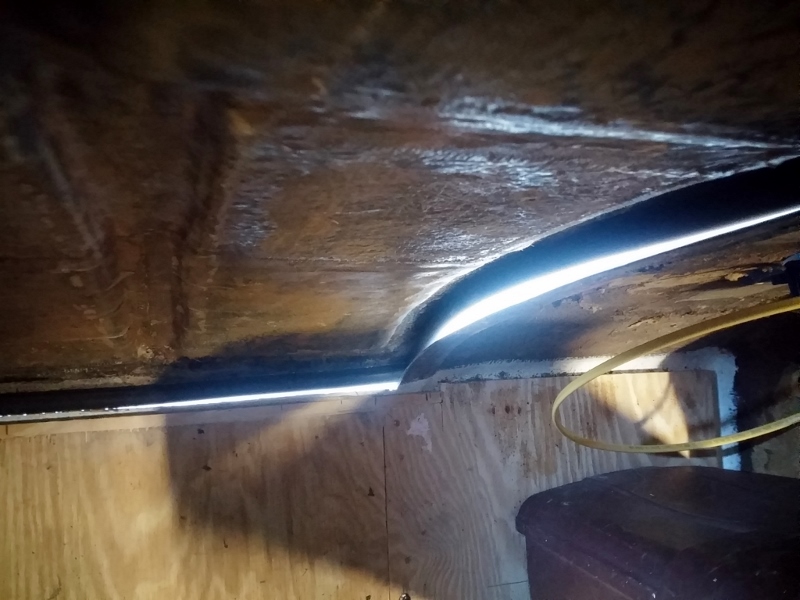
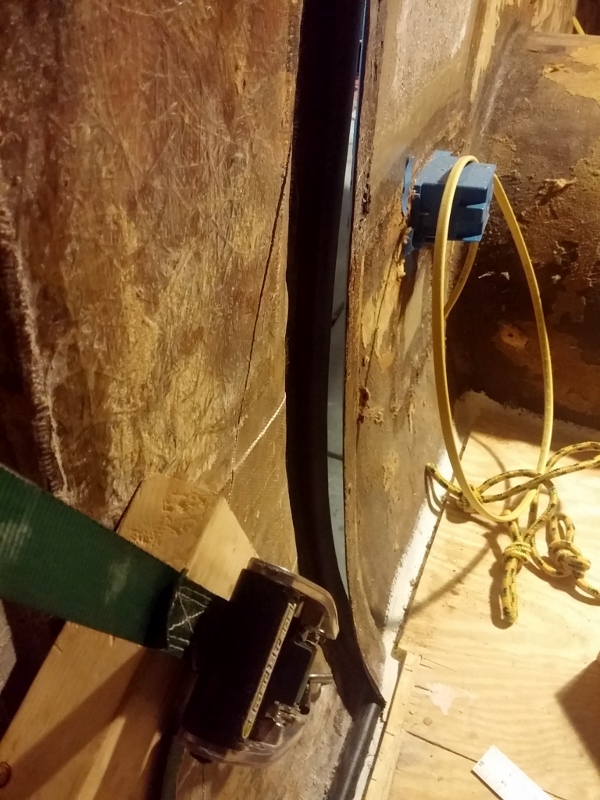
As I was shuffling around I came across another structural detail I'll need to attend to - for whatever reason, Casita didn't put a cross support on the frame in one location (at the back of the main floor right before it steps up) which I'm noticing is causing the sub-floor to flex a lot:
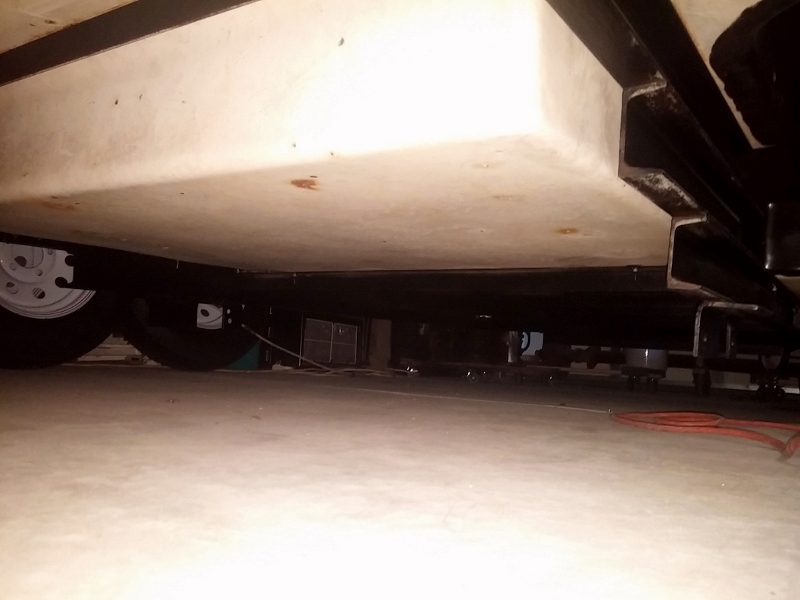
I've got some angled steel which should take care of this, it will just be a matter of struggling through the process of drilling a few more holes in the frame... oh boy, my favorite. 
Jonathan
|
|
|
|
|
07-25-2016, 05:41 PM
|
#126
|
|
Senior Member
Name: Jonathan
Trailer: 1991 16' Casita
North Carolina
Posts: 178
|
My short time after work today was spent working on the door which led to some good news and bad news. The good news is that the backing plate I whipped up out of the aluminum strips got the latch connecting with the strike plate in a way that felt the way it should when closing the door, a little bit of pressure required to make it click, and a nice firm grip once it did. 
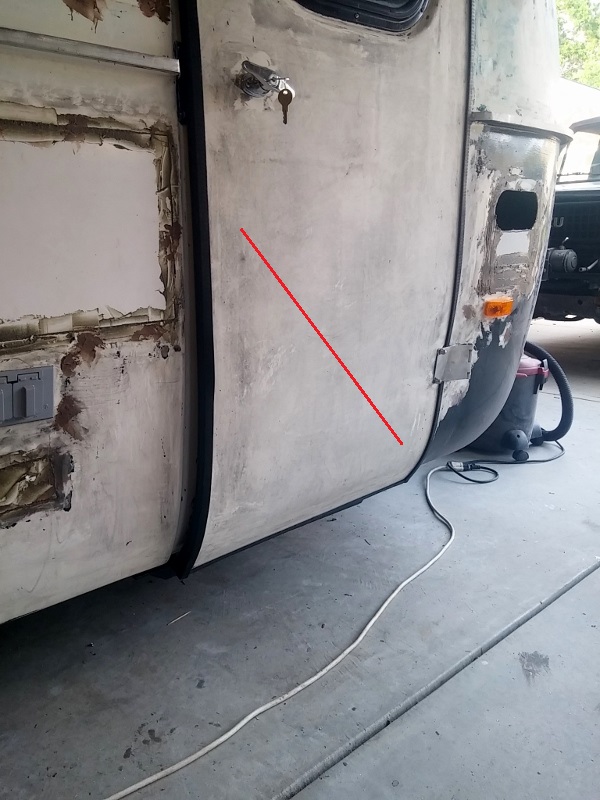
The bad news is that it led me to the conclusion that the door itself is still out of whack. From the perspective of the inside, there's a bit of a gap on the upper right hand side (1/8" or less) which I think I'll be able to resolve by tweaking the hinges a bit:
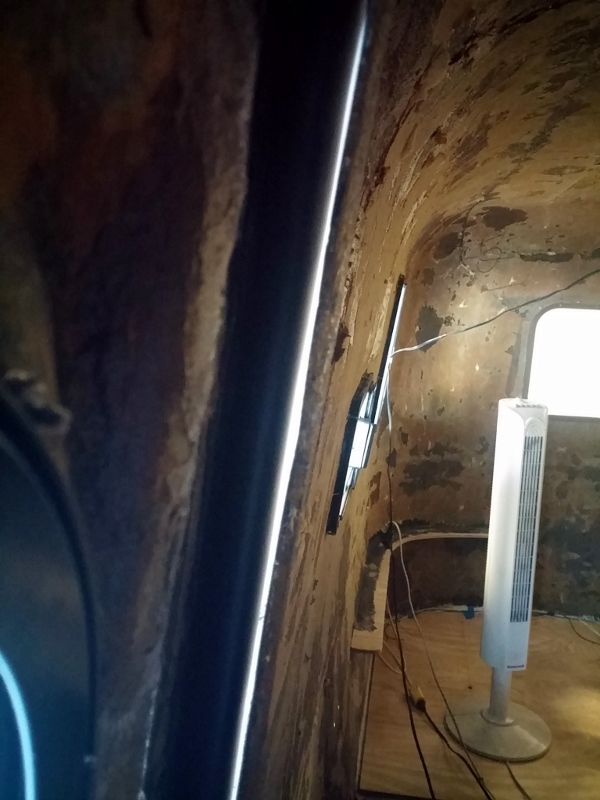
But the gap on the bottom right is pretty bad:
The shell itself in that lower area I think will get pushed a little further out whenever I get the interior structural pieces put back in, although at present my sense is that I'll need to warp (or un-warp) the door itself with a cross cut on the inside like this:
Theoretically this would allow me to ratchet the lower portion in, and result in a good fit all the way around... at least that's what I'm thinking at this moment.
Jonathan
|
|
|
|
|
07-25-2016, 06:23 PM
|
#127
|
|
Senior Member
Name: Kelly
Trailer: Trails West
Oregon
Posts: 3,046
|
Doors are such a drag to align and the shape of your door takes it way beyond the normal into a quantum number.
As far as the look of the exterior I think it is approaching the look some avant garde artist deliberatly try to create. Just think, you could roll it into a gallery in Soho and it would not look out of place! You might think I am joking but it is actually true. Now you just need to stage an "event" on the inside, films showing on the walls, some music, crates to sit on.
Just enjoy it for what it is in its current condition. Not so much ugly as transitionally interesting with layers of history.
|
|
|
|
|
07-28-2016, 10:19 AM
|
#128
|
|
Junior Member
Name: Graeme
Trailer: Casita
Vermont
Posts: 16
|
We are going through much of the same with our 1984-5 Casita SD. We have an active thread on a different Casita forum under the title Crusty Casita. We bought ours in a gutted condition, working along at a slightly slower pace than you, but making gains. Thanks for the thorough posts with pics. Excellent stuff.
|
|
|
|
|
07-28-2016, 05:40 PM
|
#129
|
|
Senior Member
Name: Jonathan
Trailer: 1991 16' Casita
North Carolina
Posts: 178
|
Quote:
Originally Posted by GraemeandJenn
We have an active thread on a different Casita forum under the title Crusty Casita. |
I can use all the ideas and inspiration I can get so will try and find your thread so I can follow along!
In terms of my old camper, my work schedule has kept my available project time pretty low since Tuesday. As much as it pained me to do it, I made a kerf cut in the door and played around with a number of different angles to ratchet it, finally landing on this which had the best result of anything as it got the bottom of the door completely flush and tight all the way across:
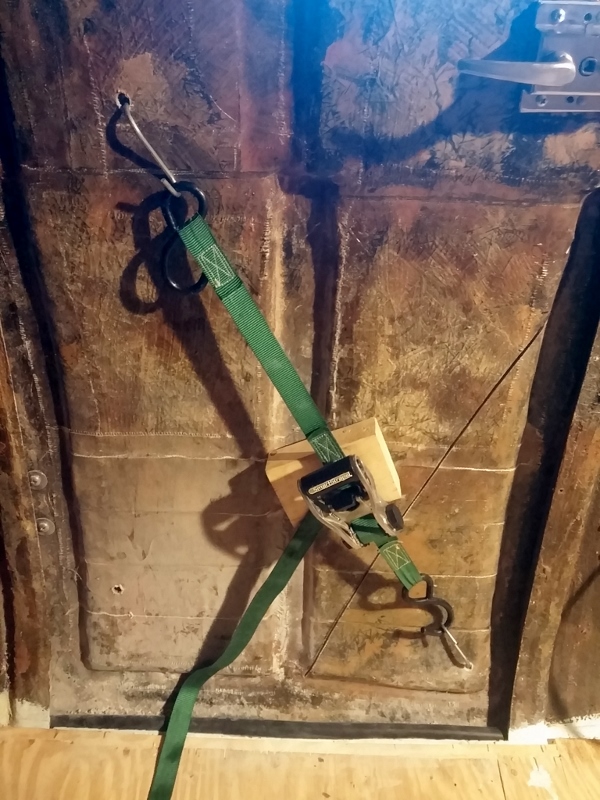
Unfortunately despite all of the angles I tried there remains a big gap in the one spot:
After staring at said big gap for probably ten minutes I started to wonder if the problem is in the contour of shell itself and not the door, so something I'm going to look at more closely next.
Jonathan
|
|
|
|
|
07-29-2016, 04:51 AM
|
#130
|
|
Junior Member
Name: Graeme
Trailer: Casita
Vermont
Posts: 16
|
I hate to say it, but I think that any further attempt to eliminate the gap should be stopped until you have the interior installed. I know on mine the cabinet next to the door pushes up on the roof a bit when put in place without the carpet installed. The pressure will only increase when we install the Kangaback. I think things will change. I hope, because my door looks about the same right now, without any of the interior installed.
Casita Club, "Crusty Casita"
|
|
|
|
|
07-29-2016, 06:36 AM
|
#131
|
|
Senior Member
Name: Steve
Trailer: Escape 5.0 TA
Pennsylvania
Posts: 231
|
Door issue.
I agree with Graeme. Larry of Little House Customs once observed a gutted Casita being towed down the road to his workshop. He described it as a large egg shaped piece of jello on wheels. It's not hard to imagine that what is inside is important to stiffening and shaping the structure. How you will get your shell back to its original shape is the biggest question. All that interior furniture including the bathroom shower is important to the strength of the structure. Hopefully you didn't junk it all. For what it's worth, a lot of 16's have doors that don't fit and seal perfectly.
|
|
|
|
|
07-29-2016, 08:00 AM
|
#132
|
|
Senior Member
Trailer: 1988 16 ft Scamp Deluxe
Posts: 25,710
|
Quote:
Originally Posted by GraemeandJenn
We are going through much of the same with our 1984-5 Casita SD. We have an active thread on a different Casita forum under the title Crusty Casita. We bought ours in a gutted condition, working along at a slightly slower pace than you, but making gains. Thanks for the thorough posts with pics. Excellent stuff. |
Direct link to the Crusty Casita on the Casita Club forum: Crusty Casita - Casita Trailer Modifications Forum - The Casita Club Forums
__________________
Donna D.
Ten Forward - 2014 Escape 5.0 TA
Double Yolk - 1988 16' Scamp Deluxe
|
|
|
|
|
07-29-2016, 08:08 AM
|
#133
|
|
Junior Member
Name: Graeme
Trailer: Casita
Vermont
Posts: 16
|
Thank you Donna. I didn't want to cross an boundaries by posting a link to another forum.
|
|
|
|
|
07-29-2016, 09:30 AM
|
#134
|
|
Senior Member
Name: Jonathan
Trailer: 1991 16' Casita
North Carolina
Posts: 178
|
Thank you very much for the input, and what you mention about the shell losing its shape due to the lack of the interior structural pieces makes perfect sense. The good news is that I retained everything that was salvageable with the intent of reinstalling it slowly over time, what I may need to do is accelerate this process or at least install some temporary pieces so I can solve for the shape issue, yet also actually use the camper which I'm really eager to do.
Also, thanks for the link Donna, I'm off to check out "Crusty"! 
Jonathan
|
|
|
|
|
07-30-2016, 08:45 AM
|
#135
|
|
Senior Member
Name: Jonathan
Trailer: 1991 16' Casita
North Carolina
Posts: 178
|
<start sidetrack>
I got out of work early yesterday and had every intention of coming home and diving into things, but ended up wandering aimlessly in and around the camper for probably an hour before I found myself sitting inside on the computer staring blankly at my collection of notes, tasks and links in Evernote... basically paralyzed with both hands on the Rubik's Cube, a reference "Keith2000" made which I think is brilliant, unable or perhaps unwilling to make a turn in any direction.
I walked away from the project with a wide array of thoughts and emotions, and must admit frustration and discouragement were probably the highest two. Why are there so many $*&#ing dependencies? What if I screw something up? What if the camper doesn't come out as well as it should?
Sure enough, some time away to reflect answered all of these questions. The dependencies are there because the project is complex, if I screw something up I will figure out a way fix it and in the end my goal is not to have the camper showcased in publications, but to have a clean, easy and functional solution for living while on adventures in the great outdoors, if it ends up having its quirks or shortcomings so be it.
While technically I lost several hours going through this mental and emotional exercise, it gave me the fresh perspective I needed to become unparalyzed and excited again about moving forward.
<end sidetrack>
Jonathan
|
|
|
|
|
07-30-2016, 09:27 AM
|
#136
|
|
Member
Name: Rhonda
Trailer: 1976 Boler "Small Scale"
Ontario
Posts: 33
|
Don't stop believing:)
I am astounded at the amount you have accomplished with something that didn't immediately appear to be that bad. Obviously your work inspires others as I quickly glance over comments. Many would have given up long before now and as they say, it is always darkest before the dawn.
I sincerely hope that you take a well deserved rest and then continue - I am sure that many others are eager to see the results of your skill, problem-solving and determination.
|
|
|
|
|
07-30-2016, 09:34 AM
|
#137
|
|
Senior Member
Name: Patricia
Trailer: 1975 Ventura
Ontario
Posts: 353
|
Right there
Good post. I am right there with you.
I had to take a few days off this week for the same reason. I had realized that the summer is slipping away and that I had better stop working on the inside and get the outside patched and painted and the new door made and windows in before the fall, The I read the posts here about the inside build effecting the door fitting and started to rethink my plan which lead to overthinking...
We, or at least I, think that because the trailer is little, the job is straightforward but you are right, it is complex. I have been trying to figure out heating, water system, lighting and solar and batteries etc in minute detail because I want to get it right. But I realized on my time away that at least some of these things can be added later and that I do not have to have the perfect plan before I can go on.
I take your acceptance that your camper will have its quirks and be uniquely yours as a lesson in keeping my eyes on the goal as well.
|
|
|
|
|
07-30-2016, 02:18 PM
|
#138
|
|
Senior Member
Name: Kelly
Trailer: Trails West
Oregon
Posts: 3,046
|
I don't consider time sitting there staring at the project to be totally wasted time. You do need to stop and evaluate and think and absorb the visual space. Your brain is busy recording and working even if your hands are not. Day dreaming is important, you know how you wake up in the morning knowing solutions? Day dreaming is part of that mental processing time.
|
|
|
|
|
07-30-2016, 04:51 PM
|
#139
|
|
Senior Member
Name: Jonathan
Trailer: 1991 16' Casita
North Carolina
Posts: 178
|
I can't thank you all enough for your kind and supportive words, they mean more to me than you may ever know.
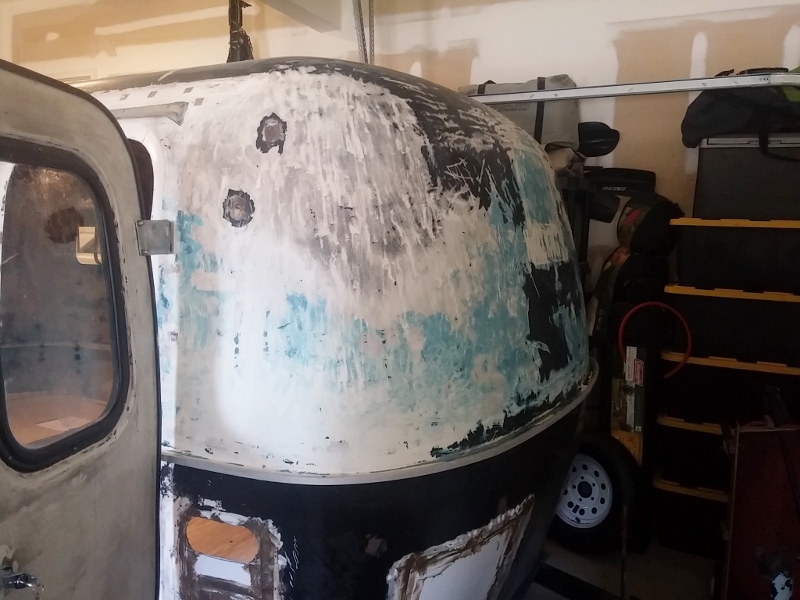
As for today, with a renewed sense of purpose and direction, I decided to bite the bullet and tackle one of the big items that was causing a lot of the bottleneck......... the dreaded task of getting the interior walls and ceiling cleaned up. Being covered up head to toe in protective gear in 90 degree weather while being pelted with globs of adhesive and shards of fiberglass is admittedly not the most ideal way to spend a Saturday, but about four hours and three clothing changes later I was able to mark the task off as being done!
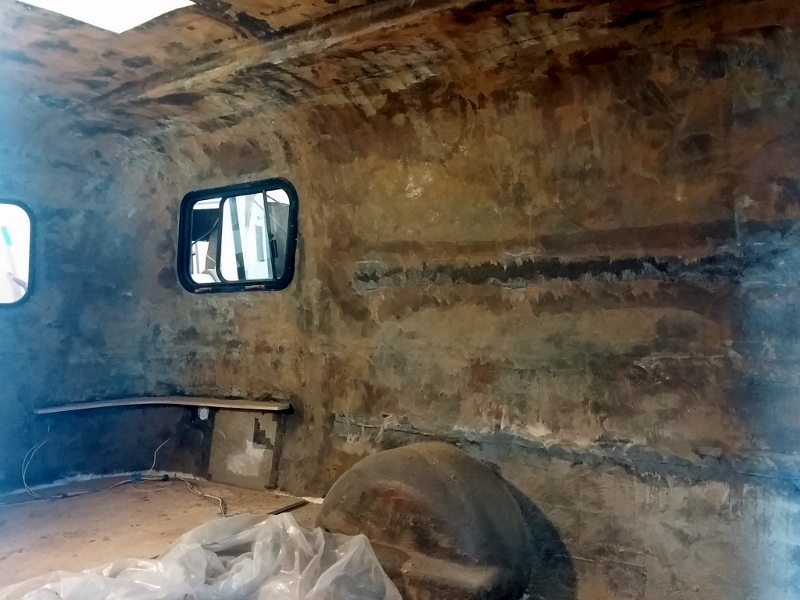
The surface was/is far from perfectly smooth and flawless, and my original thought was to do a coat of gelcoat paint in order to get a more finished look, although my interior designer (aka my wife) helped come up with a completely different concept for the interior which should allow any imperfections to be minimized.
First off, while said interior designer's first choice was to have the camper done in a palette of pastels, she realized the necessity of having it appropriately reflective of her client... me. Not too long ago we landed on an exterior color scheme which will be a creamy off-white color on the top half, and what is known as "limestone green poly" for the lower half, a classic Ford Bronco color seen here:

For the interior we determined we could carry on the more retro-rustic theme, and while we haven't selected the exact materials and colors I anticipate the end result will be along the lines of a modern cabin - taupe walls, with some exposed wood and maybe some burnt orange accents.
This design adjustment meant full steam ahead, so I spent the remainder of the day getting things primed with Kilz, here's how things look as of now:
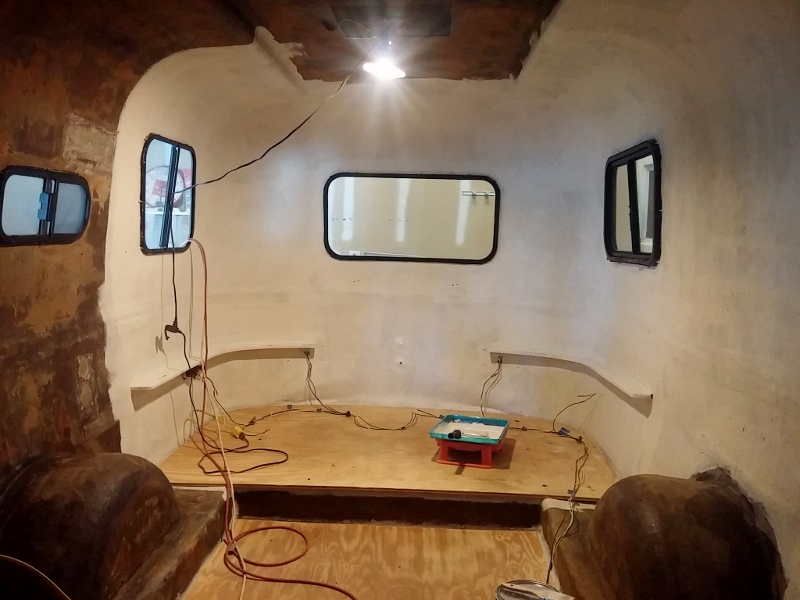
More updates to come!
Jonathan
|
|
|
|
|
07-30-2016, 07:33 PM
|
#140
|
|
Senior Member
Name: Patricia
Trailer: 1975 Ventura
Ontario
Posts: 353
|
Now that's progress! Amazing what a renewed sense of purpose, a vision and a can of Kilz can do.
Great colour choices for the outside.
|
|
|
|
|
|
|
Currently Active Users Viewing This Thread: 1 (0 members and 1 guests)
|
|
|
 Posting Rules
|
You may not post new threads
You may not post replies
You may not post attachments
You may not edit your posts
HTML code is Off
|
|
|
|
 » Recent Discussions
 |
|
|
|
|
|
|
|
|
|
|
|
|
|
|
|
|
|
|
|
|
|
|
|
|
|
|
|
|
|
|
|
|
|
» Upcoming Events |
No events scheduled in
the next 465 days.
|
|


 Linear Mode


