 |
|
 07-31-2016, 07:53 PM
|
#141
|
|
Senior Member
Name: Bill&Laura
Trailer: 1988 Bigfoot Fiver
Kentucky
Posts: 814
|
Great job hanging in there! I enjoy reading your posts. You, K. Corbin and Patricia are feeding my fire to keep me facing forward on our project. This is Laura (not Bill). If you've read our thread we got so burned out and tired we decided to sell our camper. We were going to take the loss and just be done. But people that looked at it couldn't appreciate all the invisible work we had done - they didn't know how hard we had worked just to get to that point. In the meantime we camper shopped and I couldn't find one single camper I was willing to spend money on or want to maintain. I love our camper named Ziggy. I was just so sick of working on him. I just want to go camping!!! Since no one else could appreciate Ziggy we decided to keep him and go all in (again) and finish what we started. Ziggy will never be perfect, but will be ours just the way we make it and good enough for us. We will enjoy it. Renewed spirit in deed. Glad you are forging ahead. I really enjoy your posts and check here everyday. You are doing super hard work and I thank you for sharing all of it, ups and downs.
__________________
"All that is gold does not glitter,
not all those who wander are lost..." J.R.R. Tolkien
|

|

|
|
08-02-2016, 05:21 PM
|
#142
|
|
Senior Member
Name: Jonathan
Trailer: 1991 16' Casita
North Carolina
Posts: 178
|
Quote:
Originally Posted by TheWanderers

Since no one else could appreciate Ziggy we decided to keep him and go all in (again) and finish what we started. Ziggy will never be perfect, but will be ours just the way we make it and good enough for us.
|
Your post made me smile Laura. I absolutely love that you've given your camper a name, and have no doubt that with your degree of care and appreciation that your home away from home will be something truly special. 
As for my oddball project, I've been tied up with work the past couple of days so here's a recap.
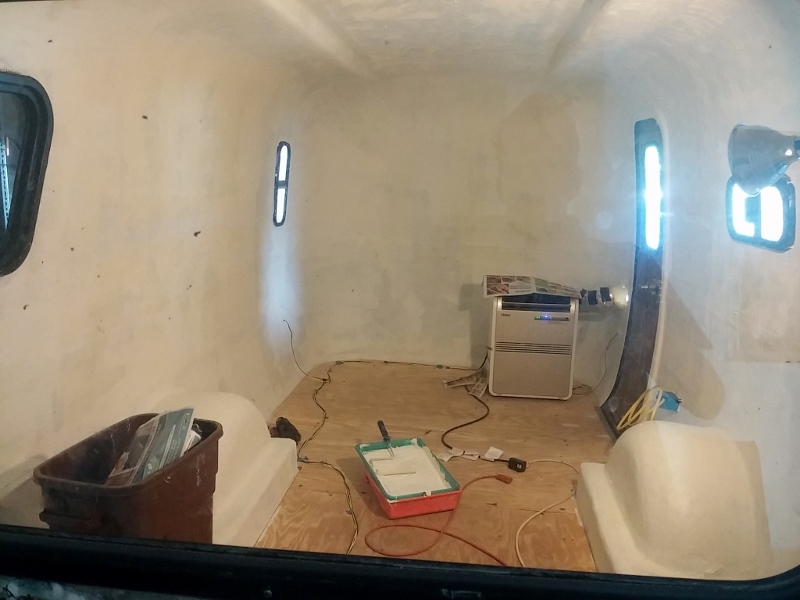
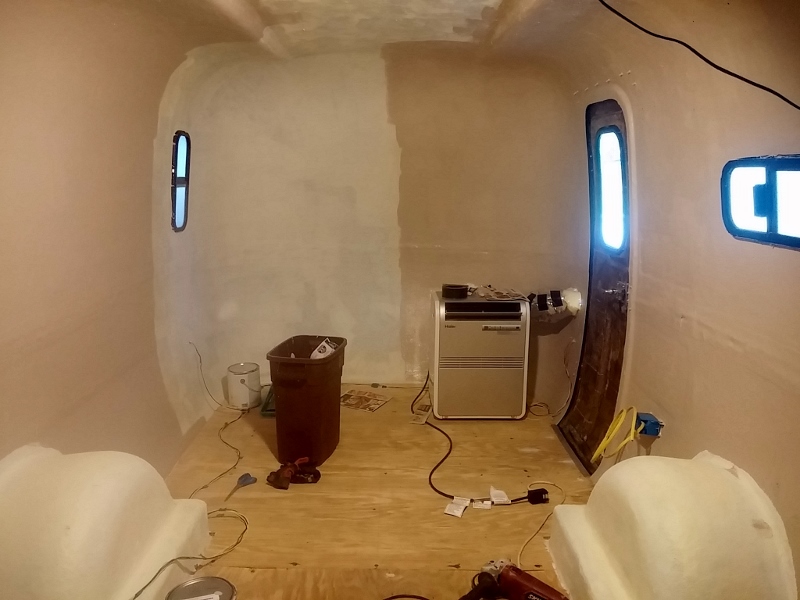
On Sunday I continued to make some noticeable progress which felt good. First task of the day was finishing up the primer coat of Kilz on the interior, here's a shot from the outside looking in through the rear window:
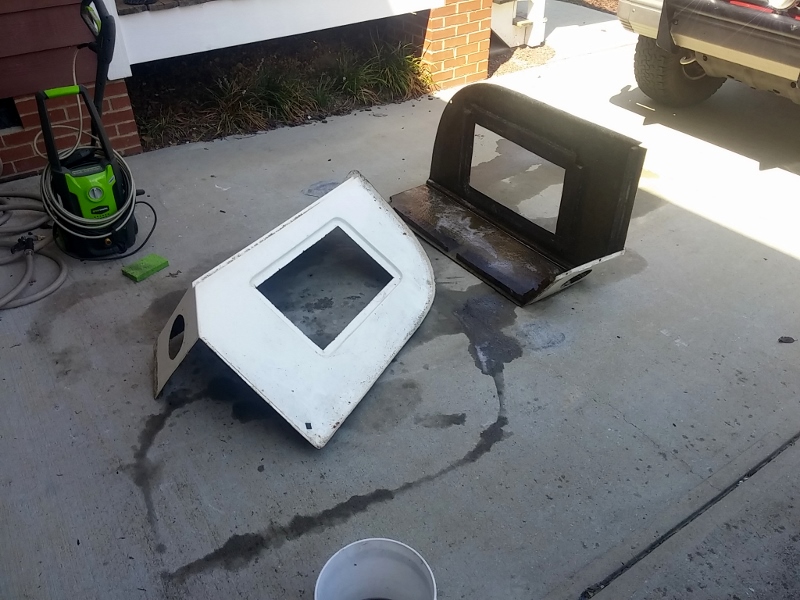
I had intended on building a temporary platform for the bed in the back dinette section but decided to scrap that idea and just go ahead and getting the original benches reinstalled, first step was a serious cleaning and mold/mildew treatment:
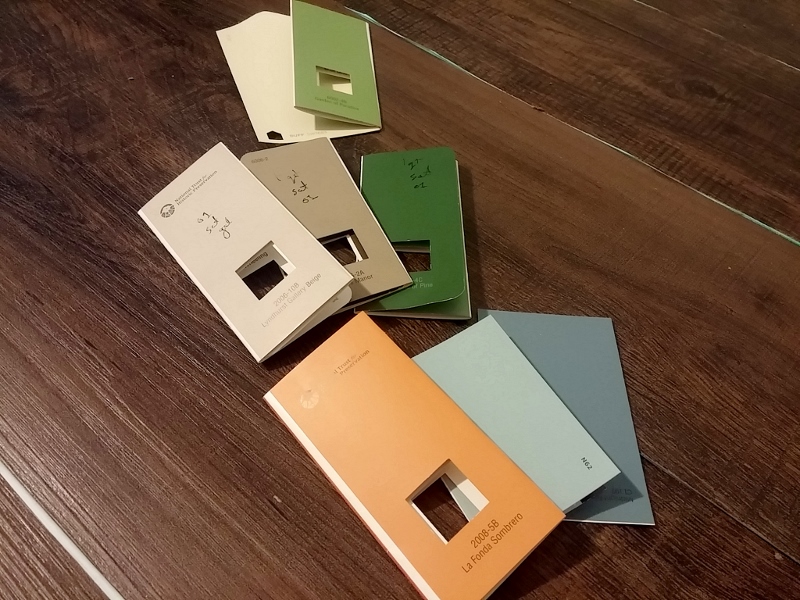
In order to cool down, I then took a trip to Lowe's with my designer to get all fancy and pick out some colors and materials. This is a shot of the floor I'm expecting to put in (a stick on vinyl tile) along with the colors... the top two are representative of what the exterior will be, the middle three are the primary for the interior, and the bottom three will be various accents:
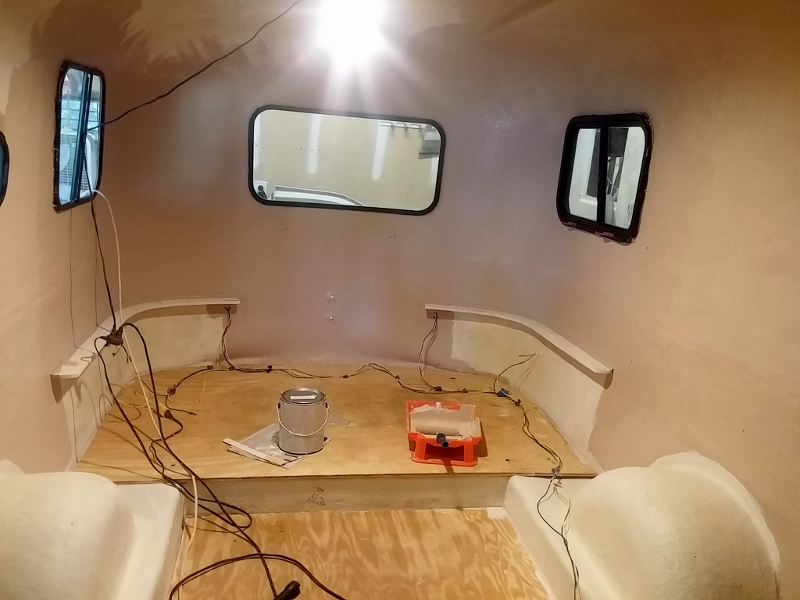
I got a start on the walls on Sunday and did a little more yesterday, here's a shot of the current state:
In other news, after weighing more options than any normal person should, I finally decided to pull the trigger on the "His-N-Hers" sunroof for the roof vent which arrived today:
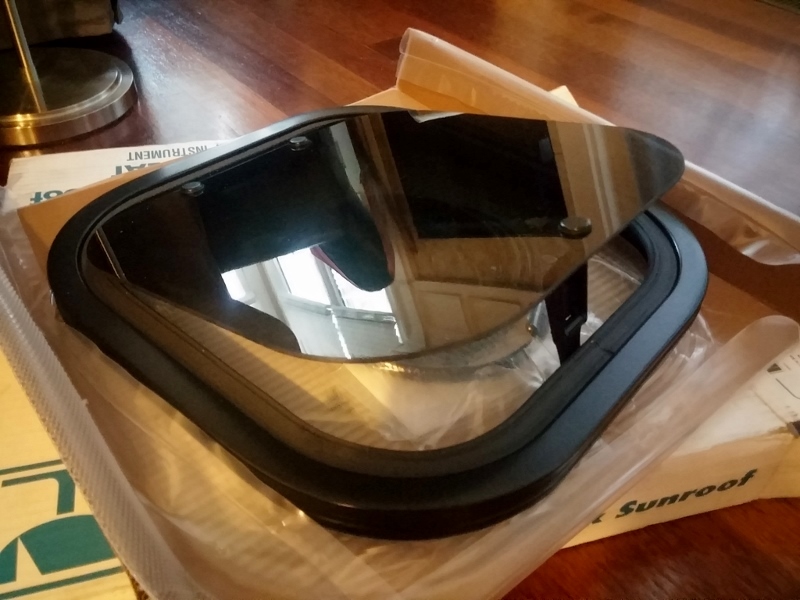
Fingers crossed it works out!
Jonathan
|
|
|
|
|
08-04-2016, 05:29 PM
|
#143
|
|
Senior Member
Name: Jonathan
Trailer: 1991 16' Casita
North Carolina
Posts: 178
|
I got the rest of the interior walls painted this evening after work, the areas with just primer will be covered by either the bathroom stall or the ceiling panel I'm planning on installing:
More updates soon!
Jonathan
|
|
|
|
|
08-05-2016, 04:59 PM
|
#144
|
|
Senior Member
Name: Jonathan
Trailer: 1991 16' Casita
North Carolina
Posts: 178
|
Today was another one of those days where I had items planned which I quickly realized all had items which I'd need to do before I got to said items planned. Take the dinette benches for example, I was going to get them painted so I could install them but realized I needed to do some patching... and since I was doing some patching, I figured might as well patch some of the other structural pieces while I had a batch of fiberglass resin mixed up... which in order to do this would require me to rid them of their remaining carpet and foam first......... so basically I scratched my original plan and spend the afternoon doing various work on all of the miscellaneous pieces:
I got them all carpet/foam free, wire brushed, sanded and patched, tomorrow I'll work on getting all of the patches nice and finished then at least get a coat of Kilz on any of the raw sides. If time allows I'll start to tear apart the kitchen unit, it needs a lot of TLC!!
Jonathan
|
|
|
|
|
08-05-2016, 06:24 PM
|
#145
|
|
Senior Member
Name: Walter
Trailer: 2017 Escape 17B
SW Virginia
Posts: 2,255
|
One of those days where a lot got done, but it doesn't show....yet.
Good work.
Walt
__________________
Past owner of 1995 13' Casita, 1994 16' Casita, 2012 Parkliner, 2002 17' Bigfoot.
|
|
|
|
|
08-06-2016, 05:11 PM
|
#146
|
|
Senior Member
Name: Jonathan
Trailer: 1991 16' Casita
North Carolina
Posts: 178
|
Quote:
Originally Posted by WaltP
One of those days where a lot got done, but it doesn't show....yet.
Good work.
|
Thanks Walt!! Yes, there are definitely a lot of things brewing, and I'm actually starting to feel like things might finally start coming together soon!
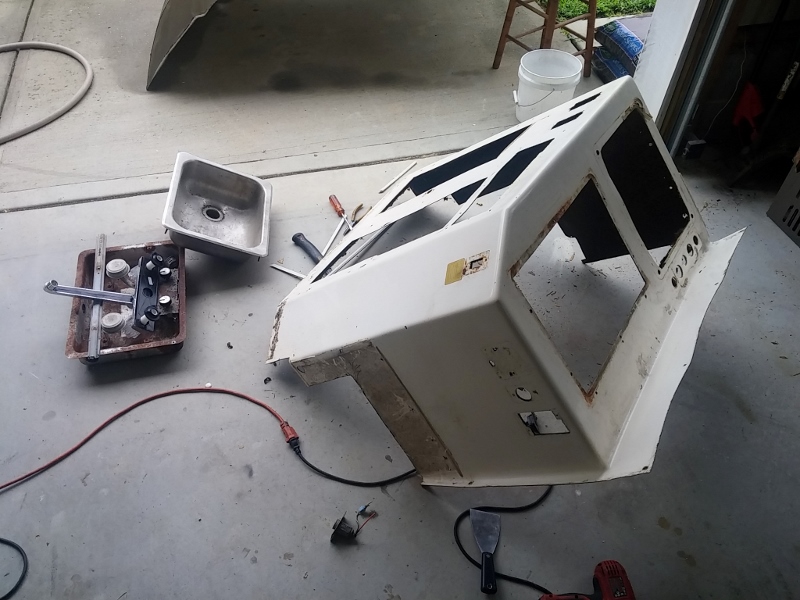
Today was a little like yesterday where I was all over the map, but made tons of progress which felt really good. It was pretty early when I got started so spent some time on a quiet project which was tearing the kitchen unit apart. Here's a before shot:
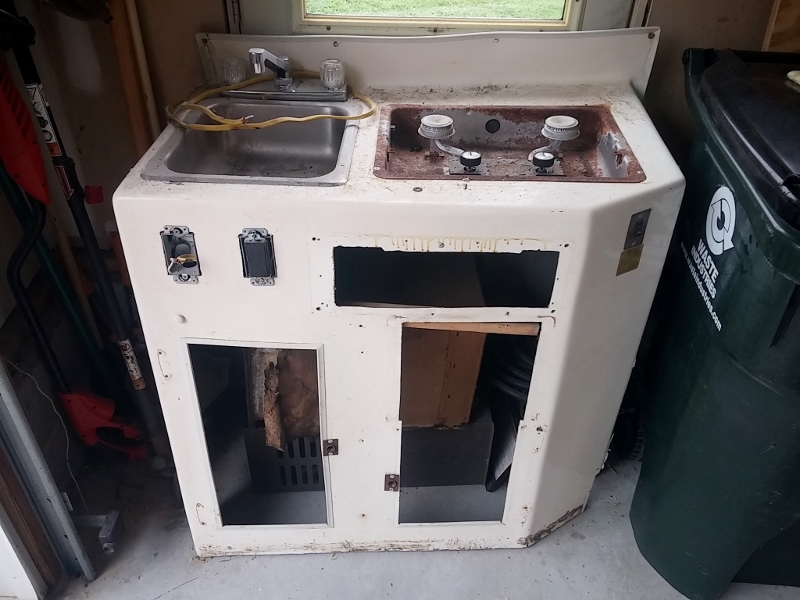
And the raw shell which shortly after I dragged out into the driveway to wash and smother with mold/mildew cleaner:
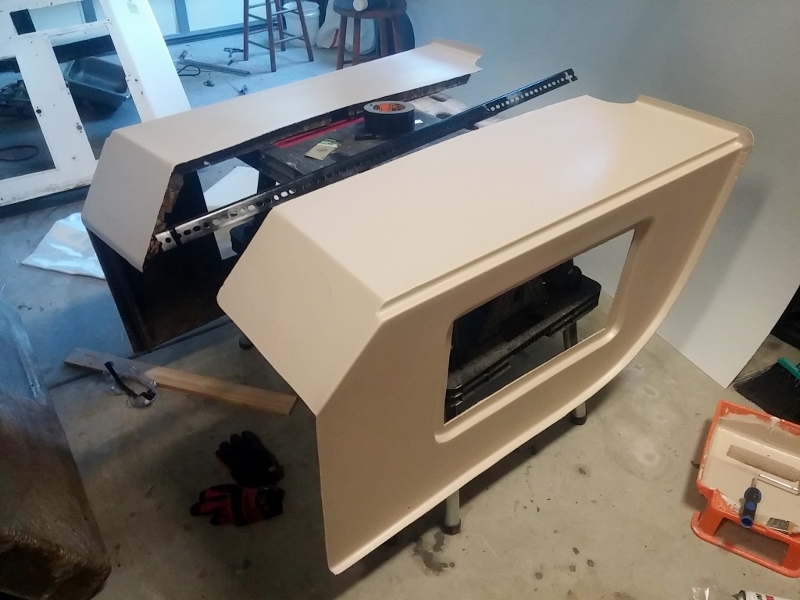
In between a few other small items like getting the extra floor support cut and painted I sanded and painted the dinette benches. I was going back and forth on whether I should use a roller or a sprayer and ended up going the roller route so they would blend in with the walls. I was a little apprehensive but I'm really happy with how they turned out:
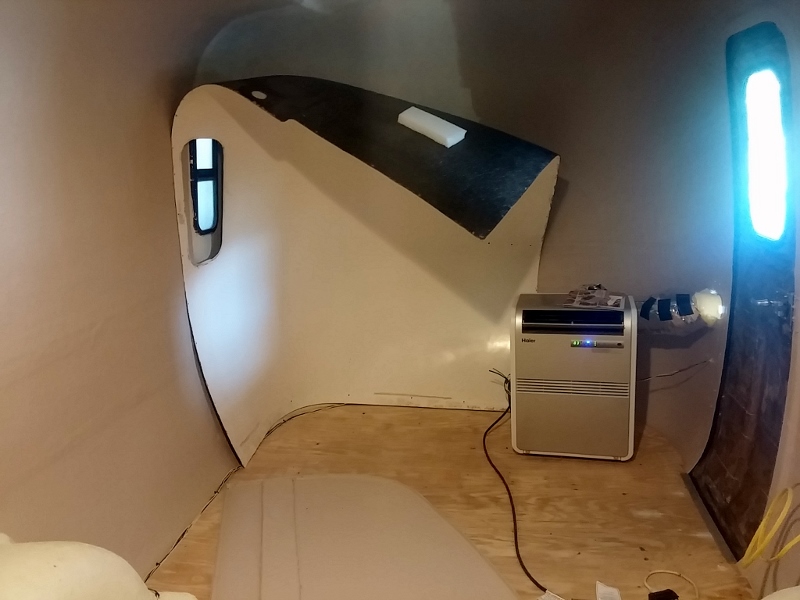
It felt really weird to be putting things back *into* the camper, but I also managed to get most of the bathroom reconstructed:
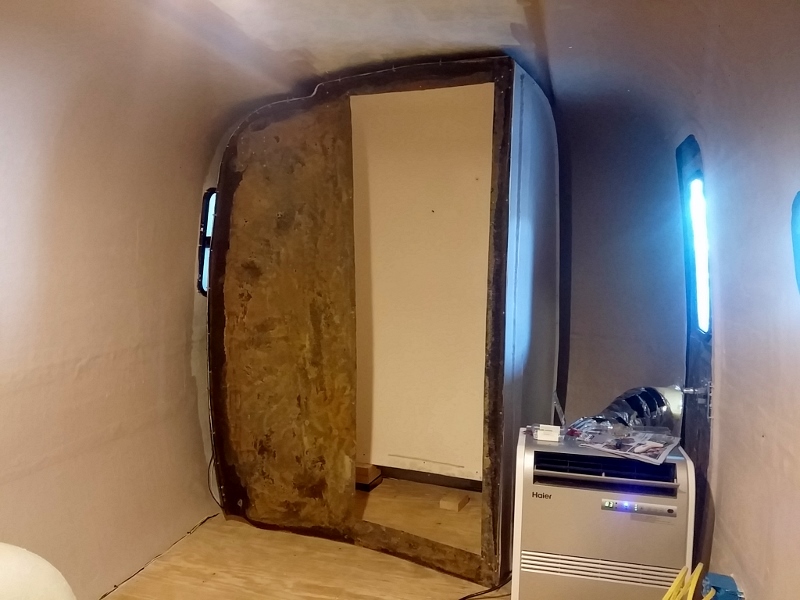
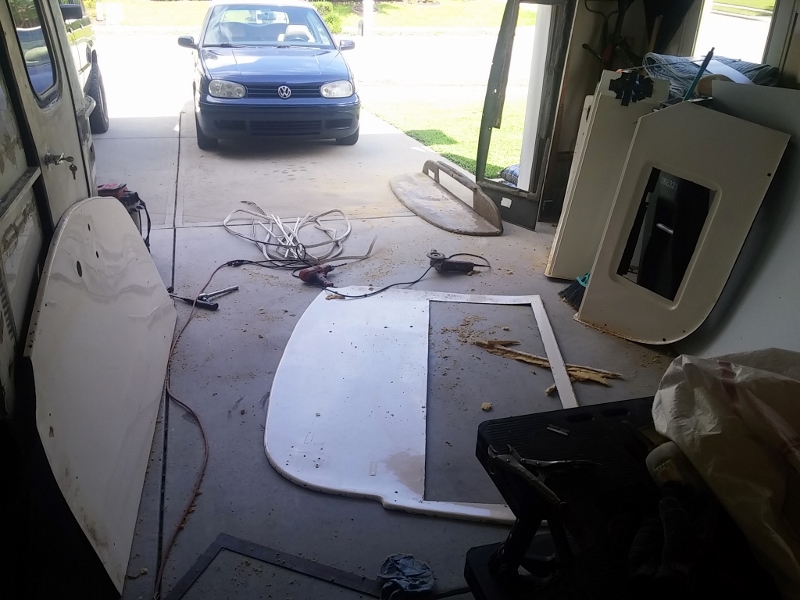
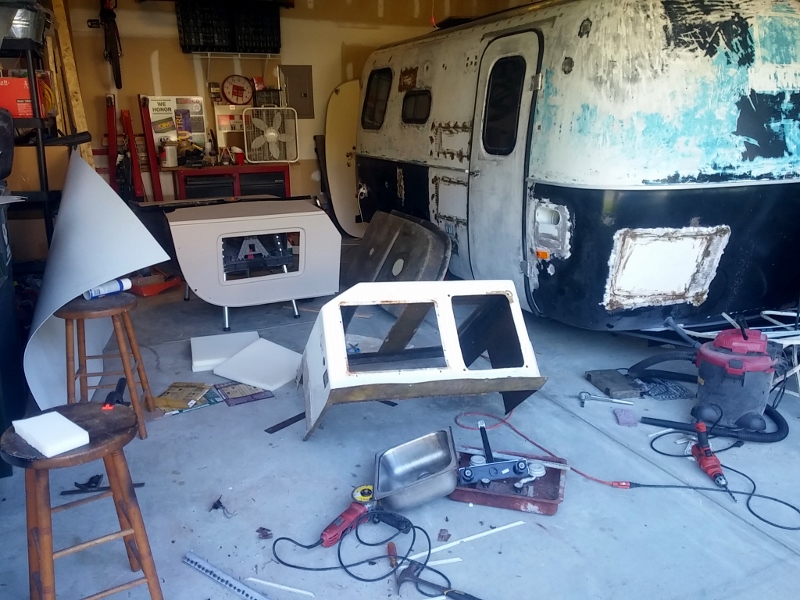
The garage is currently in a state of "AAAAAAAAAHHHHHHHH!!!!", step one tomorrow will be to sort through the carnage and figure out what's next:
Jonathan
|
|
|
|
|
08-06-2016, 05:29 PM
|
#147
|
|
Senior Member
Name: Kelly
Trailer: Trails West
Oregon
Posts: 3,046
|
I realized what the exterior of the trailer reminds me of. A home for a character from a cartoon such as Nightmare before Christmas where it matches the costumes made from assorted patchwork clothing with big X type stitches holding it together. It really is a fun kind of look at the moment, not what one would want forever but it has its own kind of story book charm with its current quirky look. Franken-trailer 
I am rather fond of how it looks on the outside at present but of course I don't have to fix it so I get to smile when I see it.
|
|
|
|
|
08-07-2016, 06:02 PM
|
#148
|
|
Senior Member
Name: Jonathan
Trailer: 1991 16' Casita
North Carolina
Posts: 178
|
@ KC - going with a "nightmare theme" would sure make the exterior work a lot easier............ hmmm.
Today was more focused, but still a whole bunch of little tasks to complete in order to get to the final results. For the dinette benches I got the wood pieces that hold it down to the floor cut and in place, while that was drying I painted the areas underneath the benches with Kilz so there was a clean and finished surface:
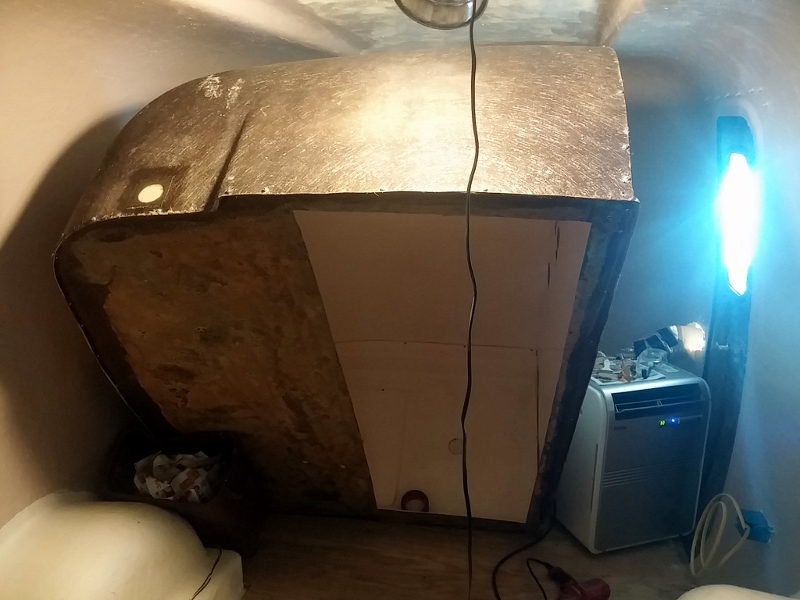
The bathroom was another main item for the day, I got the floor pan thingie scoured and the entire structure put back together and secured with stainless nuts/bolts all the way around only to realize that there were some gaps between the pan and the subfloor which made it feel squishy......... oh geez.  Thankfully there was just enough clearance for me to tilt the entire structure forward which was a lifesaver, this allowed me to get some various pieces of wood and shims in place and get everything solid:
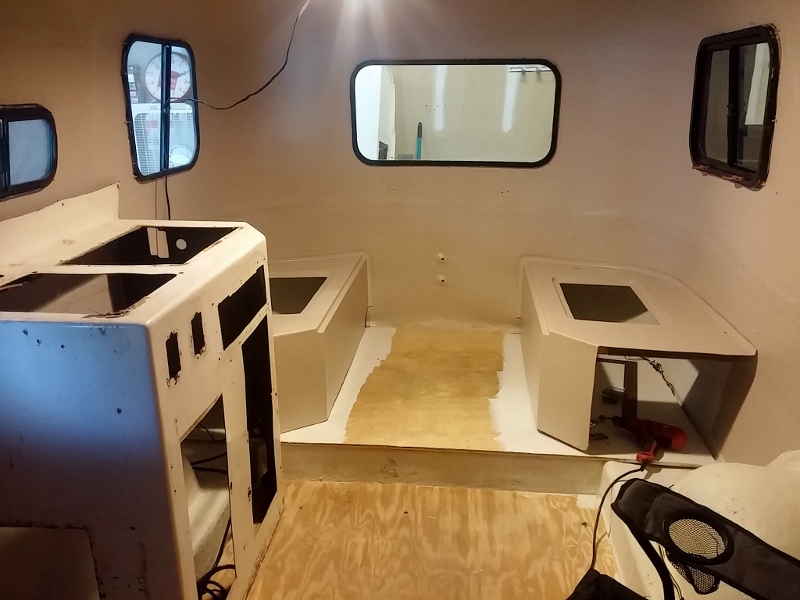
Fast forward through a bunch of other stuff to the end of the day, there are still a couple things left to do in order to get the bathroom locked into place but it's about 85% there (I set the kitchen unit in just to get some measurements):

Likewise, I've got one small thing to do on the right-side bench but these are 95% installed too:
I honestly have no idea what is up next, I guess that's what I'll have to set as my next priority!
Jonathan
|
|
|
|
|
08-07-2016, 06:22 PM
|
#149
|
|
Senior Member
Name: Bill&Laura
Trailer: 1988 Bigfoot Fiver
Kentucky
Posts: 814
|
Hi Jonathan! Wow you are really on a tear! Getting. It. Done.
I have some paint questions. 1) What type of paint did you use on the fiberglass furniture and will it stick? Previous owner did a crap job of painting ours but I don't know what will stick to it since it's slick fiberglass. I understand the sanding to rough it up, but then won't it feel rough instead of smooth after I paint? 2) Are you going to use Automotive paint for the exterior?
Thanks for sharing all your super feats here. I love how you tipped the bathroom sideways to work on it, that's pretty crazy!
Laura
__________________
"All that is gold does not glitter,
not all those who wander are lost..." J.R.R. Tolkien
|
|
|
|
|
08-07-2016, 07:20 PM
|
#150
|
|
Senior Member
Name: Patricia
Trailer: 1975 Ventura
Ontario
Posts: 353
|
Great work! It must feel so rewarding to see the dramatic change that happens when you finally get to the big stuff.
|
|
|
|
|
08-07-2016, 10:56 PM
|
#151
|
|
Senior Member
Name: John
Trailer: '71 Boler, '87 Play-Mor II
Deep South
Posts: 1,261
|
Quote:
Originally Posted by shaggydoink
<start sidetrack>
I got out of work early yesterday and had every intention of coming home and diving into things, but ended up wandering aimlessly in and around the camper for probably an hour before I found myself sitting inside on the computer staring blankly at my collection of notes, tasks and links in Evernote... basically paralyzed with both hands on the Rubik's Cube, a reference "Keith2000" made which I think is brilliant, unable or perhaps unwilling to make a turn in any direction.
I walked away from the project with a wide array of thoughts and emotions, and must admit frustration and discouragement were probably the highest two. Why are there so many $*&#ing dependencies? What if I screw something up? What if the camper doesn't come out as well as it should?
Sure enough, some time away to reflect answered all of these questions. The dependencies are there because the project is complex, if I screw something up I will figure out a way fix it and in the end my goal is not to have the camper showcased in publications, but to have a clean, easy and functional solution for living while on adventures in the great outdoors, if it ends up having its quirks or shortcomings so be it.
While technically I lost several hours going through this mental and emotional exercise, it gave me the fresh perspective I needed to become unparalyzed and excited again about moving forward.
<end sidetrack>
Jonathan
|
Jonathan, I have been there with all the what if's and had to take a step back too. Been working on restoring our 1971 Boler for over a year and a half. Just this weekend I backed up a little to fix an issue with my door which I just didn't pick up on when putting in the new floors and glassing them to the shell as I had my body off the frame too. While I did a very good job overall of that part of my project, I had to move the curb side front corner slightly towards the rear to even up the opening of the door frame even after a complete rebuild of my door. I have had to re-engineer many things as we decided to drastically change our layout by adding a bathroom (I probably have the only 1971 Boler with a front bath (shower & toilet) and it still sleeps 3 and could sleep 4. You will get there, I have had a few do overs including using the wrong primer, to much thinner in the first paint job (lost its gloss in 3 days), and a catastrophic failure of our headliner due to the glue. Which by the way I was really intrigued by the styrofoam in yours...what was the wall covering when you got it? I did not know that Casita used foam for insulation, I would sure like to know what glue/adhesive they used on theirs. You might find some useful stuff on my complete door rebuild in my restoration thread. Oh, and I REALLY like your dragster wheels on the back bumper, very cool idea. Keep at it, maybe we can meet up somewhere camping and compare notes!
|
|
|
|
|
08-07-2016, 11:54 PM
|
#152
|
|
Senior Member
Name: Kelly
Trailer: Trails West
Oregon
Posts: 3,046
|
Switching to working on the interior for those nearing completion rewards was a good tactic to keep yourself moving forward after reaching burnout on the exterior. But of course being August it also makes perfect sense to get that AC break from the heat now and again. I am amazed how much you got done in those brutal temperatures.
I will have AC tomorrow, predicted high of 67 degrees, I will enjoy it ") .
|
|
|
|
|
08-08-2016, 06:08 PM
|
#153
|
|
Senior Member
Name: Jonathan
Trailer: 1991 16' Casita
North Carolina
Posts: 178
|
I've got a small update, but first some responses!
@ Laura - for the interior pieces I did a rough sand, primed them with Kilz then used the same interior latex as I used on the walls. Will it stick? Well, it's still on as of today, whether or not it'll go down the tubes later is to be determined!  LOL! As for the exterior, I honestly don't know yet what type of paint I'll use. I've seen a number of posts and articles which lobby for using marine paint, a friend on an ISUZU forum just suggested something called "Monstaliner", although since I'd like it to match the Bronco it suggests that an automotive paint might be the route I should go... another "TBD".
@ Patricia - thank you! Yes, as KC noted, my change in strategy led to some much needed inspiration, it gave me the sense that I might actually be able to pull off a miracle and save this poor camper!
@ Johnny - the foam was under the carpet, fused with adhesive that will probably haunt me for the rest of my life! LOL!! I will definitely check out your latest restoration, kudos for sticking with it!
@ KC - is there any way I can talk you into enjoying 71 degrees and sending me the 4 degree difference? 
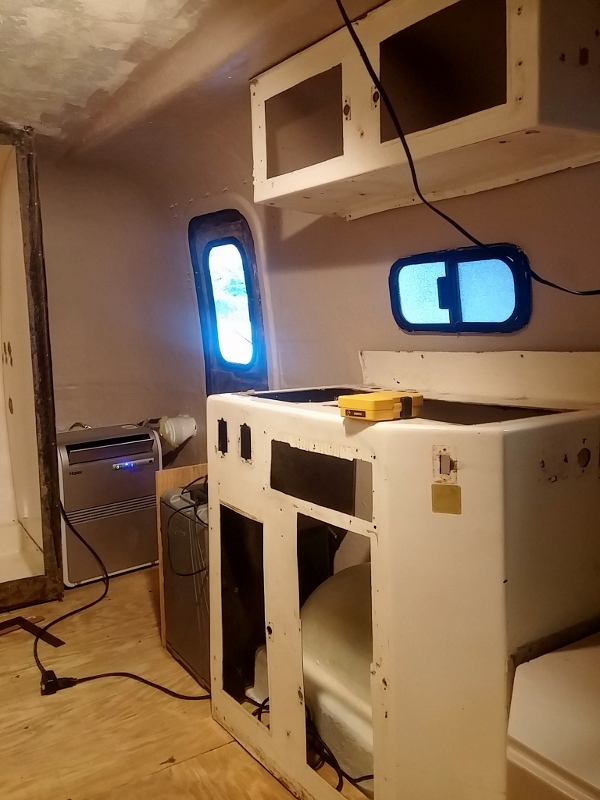
Now for the update... I got a few small items done after work today, I got the driver side dinette bench finished up, stared at the gap in the door for about 15 minutes then got into a little more cabinet carnage:
This wasn't a completely random direction change, I'm fairly sure I'll be able to fix said door gap with a piece that has the proper contour to the right side of the door, but first wanted to get a rough feel for how the end result on the kitchen area would be, which included making a call on whether or not I'd reinstall the cabinets above the sink/stove. The look and function of everything seems to be good, here's a very loose interpretation - above the fridge will be a butcher block surface that's at the same height as the fiberglass unit for extra cooking prep space with a shelf or drawer just below it:
On tap for tomorrow is hopefully finishing up the small cabinet that's over the dinette area so I can get measurements for the ceiling panel so I can install said ceiling panel and get the sunroof installed (my only option due to height constraints).
Jonathan
|
|
|
|
|
08-09-2016, 05:35 PM
|
#154
|
|
Senior Member
Name: Jonathan
Trailer: 1991 16' Casita
North Carolina
Posts: 178
|
A pretty minor update for today, I wasn't feeling all that motivated and spent most of my time thinking about how I wanted to build out a few things on the interior, but I did manage to stay on track with getting the cabinet that installs over the bed/dinette area prepped and a first coat of paint on the outer side:

Tomorrow I'll get the second coat on the outer side, paint the inside on Thursday and hopefully install it on Friday so I can move onto the ceiling and moon roof. In parallel to this I'll be working on fixing up the main kitchen unit, I want to get this installed first in order to make sure whatever I fabricate for the fridge area aligns well. Stay tuned!
Jonathan
|
|
|
|
|
08-09-2016, 05:53 PM
|
#155
|
|
Senior Member
Name: Walter
Trailer: 2017 Escape 17B
SW Virginia
Posts: 2,255
|
It's exciting seeing it start to come together.
Walt
__________________
Past owner of 1995 13' Casita, 1994 16' Casita, 2012 Parkliner, 2002 17' Bigfoot.
|
|
|
|
|
08-09-2016, 06:50 PM
|
#156
|
|
Senior Member
Name: Kelly
Trailer: Trails West
Oregon
Posts: 3,046
|
Nope, sorry it is too late to trade temperature, it is going to climb steadily the next few days ending in the mid 80s by the weekend. We have roller coaster summer weather as the mountains to the west and the east break up hot weather systems after 4 days of it.
|
|
|
|
|
08-11-2016, 05:46 PM
|
#157
|
|
Senior Member
Name: Jonathan
Trailer: 1991 16' Casita
North Carolina
Posts: 178
|
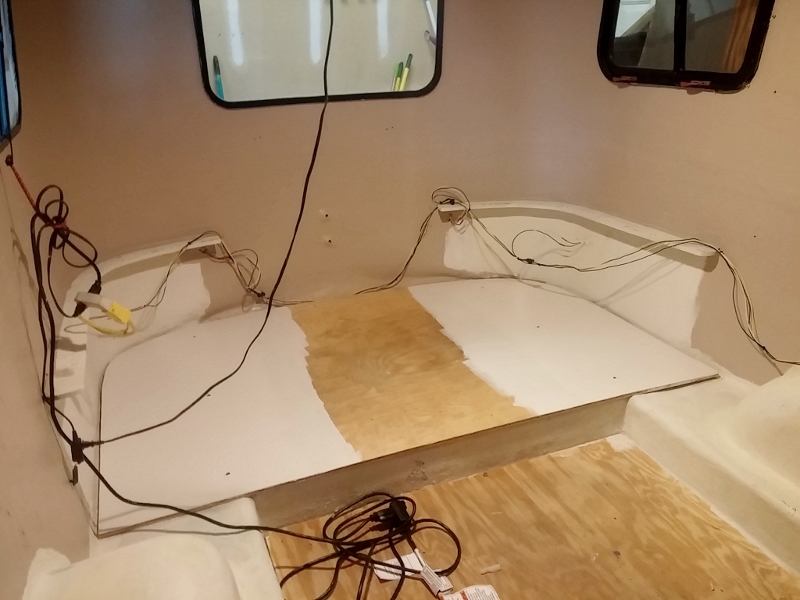
A very quick update for today which is amusing at least to me... I carefully measured and fabricated a perfectly angled insert for the bed:
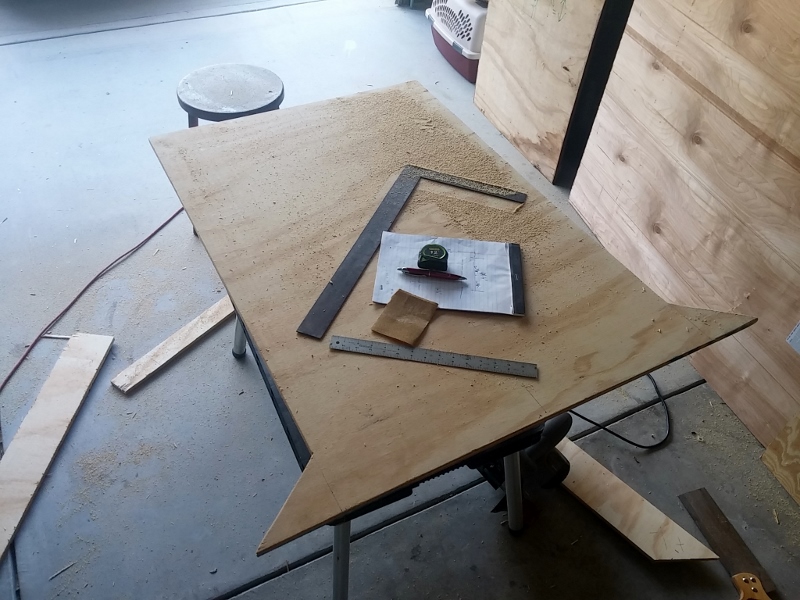
Which would have been great had I been installing it in a camper that was equally as perfectly angled... oops. 
Yeah, I'll be working on cutting a piece that factors in the quirky angles of the camper tomorrow.
Jonathan
|
|
|
|
|
08-11-2016, 11:18 PM
|
#158
|
|
Senior Member
Name: Kelly
Trailer: Trails West
Oregon
Posts: 3,046
|
Quote:
Originally Posted by shaggydoink
A very quick update for today which is amusing at least to me... I carefully measured and fabricated a perfectly angled insert for the bed:
Which would have been great had I been installing it in a camper that was equally as perfectly angled... oops.
Yeah, I'll be working on cutting a piece that factors in the quirky angles of the camper tomorrow.
Jonathan |
My favorite for template making is the big flat sheets of cardboard that goes between layers of stuff stacked on pallets, I love it when I find that stuff in the recycling dumpster 
|
|
|
|
|
08-11-2016, 11:25 PM
|
#159
|
|
Senior Member
Name: John
Trailer: '71 Boler, '87 Play-Mor II
Deep South
Posts: 1,261
|
Quote:
Originally Posted by shaggydoink
A very quick update for today which is amusing at least to me... I carefully measured and fabricated a perfectly angled insert for the bed:
Which would have been great had I been installing it in a camper that was equally as perfectly angled... oops.
Yeah, I'll be working on cutting a piece that factors in the quirky angles of the camper tomorrow.
Jonathan |
That'll buff right out!
|
|
|
|
|
08-13-2016, 05:36 PM
|
#160
|
|
Senior Member
Name: Jonathan
Trailer: 1991 16' Casita
North Carolina
Posts: 178
|
@ KC - a dumpster diver, eh? Any chance we're related?
@ Johnny - I completely cracked up when I read you post as that's what I say anytime someone damages their truck out on the trails, it's one of those sayings that never seems to cease amusing me!
OK, so an update for the past two days...
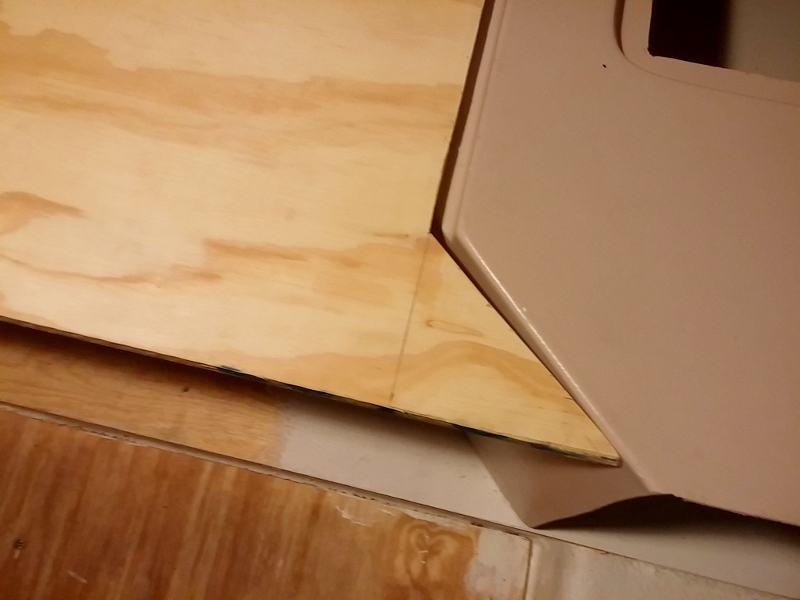
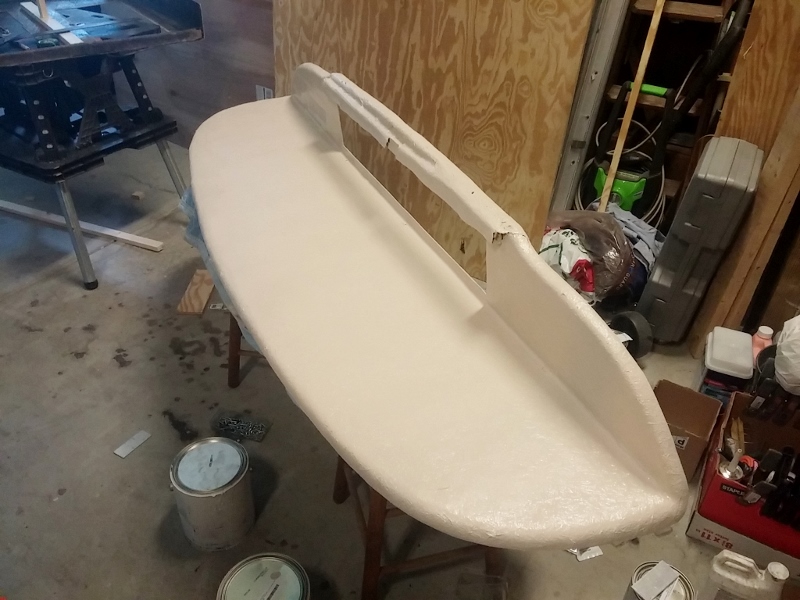
Back to the bed support, since I expect the mattress will be somewhat permanent in the back dinette area I decided to take an easier route and get the support built out of two pieces instead of one since it's almost never going to be visible so therefore doesn't really matter if it's not as obsessively perfect as I might have wanted. Here it is assembled, painted and in place:
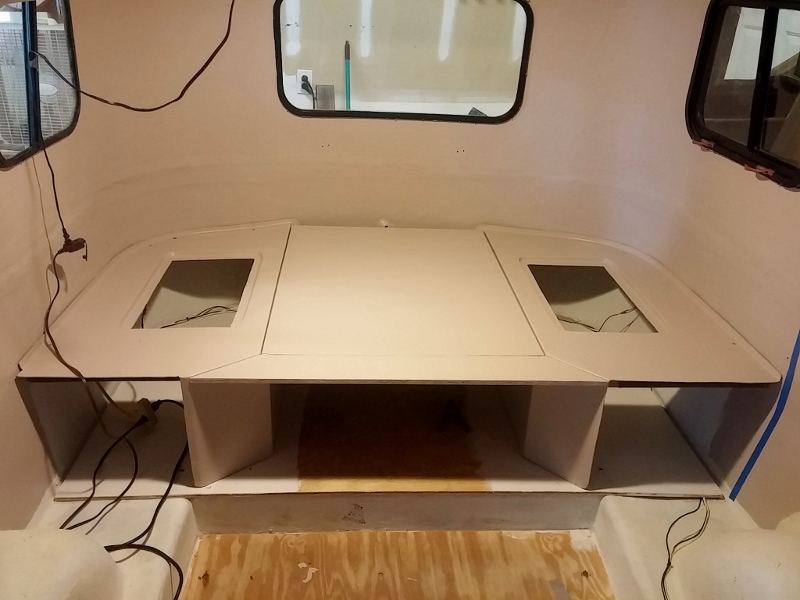
While I was in paint mode I also finally finished the upper cabinet that installs over the dinette/bed:
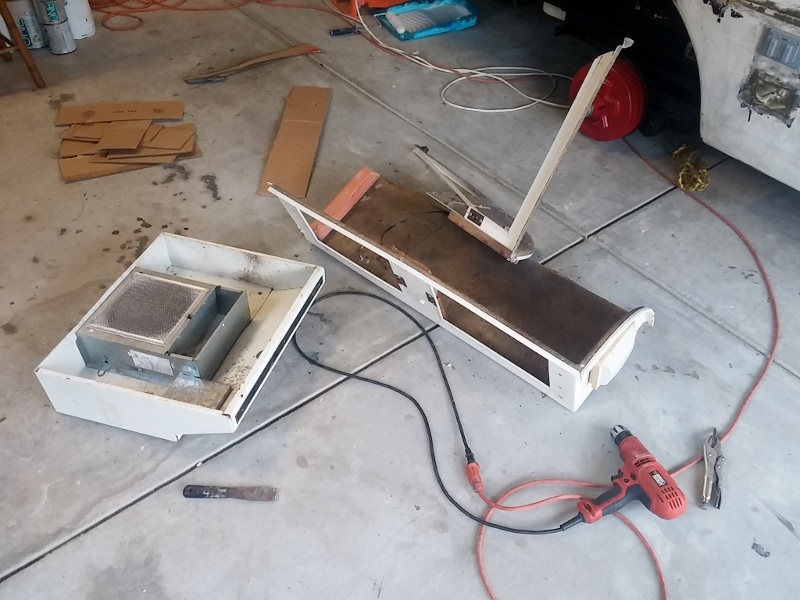
Last but not least, I got a start on refurbishing and framing out the kitchen unit. I've been winging the inside part a bit as originally part of the space was consumed by the gas heater which I've since removed, but the goal was to end up with at least one shelf for pots and pans and one drawer for cooking utensils... this is the work I got done:
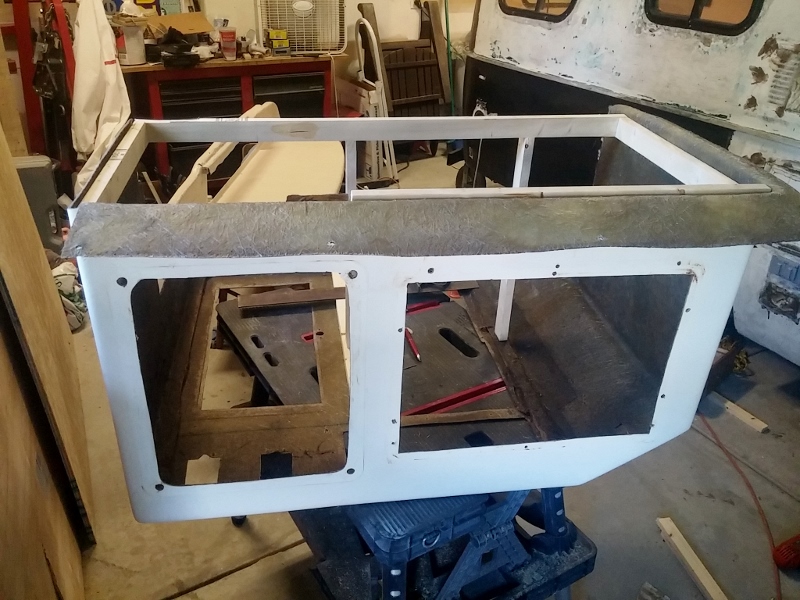
Another post follows as this forum apparently only allows 8 images per posts for some unknown reason.
Jonathan
|
|
|
|
|
|
|
Currently Active Users Viewing This Thread: 1 (0 members and 1 guests)
|
|
|
| Thread Tools |
Search this Thread |
|
|
|
| Display Modes |
 Linear Mode Linear Mode
|
 Posting Rules
|
You may not post new threads
You may not post replies
You may not post attachments
You may not edit your posts
HTML code is Off
|
|
|
|
 » Recent Discussions
 |
|
|
|
|
|
|
|
|
|
|
|
|
|
|
|
|
|
|
|
|
|
|
|
|
|
|
|
|
|
|
|
|
|
» Upcoming Events |
No events scheduled in
the next 465 days.
|
|


 Ziggy
Ziggy


