 |
|
 12-06-2014, 06:50 PM
|
#1
|
|
Member
Name: Totie Fan
Trailer: Tote N Tarry
West Coast
Posts: 81
|
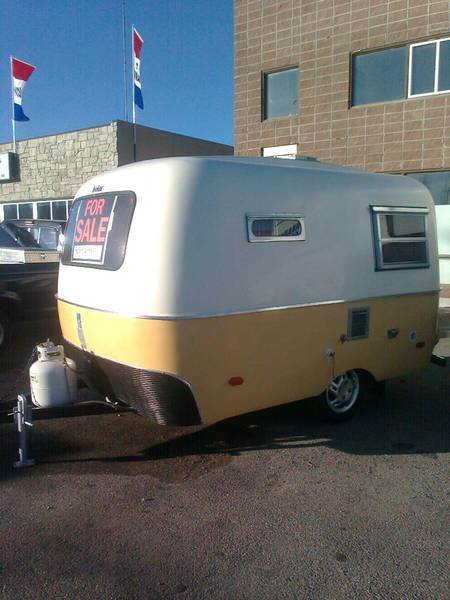
Tote-n-Tarry Lemon Chiffon Rehab
By the time I'm done rehabing TNT, it's gonna cost some $$; it's a Christmas gift I wish to customize, and I will use it too to see how well I do with a small RV. I'll try to keep my posts quick 'n clean. If you're like me, I just like to look at the pictures, mostly!
Today I discovered the true original color of TNT from 1973 under an old sticker: Lemon Chiffon Pie. ") Took out wiring remnants, old copper gas pipe that was snapped off, old ice-box; it's clean and dry inside, just sad. Welder did one crossbar and fixed tongue, more to come from him on that. Shopping underlayments as wall insulation; may not use coated carpet padding as rubber is poor insulator but it's still a "maybe". Will put 1", not 2" rigid foam on floors to maximize headroom. Will be checking tires, undercarriage further. Found a 12V DC Coleman refrigerator to replace, will be on a switch, plastic-painting it Claret Wine (first coat shown...cheery color).
|

|

|
|
12-06-2014, 07:01 PM
|
#2
|
|
Commercial Member
Name: Ian
Trailer: 1974 Boler 1300 - 2014 Escape 19'
Alberta
Posts: 1,380
|
Fun project. Looks like it was the same original color as my Boler.
You call it Lemon Chiffon, I call it Buttercup yellow
|
|
|
|
|
12-06-2014, 07:08 PM
|
#3
|
|
Member
Name: Totie Fan
Trailer: Tote N Tarry
West Coast
Posts: 81
|
It's a happy color.
Gotta like happy.
|
|
|
|
|
12-06-2014, 07:34 PM
|
#4
|
|
Senior Member
Trailer: 1988 16 ft Scamp Deluxe
Posts: 25,710
|
Whatever you call "yellow," makes me happy. Reminds me of the sun, and we don't get (typically) bunches of it. 
__________________
Donna D.
Ten Forward - 2014 Escape 5.0 TA
Double Yolk - 1988 16' Scamp Deluxe
|
|
|
|
|
12-06-2014, 10:56 PM
|
#5
|
|
Member
Name: Jeff
Trailer: Escape
Oregon
Posts: 39
|
Quote:
Originally Posted by Donna D.

Whatever you call "yellow," makes me happy. Reminds me of the sun, and we don't get (typically) bunches of it. |
Donna, you should come east to sunny Central Oregon!
|
|
|
|
|
12-08-2014, 01:07 AM
|
#6
|
|
Member
Name: Totie Fan
Trailer: Tote N Tarry
West Coast
Posts: 81
|
Welded Cargo Cage Update: Neat!
Attachment 79087

Quote:
Originally Posted by Tote-n-Tarry No.2
Welder did one crossbar and fixed tongue, more to come from him on that.
|
Here's an update on the cargo welding so far: Welder did a fantastic job making a bent steel cargo cage for the back. This is as lightweight as we can get, and it's verrrry strong, he even stood on it. He recommended not exceeding 150 pounds but that's more than I had hoped for anyway. It's going to be perfect for those bulky yet lightweight things like folding chairs, tarps, canopy, and a small plastic kayak. It sticks out 18" and is full width. I'll show you the way mine turned out. If you live in PNW and want an artistic welder I can forward his contact information.
|
|
|
|
|
12-08-2014, 01:13 AM
|
#7
|
|
Senior Member
Trailer: Escape 17 ft
Posts: 8,317
|
Two issues to consider. It's not the weight that the carrier will handle that you need to worry about. It's that adding weight to the rear will remove weight from the tongue, and if you remove too much weight you will induce sway.
The other is, if you put stuff in that cage, it appears that you will cover your tail and brake lights.
__________________
What happens to the hole when the cheese is gone?
- Bertolt Brecht
|
|
|
|
|
12-08-2014, 01:16 AM
|
#8
|
|
Member
Name: Totie Fan
Trailer: Tote N Tarry
West Coast
Posts: 81
|
Thanks. All good points which will figure in to the final, very important points. I was going to have to totally redo my lights since there's no wires inside and the old ones are broken. I looked it up and brake lights on a trailer can be up to 60" off the ground. The battery, propane, water tank and spare will be up front to offset weight redistribution.
Adding also that when driven back on the freeway it did not fishtail. The whole thing is an empty shell right now, as appliances, pads, insulation are added things may need adjusting.
|
|
|
|
|
12-08-2014, 01:20 AM
|
#9
|
|
Member
Name: Totie Fan
Trailer: Tote N Tarry
West Coast
Posts: 81
|
[QUOTE=Tote-n-Tarry No.2;495307] Attachment 79087
Here is where I got the idea for the cargo cage (but I don't like the curly-q railing material)...so this one isn't mine, but it got the idea ball rolling.
|
|
|
|
|
12-08-2014, 01:25 AM
|
#10
|
|
Senior Member
Trailer: Escape 17 ft
Posts: 8,317
|
You have it in hand then. I didn't realize for some six months that I couldn't unbolt my spare tire because the box prevented the wrench from turning. Luckily, I discovered that in my driveway, not on some deserted road with a flat.
__________________
What happens to the hole when the cheese is gone?
- Bertolt Brecht
|
|
|
|
|
12-08-2014, 09:39 AM
|
#11
|
|
Senior Member
Name: Tim
Trailer: '88 Scamp 16, layout 4
North Florida
Posts: 1,547
|
Quote:
Originally Posted by Glenn Baglo
Luckily, I discovered that in my driveway, not on some deserted road with a flat.
|
That be cheating, as in cheating yourself out of an opportunity to improvise, adapt, and overcome. Oh, and I like pie, of any color. Oh, and I like pie, of any color.")
|
|
|
|
|
12-08-2014, 12:30 PM
|
#12
|
|
Member
Name: Totie Fan
Trailer: Tote N Tarry
West Coast
Posts: 81
|
Now that you mention it, good thing to check.
|
|
|
|
|
12-08-2014, 01:59 PM
|
#13
|
|
Senior Member
Trailer: 92 16 ft Scamp
Posts: 11,756
|
Glenn raised the big issues but another to consider when redoing your lights is most places have regulations regarding their location -ie how high off the ground etc they should be and they also require the licence plate to be to have a light on it.
Here is a link to the trailer light location regs that may help you.
|
|
|
|
|
12-08-2014, 08:38 PM
|
#14
|
|
Member
Name: Totie Fan
Trailer: Tote N Tarry
West Coast
Posts: 81
|
Harbor Freight trailer lights...
are major-ly clunko looking but they'll do for now, (the ones on the cargo cage are the leftover magnetic towing lights) and the wires will be in for the next iteration (shopping for something cool). Since it's a fiberglass egg and there's no grounding in the walls the sidelights connected by a single wire won't work until I run a separate ground to them tomorrow in daylight (normally the metal trailer frame itself would serve as ground but the walls have no conductivity). I could have put the rear brake lights up to 60" high legally...another source said up to 72" but they're about 48". I have some big holes leftover from the last installs; they cut about 2" holes which will later need patching (duct tape for now). I took off 5 broken old exterior brake/signal light fixtures, leaving lots of other little holes to fix
Over the next week or so will do the 12V wiring, then the 110, then the propane, then the water connections/tank/pump, then the fixtures (hanging by the wires), outlets, switches...then the insulation (in that order), fully-attach light fixtures, then install battery, vents, converter/fusebox/inverter, fridge, microwave, stove, heater, sink/water supply installs. I'm going to use good quality house-parts since that's easy to fix later.
I think I may have found a source for big quantity of economical generic ensolite...waiting on more info. It may be pink or purple, but I'll just paint it later. I found a 12V pump. Buying lots of used parts to save $$.
|
|
|
|
|
12-09-2014, 11:03 AM
|
#15
|
|
Member
Name: Jaydeen
Trailer: Burro 13'
California
Posts: 35
|
Hey that's mine ! It has worked great for us. My Dad created this back in 1981. It's mainly lengths of all thread rod. Capped off with plastic wire nut caps (he was an electrician). We usually just put our lightweight items back there. Canvas chairs, poles and area rug. Glad it was an inspiration.
|
|
|
|
|
12-09-2014, 05:07 PM
|
#16
|
|
Member
Name: Totie Fan
Trailer: Tote N Tarry
West Coast
Posts: 81
|
Thanks for the inspiration
Attachment 79149I like the way your dad curved the ends to fit the trailer. Having camped a whole lot I know that getting the lightweight bulkies out of the way, instead of taking up the car or rig, makes things easier, especially if they're a bit dirty from camping.
It's like that line from Saturday Night Fever when Johnny Manero, is asked about a dance move...
"That's nice. Did you make that up?"
"I saw it on TV first, then I made it up."
|
|
|
|
|
12-17-2014, 07:49 PM
|
#17
|
|
Member
Name: Totie Fan
Trailer: Tote N Tarry
West Coast
Posts: 81
|
Minor Updates on Welding and Demo and Insulation
I got the tire-holder re-welded, since it's now in the front. I like. Lots of tape over old holes. I'm inventing a new flange for my bendy gas line. Stay tuned. I still need a flange for the trailer wires.
I had to take off Tote 'n Tarry stickers since they'll impede overall refinishing, but I photographed them and will duplicate the name in a stencil done on my Cameo Silhouette...probably way next year though. My daughter wants light blue. Robin's egg Tote N Tarry. Hmmm.
I cut out the center right bed in preparation for making it into a dinette. The battery will go on the right, the water tank on the left, and all the storage under the full-time bed will be available. We removed what appears to be a cut-off cigarette lighter (?) in the upper right cupboard, (bang bang ugh argh, drill, squish, force) as well as the old trailer wires. Maybe someone will say, "gee you shouldn'ta-oughta done that!" but I bought all new light fixtures so if this was one, it's now toast. I drilled for FOUR exterior lights on all sides to light up any campsite or activity, with weather-tight wire clamps which will be fiberglassed in. I put up a simple pull string 110 fixture for when plugged-in, with an outlet in it. I bought led toggle switches for the 12V pump, fridge and undercab lighting, to make a cool board.
I had to take off the door since it was literally hanging by threads, we actually had to tie it from the inside bolts with ropes. I will reinforce the fiberglass and back the hinges with some tigerwood on the inside, whichis a material I will use for other finishes inside as it never rots and is gorgeous. The difficulty was that the steel bolts had electrochemically welded themselves to the aluminum hinges, which are irreplaceable, and so we had to drill them out, then finally sawsall them off in a tight squeeze. I can fix the scratches from the blade with fiberglass later, when the weather isn't icky.
Just returned from a winter camping trip but in my Class C (it's just a regular fiberglass skin RV), first time doing this, and it was wonderful because there were no other campers except one night there were 2 others...in the entire campground! Saw Orcas, sea birds, tide pools, lakes, creeks...other than the cougar warnings everywhere it was nice. See I had put up this motion detector light and it kept going off all night, except since there were zero other campers I couldn't see what "it" was that set it off, the darkness was like black pudding, and it was very windy by the sea which makes its own effects on the rig...spookay.
I like.
I used a plug-in electric heater together with propane furnace, it was like 41F-32F. Insulated curtains are the trick.
TNT insulation odyssey continues: I don't want flammability or offgassing. The radiant foil type is pointless since it only works if the reflective surface is adjacent to a trapped airspace. So I got some ethyl acetate "anti fatigue mat" material squares, nicely insulating but goes WHOOSH up in flames. I need closed cell PVC butyl nitrile foam, self-extinguishing. But first I'm going to run an experiment with Great Stuff, which polymerizes with water, trying to mold it against the wall to wind up smooth and hard. This would be good since if you needed to get to wiring under it, you could just fix it again for $3. So what I think I'll do is make a version of plastic curved "studs" and use a vaselined-piece of bendy plastic, spritz both sides with water, and feed in the great stuff via a hole. By doing it this way it should come out extremely hard and perfectly molded. I hope. If not, I'll buy yoga mats, closed cell butyl nitrile, not open cell which will hold moisture.
|
|
|
|
|
12-22-2014, 01:13 AM
|
#18
|
|
Member
Name: Totie Fan
Trailer: Tote N Tarry
West Coast
Posts: 81
|
Under the permanent double bed will be storage, requiring flat floors. So over about 6 days we removed with a ratchet wrench, screwdriver and grinder, the stanchion base. It was bolted below the trailer with nuts, which came off with great effort because they were rusty. But then the stanchion base flat-head machine bolts wouldn't budge, self-welded in. So out came the grinder and the part was forcefully removed.
The entire floor of the Tote is fiberglass, except a little by the front under the former couch.
Now the floor must be scraped and vacuumed and insulated.
|
|
|
|
|
12-22-2014, 11:41 AM
|
#19
|
|
Senior Member
Trailer: 2009 Trillium 13 ft ('Homelet') / 2000 Subaru Outback
Posts: 2,222
|
 Modifications
"I cut out the center right bed in preparation for making it into a dinette."
It always concerns me when people start chopping out features of the interior of their rigs. Features that are glassed in are often part of the structure of the shell which gives it its rigidity. 
__________________
A charter member of the Buffalo Plaid Brigade!
Whether you think you can or think you can't, you're right. 
|
|
|
|
|
12-22-2014, 04:04 PM
|
#20
|
|
Member
Name: Totie Fan
Trailer: Tote N Tarry
West Coast
Posts: 81
|
Lateral support of bench front
Quote:
Originally Posted by Roger C H
"I cut out the center right bed in preparation for making it into a dinette."
It always concerns me when people start chopping out features of the interior of their rigs. Features that are glassed in are often part of the structure of the shell which gives it its rigidity. |
I hadn't gone into that yet, but the plan was when the wiring/gas/water was done, one of the next steps was to frame out the dinette base with tigerwood which doesn't rot or swell and will look like furniture. The base would in no way shape or form support a human toosh at this point. I also intend to put a small microwave in the upper cabinet, supported from top and bottom with tigerwood, so I'll of necessity have to gnaw into that glass a bit and support it alternatively with tigerwood and more glass. So in essence, for whatever fiberglass is removed, more skeletal framework will be added in glass, metal or tigerwood. The floors are fiberglass and the lateral front bench doesn't seem to contribute anything to the trailer integrity as far as torc-ing, twisting, bending. Its function appears only to be the seat support and it was nipped only in the front leaving the back alone.
Others may not "dive in" to their trailer as I have and seek to preserve it status-quo and maintained as a work of antiquity to be respected in rather immutable fashion. This Tote however was a rubbishy-shell, gutted of all insulation, appliances, innerds, not even the trailer lights worked, it was a blank-slate. I have dreams (not delusions) of grandeur for it, and in order to get there, well, 'gotta be a bit bold!' I suppose. The permanent bed was high on the list and that requires major reformatting but also, since there's no need for as open an access (to the former dining table) it opens up possibilities such as...perhaps, an enlarged closet.
Good point of engineering concern though. I would suggest in this Tote that the upper integrity is bolstered by the molded in lateral cabinets, but then I note these cabinets don't exist at all in other brands of 13-footers and people build their own shelves just to have anything up there. I will also be putting up a few more shelves in addition to the upper cabs. But, I don't want to get that far ahead of myself in describing projects since I'm really at the point of welding, tubes, wires, foundationals, nothing pretty or exciting...no place to put a teddy bear or those new neat kitchen towels yet. I expect to hit a few dead ends and re-dos. Everything should be dependable and work, strong and dry, before 'decorating'.
One thing I have tried and failed at was using a fish line to push wires through the hollow layers of fiberglass where the original wires were. I couldn't push anything through without it getting stuck severely, with the narrowest fish line, even where the old chopped wires used to be. I thought about maybe using one of those really long (like 4-5 foot) floppy drillbits to open a cave, but, nah, those wires are just going to have to be ugly and on the inside of the shell and hidden with insulation later. At the factory they have luxuries of access which are never to be known again.
|
|
|
|
|
|
|
Currently Active Users Viewing This Thread: 1 (0 members and 1 guests)
|
|
|
 Posting Rules
|
You may not post new threads
You may not post replies
You may not post attachments
You may not edit your posts
HTML code is Off
|
|
|
|
 » Recent Discussions
 |
|
|
|
|
|
|
|
|
|
|
|
|
|
|
|
|
|
|
|
|
|
|
|
|
|
|
|
|
|
|
|
|
|
» Upcoming Events |
No events scheduled in
the next 465 days.
|
|


 Buttercup
 Casita Vino (SOLD)
 Proud-Canadian Escape
 1992 Scamp Side bath
 1981 Burro
  "Homelet" Trillium 1300
 Linear Mode


