 |
|
 06-16-2016, 05:56 PM
|
#41
|
|
Senior Member
Name: Jonathan
Trailer: 1991 16' Casita
North Carolina
Posts: 178
|
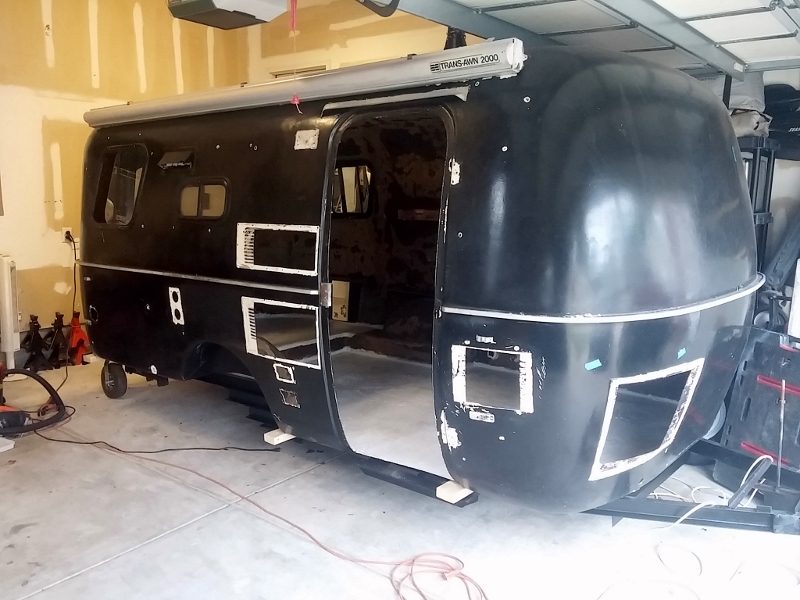
Nothing too Earth shattering today, the frame needed some additional rust-related work (not really picture worthy) and I spent some time pulling a couple of the metal vents off in preparation for some patch work:
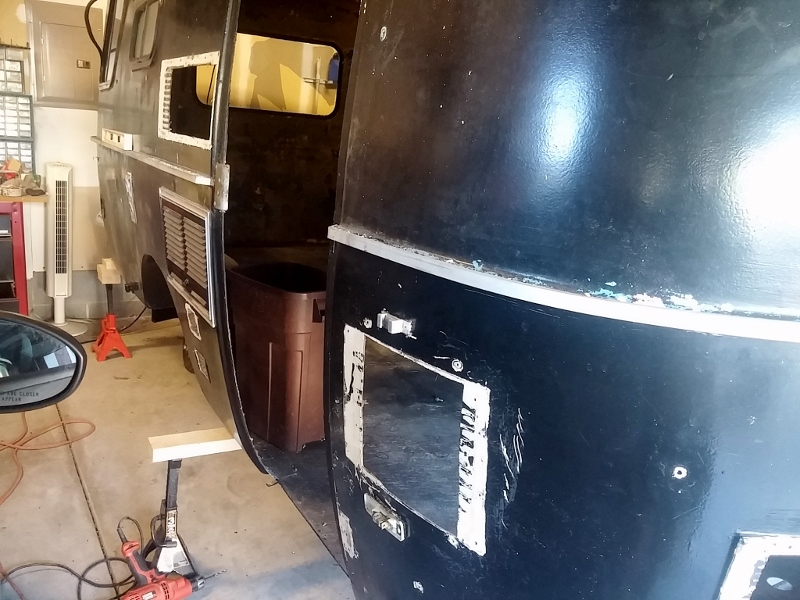
Speaking of which, I never would have guessed how difficult it would be to find a source for the 3/16" sheet material I need. An RV salvage company in Arizona initially said they had some that they could sell me, but when I called to order it they said they didn't have any... not sure what was up with that?!
The local LKQ has a few trucks with fiberglass camper shells so I'm planning on heading over there to check this out, if this doesn't pan out there's a fiberglass shower stall that must have blown off a garbage truck on the highway between my house and work... yeah, that would be pretty redneck, but the price would certainly be good... assuming I don't get a citation while doing the salvage operation.  If all else fails I'll go with the FRD that Home Depot sells, not ideal from what I've read but better than nothing.
Jonathan
|

|

|
|
06-17-2016, 05:40 PM
|
#42
|
|
Senior Member
Name: Jonathan
Trailer: 1991 16' Casita
North Carolina
Posts: 178
|
Update for today is back to the frame, I got it primed and first coat of paint on most of it:
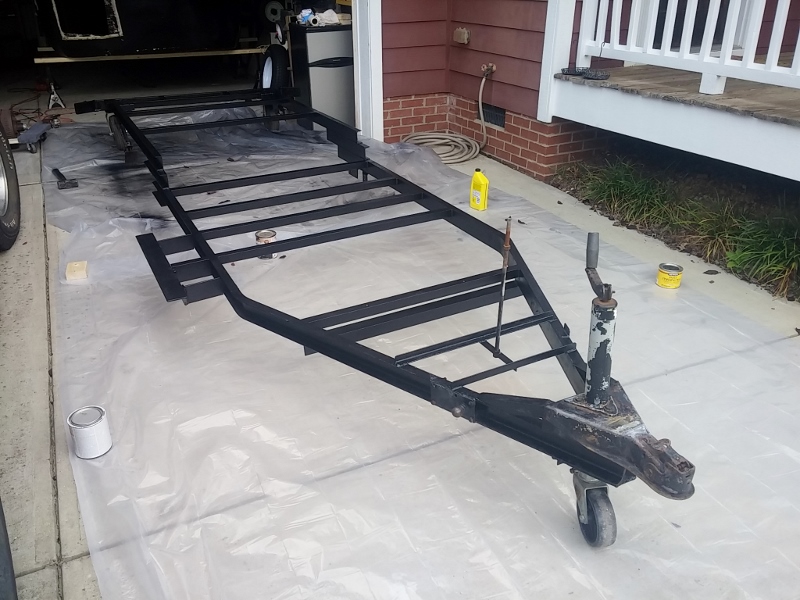
The front portion I'm intentionally leaving untouched as I need to do a little work on the hitch and jack, I'll loop back around to this at some point after I get the 498 other items done that are more important. 
Jonathan
|
|
|
|
|
06-18-2016, 08:22 AM
|
#43
|
|
Senior Member
Name: Jonathan
Trailer: 1991 16' Casita
North Carolina
Posts: 178
|
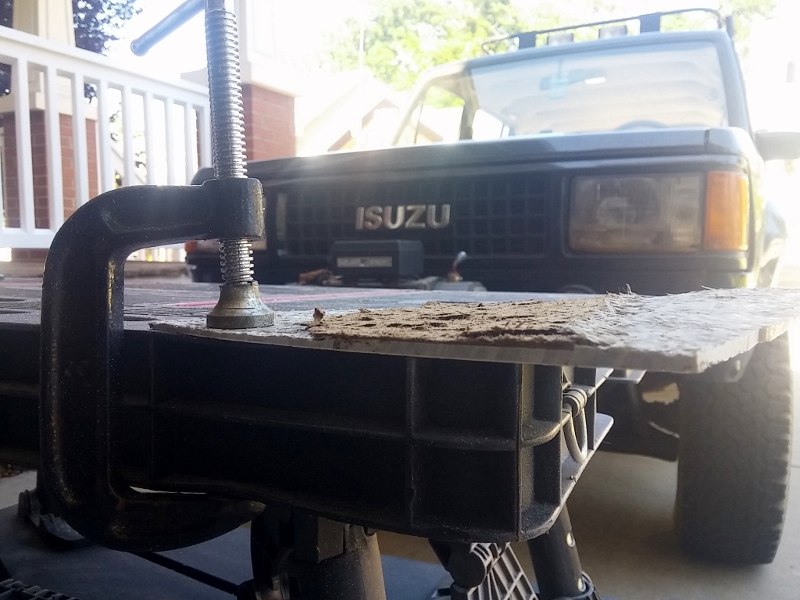
After a bust at one of the local auto salvage yards this morning I decided to swallow my pride and swing over to check out the shower stall that was on the side of the highway:
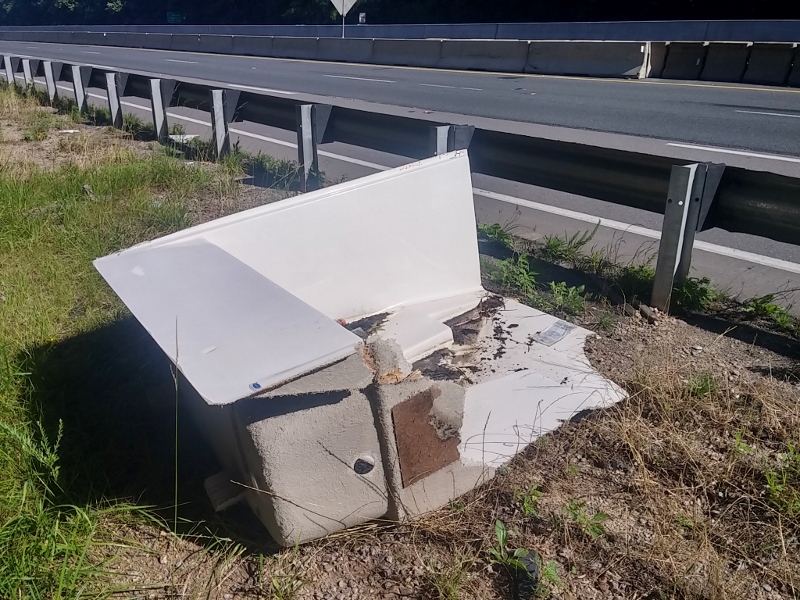
It's actually perfect, 3/16" and smooth on the one side so I grabbed a couple of the smaller pieces that I was able to tear off by hand, I'll be heading back with a cordless saw probably early tomorrow morning to get a couple of the larger pieces I need. 
Jonathan
|
|
|
|
|
06-18-2016, 09:50 AM
|
#44
|
|
Senior Member
Trailer: 1988 16 ft Scamp Deluxe
Posts: 25,707
|
You're not the first to use pieces from a shower stall to repair a hole or two or three. But those folks typically found what they needed on Craigslist, not along side the road  I love it when people are creative in sourcing!
Good luck to you! 
__________________
Donna D.
Ten Forward - 2014 Escape 5.0 TA
Double Yolk - 1988 16' Scamp Deluxe
|

|
|
|
06-18-2016, 03:05 PM
|
#45
|
|
Senior Member
Name: Jonathan
Trailer: 1991 16' Casita
North Carolina
Posts: 178
|
Quote:
Originally Posted by Donna D.

Good luck to you! |
Thank you Donna, the encouragement is certainly appreciated! ")
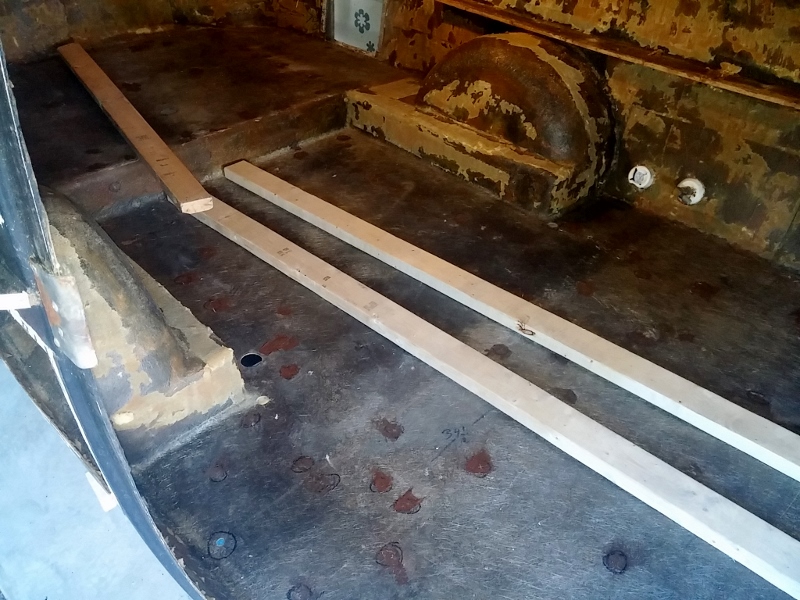
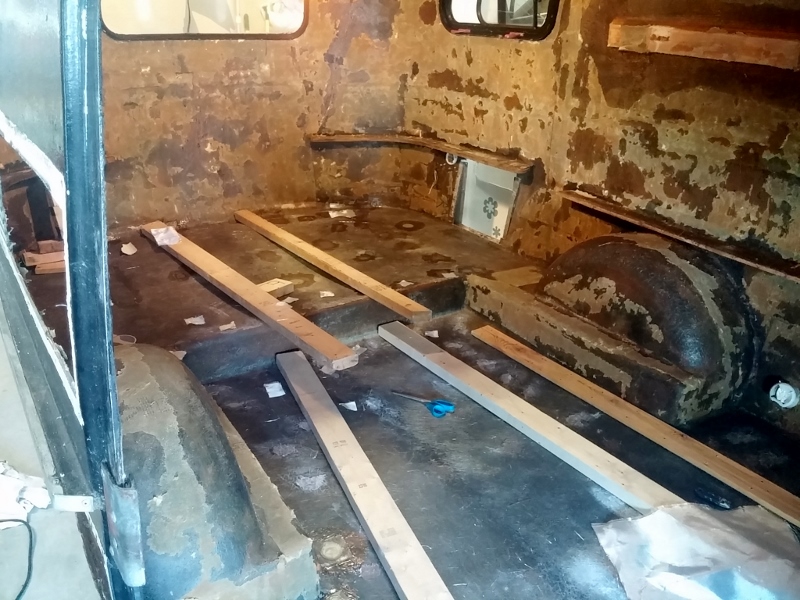
I got a second coat of paint on the frame before I set out early this morning, so after yet another trip to Lowe's and some lunch I got the shell lowered back down onto it with some temporary 2x4s sandwiched in between to leave a gap while I started the floor repair. I got all of the smaller holes filled with Bondo Glass - here's a shot that also shows my perilous catwalk:
Tomorrow I'll do a little sanding then cover each one with a small piece of fiberglass cloth and resin. I'm not entirely sure if both are really necessary, but figured I'd air on the side of overkill.
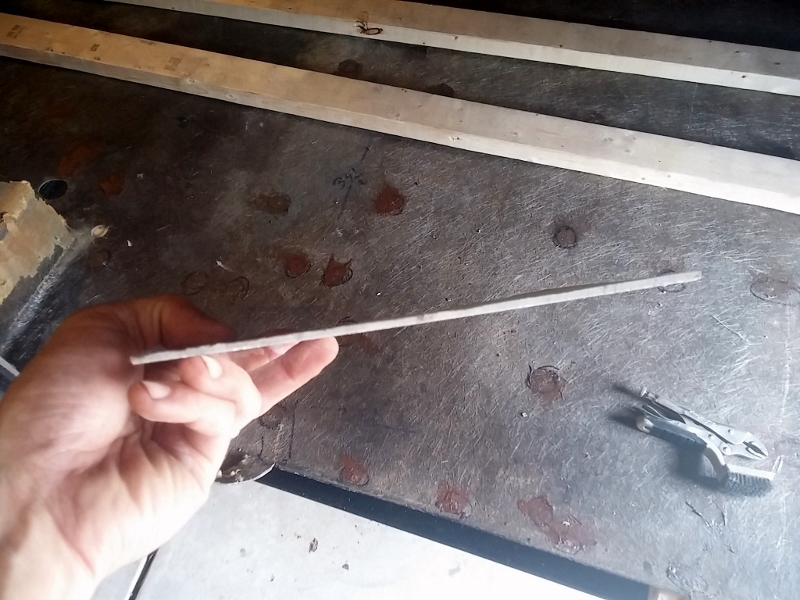
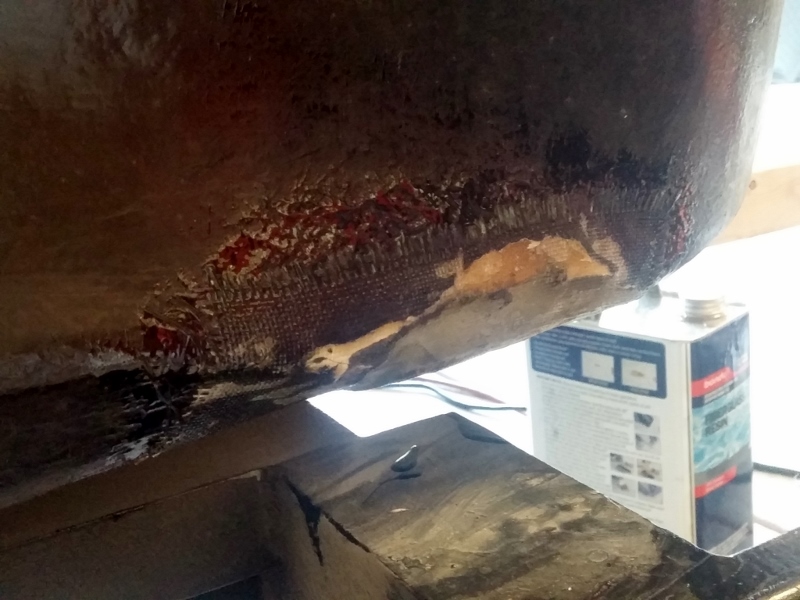
As for the shower stall, I'm finding that sections have varying thicknesses, here's a sample of once piece I cut:
I'll have to do some grinding/sanding to get pieces a little more even, so more effort than I originally anticipated, but still free so I really shouldn't complain.
Jonathan
|
|
|
|
|
06-18-2016, 04:45 PM
|
#46
|
|
Senior Member
Name: Steve
Trailer: Escape 5.0 TA
Pennsylvania
Posts: 231
|
Tub
Hey Jonathan, that tub would be perfect for watering my cows!. I wish you were closer. Anyway...nice project!
|
|
|
|
|
06-18-2016, 05:42 PM
|
#47
|
|
Senior Member
Name: Kelly
Trailer: Trails West
Oregon
Posts: 3,046
|
You are making great progress. Recycling rocks!
When the minor deities who are responsible for distributing side of the road (kill ") ) offerings present you with something you have been looking for it is best not to argue with them about the quality of what you received. The more grateful you are the closer they get to the mark next time.
|
|
|
|
|
06-19-2016, 09:33 AM
|
#48
|
|
Senior Member
Name: Jonathan
Trailer: 1991 16' Casita
North Carolina
Posts: 178
|
Quote:
Originally Posted by k corbin
You are making great progress. Recycling rocks!
|
Yes, it will definitely help me carry the project along without running out of money, so I'm pretty psyched!
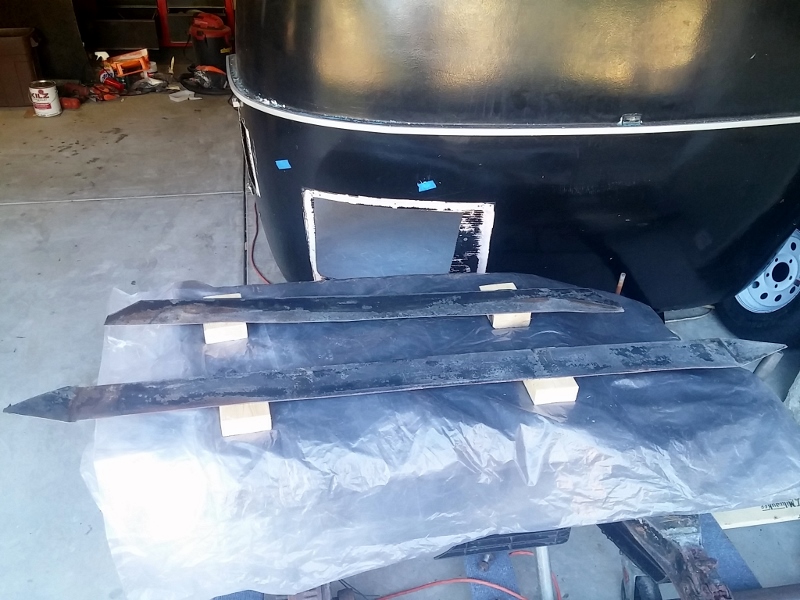
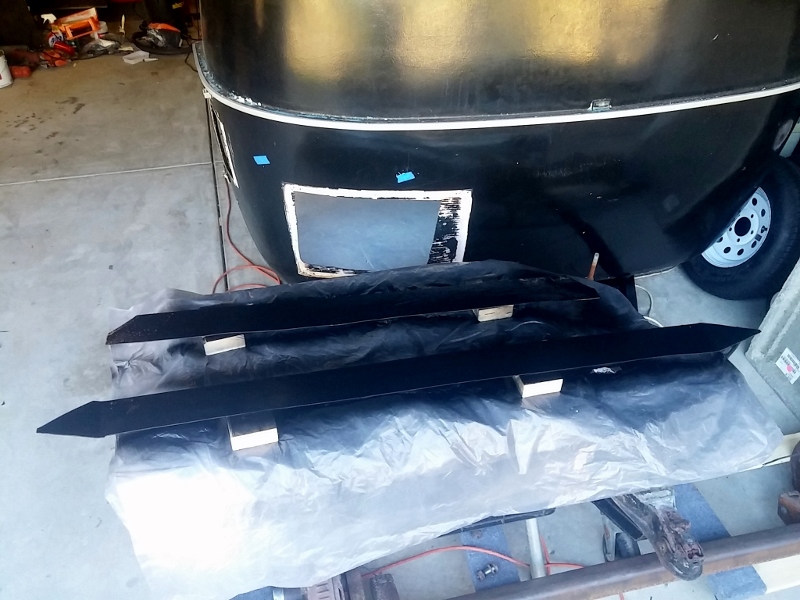
This morning was spent sourcing fiberglass and other assorted items... yet another trip to Lowe's, a couple of the cashiers are starting to recognize me which is a little frightening. I then set up a little shop in the yard to prep all of the pieces for the floor:
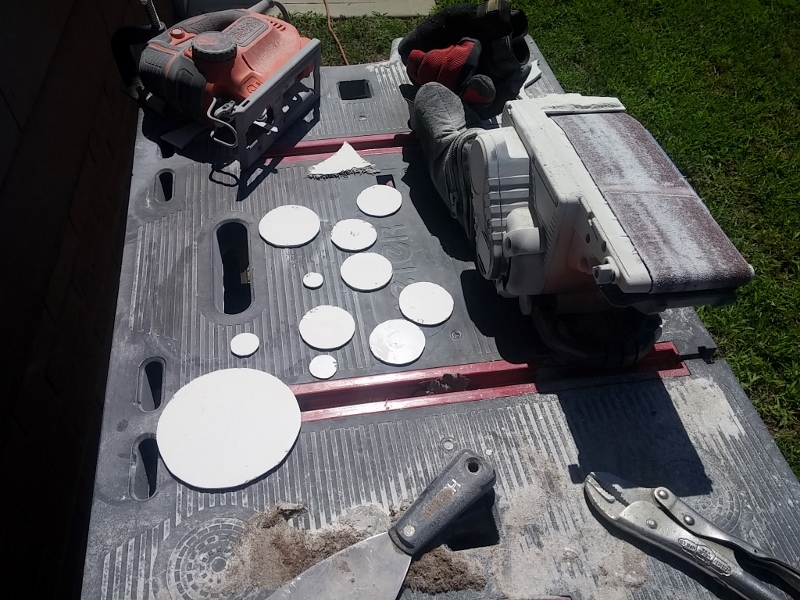
The larger pieces are going to take a little more time, but not too terrible to get the thickness more consistent:
Off to try my hand at fiberglassing!
Jonathan
|
|
|
|
|
06-19-2016, 12:05 PM
|
#49
|
|
Senior Member
Name: Barb
Trailer: Trillium Outback 2004
British Columbia
Posts: 179
|
R & R
Wow, this is a PROJECT ! Love your attitude about your discoveries even when it ended up being way more than you bargained for!
Great photos and closeups of what you're doing. As well as descriptions. Could you include the brand of the materials you are using, such as the rust inhibitor, rust paint, etc.?
For this newbie to restoration this info would be most helpful.
Really interested in seeing how this progresses. Great work and your other skills are certainly transferable.
Thanks for sharing with all of us.
Carry on!
__________________

|
|
|
|
|
06-19-2016, 02:56 PM
|
#50
|
|
Senior Member
Name: Jonathan
Trailer: 1991 16' Casita
North Carolina
Posts: 178
|
Quote:
Originally Posted by BarbinBC
Thanks for sharing with all of us.
|
Thank you for your interest and kind words!
I haven't been including specific brands thus far as I figured most people would want to follow the tracks of someone on the forum with more experience, but thus far the ones that I can recall of note include:
- Mold/mildew cleaner - WET & FORGET Moss, Mold, Mildew and Algae Stain Remover
- Rust remover - Krud Kutter Rust Remover and Inhibitor
- Primer - Rust-Oleum Self-Etching Primer
- Paint - Rust-Oleum Semi-Gloss Protective Enamel
- Fiberglass repair (thus far) - Bondo Glass Reinforced Fiberglass Filler and Bondo All-Purpose Fiberglass Resin
I must admit I was a little unsure about how the fiberglass patching was going to go having never done it before, but found it extremely easy and made a lot of progress this afternoon. I got all of the major holes filled in, as well about half of the secondary patches on all of the fastener holes I had previous filled. Here's a couple representative pictures:
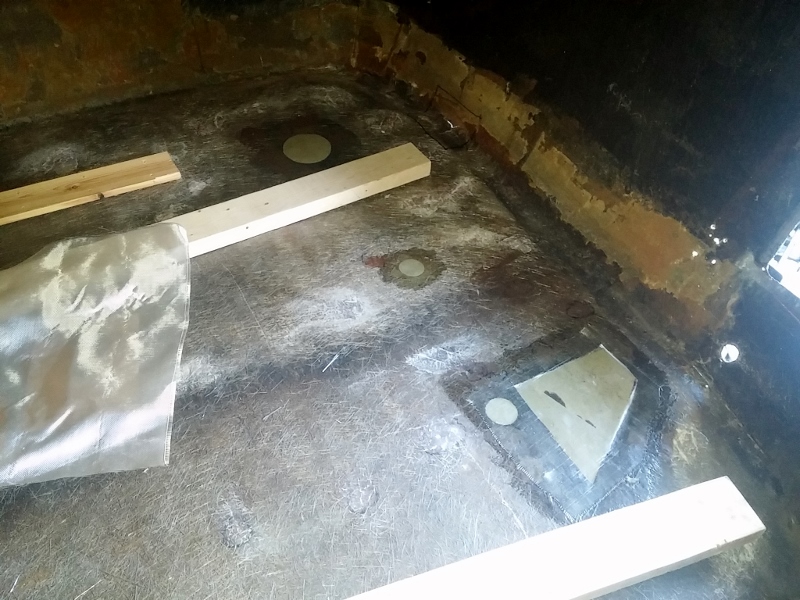
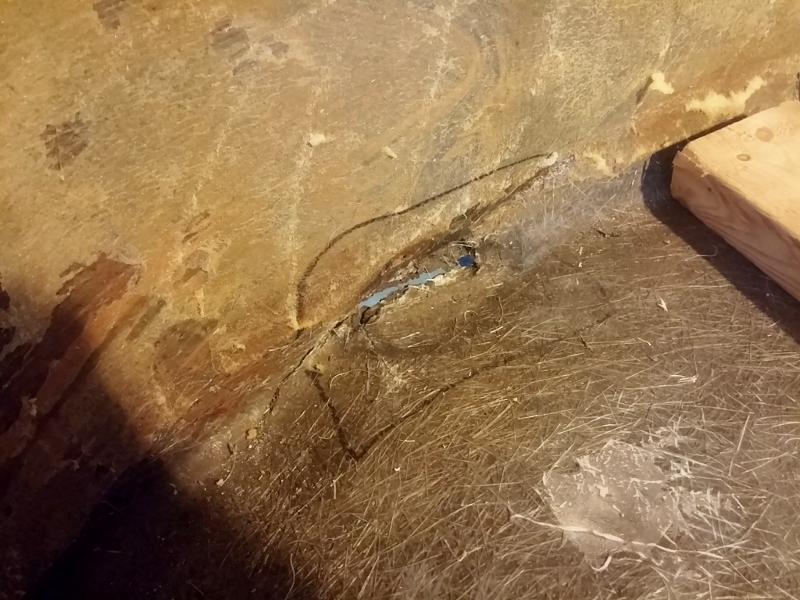
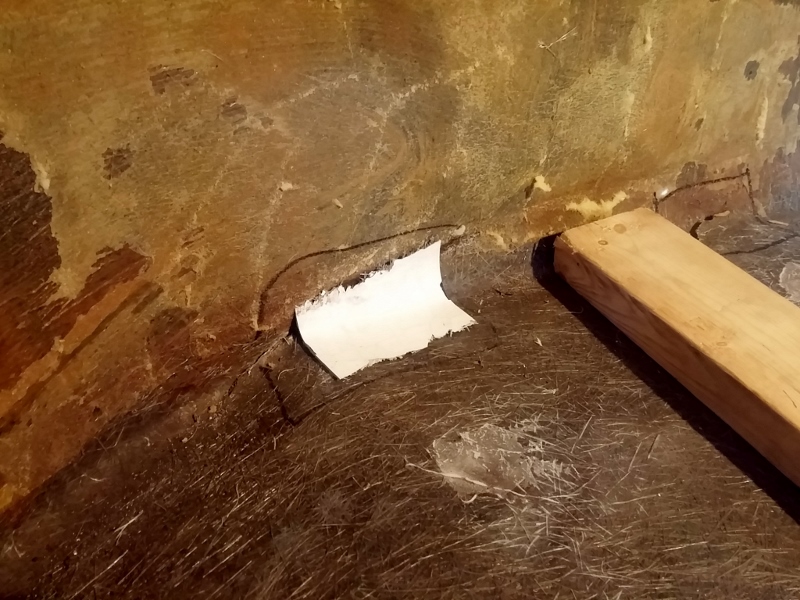
While working I discovered some additional damage in the shell where the floor meets the wall on all four corners, basically sections like this that had caved in I assume because the shell had so much play without the solid sub-floor to keep it steady:
Having the shower stall worked in my favor, I cut some curved sections which I'll put over top of a layer of fiberglass cloth/resin which I hope will give each corner some additional strength in addition to just sealing things up (this is just a test fitting):
Once I get the rest of the interior floor work done I'll make a pass with fiberglass filler on the outside of the larger holes just to get them completely sealed and flush, after that I plan on slathering on a layer of Kilz then should be ready to install some new sub-flooring. Lots left to do!!
Jonathan
|
|
|
|
|
06-19-2016, 04:03 PM
|
#51
|
|
Senior Member
Name: Walter
Trailer: 2017 Escape 17B
SW Virginia
Posts: 2,255
|
Your proactive way of dealing with all these unexpected damages is both inspiring and awe inspiring. Whew!
Walt
__________________
Past owner of 1995 13' Casita, 1994 16' Casita, 2012 Parkliner, 2002 17' Bigfoot.
|
|
|
|
|
06-19-2016, 04:13 PM
|
#52
|
|
Senior Member
Name: Kelly
Trailer: Trails West
Oregon
Posts: 3,046
|
What a great weekend you had progess wise. It all looks great.
|
|
|
|
|
06-19-2016, 05:45 PM
|
#53
|
|
Senior Member
Name: Jonathan
Trailer: 1991 16' Casita
North Carolina
Posts: 178
|
Thanks Walt and KC! The past few days have left me with my share of aches, but I too am really happy with the progress... I mean, I'm starting to feel like I actually might be able to use this camper one day!! 
Jonathan
|
|
|
|
|
06-21-2016, 05:59 PM
|
#54
|
|
Senior Member
Name: Jonathan
Trailer: 1991 16' Casita
North Carolina
Posts: 178
|
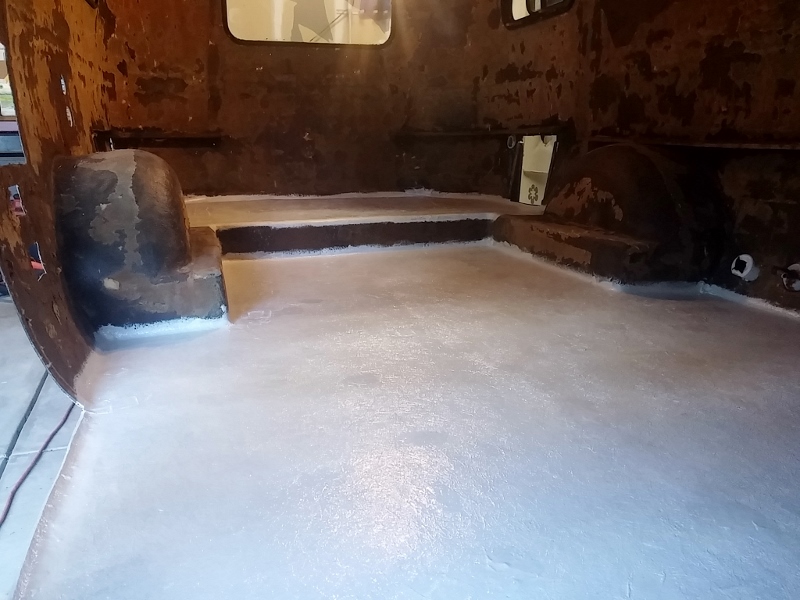
Over the past two days I crept a little further, I patched the two collapsed spots on the front corners of the shell, found and patched a couple more holes and this evening vacuumed and got a coat of Kilz down on the floor:
Here and there I've also been removing vents which I'm hoping to strip the paint off and reuse, the poor little camper is still looking pretty rough:
Sub-floor I believe is next!
Jonathan
|
|
|
|
|
06-22-2016, 10:05 AM
|
#55
|
|
Senior Member
Name: Kelly
Trailer: Trails West
Oregon
Posts: 3,046
|
Why did you paint that surface that is inside of the trailer with Kilz? What benefit did that step provide? I am scratching my head over that one .
|
|
|
|
|
06-22-2016, 10:44 AM
|
#56
|
|
Senior Member
Name: Walter
Trailer: 2017 Escape 17B
SW Virginia
Posts: 2,255
|
Maybe as a leveling, smoothing compound? Sure looks effective from here.
Walt
__________________
Past owner of 1995 13' Casita, 1994 16' Casita, 2012 Parkliner, 2002 17' Bigfoot.
|
|
|
|
|
06-22-2016, 11:00 AM
|
#57
|
|
Senior Member
Name: Jonathan
Trailer: 1991 16' Casita
North Carolina
Posts: 178
|
Quote:
Originally Posted by k corbin
Why did you paint that surface that is inside of the trailer with Kilz? What benefit did that step provide? I am scratching my head over that one .
|
It was an extra step I decided to take to minimize the chance of lingering mold and mildew smells... which I suppose some might argue wasn't necessary, although for the cost of a gallon (under $20) and 20 minutes of work it seemed worth me doing. My plan at this stage is to get the interior walls/ceiling smooth and just paint them, so I'll be able to use the remainder of the gallon as the primer.
Jonathan
|
|
|
|
|
06-22-2016, 11:01 AM
|
#58
|
|
Senior Member
Name: Barb
Trailer: Trillium Outback 2004
British Columbia
Posts: 179
|
Kilz
Kilz paint kills mold and prevents its return.
__________________
|
|
|
|
|
06-23-2016, 05:27 PM
|
#59
|
|
Senior Member
Name: Jonathan
Trailer: 1991 16' Casita
North Carolina
Posts: 178
|
Yesterday and today were spent mostly on last minute prep and research before diving into the sub-floor. Just as I was about to drop the shell back onto the frame I realized that while I had patched the inside of the collapsed four corners, the outside needed attention too... the number of items I'm trying to process on this project obviously overcame my grasp on the obvious. I'll leave the aesthetic work for later, but got the foundational repairs done - here's a representative sample:
It then dawned on me that I hadn't cleaned, prepped and painted the two metal pieces that the front and rear of the shell rested on so attended to these:
Last to think through was my selection of sub-floor thickness which I'm glad I did, originally I had thought I'd use 19/32" but after doing some measurement and math I realized I really needed to use 15/32" in order to be able to accommodate the vinyl tile that I picked out for the top layer. What a difference 0.125 inches can make!
With any luck I'll get the sub-floor in over the next day or two, at which point I plan on focusing on the exterior running lights working so I can get the camper inspected, titled and registered.
Stay tuned!
Jonathan
|
|
|
|
|
06-23-2016, 08:25 PM
|
#60
|
|
Member
Name: Steve
Trailer: Casita
Georgia
Posts: 43
|
This is an amazing project, thanks for sharing, you have us all on the edge of our seats!
|
|
|
|
|
|
|
Currently Active Users Viewing This Thread: 1 (0 members and 1 guests)
|
|
|
| Thread Tools |
Search this Thread |
|
|
|
| Display Modes |
 Linear Mode Linear Mode
|
 Posting Rules
|
You may not post new threads
You may not post replies
You may not post attachments
You may not edit your posts
HTML code is Off
|
|
|
|
 » Recent Discussions
 |
|
|
|
|
|
|
|
|
|
|
|
|
|
|
|
|
|
|
|
|
|
|
|
|
|
|
|
|
|
|
|
|
|
» Upcoming Events |
No events scheduled in
the next 465 days.
|
|


 Le Corbeau


