 |
|
 06-15-2018, 10:22 AM
|
#301
|
|
Senior Member
Name: Patricia
Trailer: 1975 Ventura
Ontario
Posts: 353
|
Congratulations on reaching a turning point. I also found getting the wall panels up to be a real boost. Your attention to detail is impressive.
|

|

|
|
06-15-2018, 04:14 PM
|
#302
|
|
Senior Member
Name: Kelly
Trailer: Trails West
Oregon
Posts: 3,046
|
Quote:
Originally Posted by Patricia D.

Congratulations on reaching a turning point. I also found getting the wall panels up to be a real boost. Your attention to detail is impressive.
|
I feel like I have to pay a lot of attention to things such as moisture control since I will be spending most of my days and nights in it for several years to come. But of course the insulation will never be up to the standards that can be achieved in modern houses. It will only be somewhat of an improvement over carpet on the walls as was done in the original.
Keeping heat in for times when heat is needed is mostly what I have been up to with my insulation measures. Keeping the heat out is a whole other technique. That is best controlled by placing materials on the exterior of the trailer such as reflective tarps and the use of shade cloth awnings. Of course even with such measures the best you can achieve is to have the interior at the same ambient temperature as the outside air. If it is 90 degrees outside it will still be at least 90 degrees inside unless you are running an air conditioner. Right now on sunny days with the windows and door open the interior is 7 to 10 degrees above ambient. That is not too bad for being in the sun with no external reflective measures being taken. I don't know what effect putting the big solar panel on the roof will bring.
|
|
|
|
|
06-16-2018, 06:31 PM
|
#303
|
|
Senior Member
Name: Patricia
Trailer: 1975 Ventura
Ontario
Posts: 353
|
During your search for fittings to use as ports on your trailer, have you ever come across solar ports (SAE) that allow you to just plug a portable solar panel into an exterior plug. That plug is then wired into the solar controller which is wired to the battery.
I have seen them in videos but can't find universal ones for sale. By virtue of your location and experience, you seem to have more knowledge of and access to unique, hard to obtain items than most of us.
Thanks.
|
|
|
|
|
06-17-2018, 10:00 AM
|
#304
|
|
Senior Member
Name: Kelly
Trailer: Trails West
Oregon
Posts: 3,046
|
There is a sidewall thru hull fitting for automotive and RVs that is made by the Zamp company. They say it will only work with Zamp panels but to make it exclusive for use with their panels all they did is reverse the polarity of the wires.
 So to install it for use with other non Zamp brands of solar panels when hooking it up inside your RV you must reverse the wiring coming out of that port. At that location only the red wire will go to black and black will go to red. That will make this plug work for panels other than the ones from Zamp. You can purchase this Zamp fitting on Amazon or from other online sources.
https://www.amazon.com/Zamp-Solar-RV.../dp/B00T36YVI4
|
|
|
|
|
06-17-2018, 10:13 AM
|
#305
|
|
Senior Member
Name: Patricia
Trailer: 1975 Ventura
Ontario
Posts: 353
|
Thanks, you come through again. I will order that port. Much appreciated.
|
|
|
|
|
06-17-2018, 10:29 AM
|
#306
|
|
Senior Member
Name: Kelly
Trailer: Trails West
Oregon
Posts: 3,046
|
Quote:
Originally Posted by Patricia D.
Thanks, you come through again. I will order that port. Much appreciated.
|
I would suggest that when you install it and reverse that wiring you wrap the original wires coming out of the port with red and black vinyl electrical tape so that it matches your inside wiring scheme to eliminate any possible confusion if someone has to troubleshoot the wiring.
|
|
|
|
|
06-18-2018, 03:35 PM
|
#307
|
|
Senior Member
Name: Kelly
Trailer: Trails West
Oregon
Posts: 3,046
|
I was looking for something entirely different on Amazon and up popped a "universal power port" for 12 volt chargers that has 12 guage wiring versus the lighter 16 gauge wiring used on the Zamp port. It is part of the BatteryMinder line of products. But taking some of the keywords and adding a few of my own I was able to find even more brands of these weather proof, sidewall or sometimes called panel mount SAE plug ports.
https://www.amazon.com/BatteryMINDer...yminder+ezc-01
Here is yet another brand of this type of port also from Amazon.
https://www.amazon.com/dp/B0031BOTFC...03_03_t_img_lh
and yet another brand of the same type of plug-in but this one they say you need to order their plugs to put on the ends of your solar cable for the best watertight fit. It is being sold as a marine product for installing battery power in a kayak. I do like using the marine products because that use requires good water proofing vs RV industry which does not always come up to the same standards.
https://www.amazon.com/Yak-Power-YP-...+sae+connector
But as is the case with the Zamp you do have to watch what polarity they have wired their ports with as it might not match the polarity coming out of your solar panel. Not hard to fix as you just change the wires on the pins to match what you need but you will need to do some electrical testing so you don't ruin your components.
I think I will install the Batteryminder unit for myself, it might come in handy if I want to use a regular trickle charger other than the one that is part of the converter or charge from a portable solar panel. I can put it next to my 110v inlet as the backing plate I installed for that fitting was extra wide so I have plenty of room to secure this port in the same area.
There will be a number of days in the summer when I want to park in the shade and the secured in place solar panel on the roof won't be generating enough electricity. But I do have an alternative 60 watt solar panel that I will keep in the car.
|
|
|
|
|
06-19-2018, 11:19 PM
|
#308
|
|
Senior Member
Name: Kelly
Trailer: Trails West
Oregon
Posts: 3,046
|
Almost done with the work on the plywood floor. That has certainly been a slow journey involving many hours of labor. But keeping it in perspective compared to some folks projects it was nowhere near the amount of work of the FGRV floor issues where you have to remove the trailer from the frame and cut out the old floor than attach a new floor to the sides of the shell.
The hardest part of the work on the floor was replacing the section just inside the door where the plywood had rotted out. But I also extended the plywood over to the sidewalls under the kitchen cabinets and for a distance forward of the wheel wells. There were other small issues, some rot around a few of the bolts, at least 50 carpet staples to remove and /or grind below the surface of the plywood.
As seen in the photo below there were low areas in the plywood created by clamping pressure where there were pieces of angle iron pressing against the floor, those were what secured the old cabinets to the floor. Those depressions needed to be filled. I still remember what a rusty mess those bolts and angles were to remove!

Yesterday evening and early this morning I mixed up epoxy with micro-balloons to create a thick filler (fairing paste). Two sessions of application got all the gouges, the low spots and also seams and transitions between panel sections leveled up enough that I can put flooring over it. It is easy to see the contrast of the white filler and that I had to do the whole surface of the floor. Photo below is after having sanded it smooth. Fortunately the plywood is overall in sound condition so this was mostly addressing scattered surface damage that only needed a bit of filler. Not surprising in a trailer that spent a number of years being a catchall storage shed.

This evening after a good sanding and dust removal I was finally able to apply a coat of epoxy over the whole surface. That was needed to fill any tiny voids I might have missed with the fairing paste.It is still wet which is why it looks so shiny in the photo below, it won't be very shiny when it dries.

It does not look pretty even though it is relatively smooth, level and well sealed. I did think about painting over it but I decided I would rather be able to look through the clear epoxy and check on the condition of plywood in case there is a leak someday in the future. My floor covering will loose laid and only held down with double faced tape along the edges. That is how it is supposed to be installed. So if there ever is a leak it won't be that difficult to lift it up, mop up, check on things, etc.
One nice thing about working in this warm weather is that the epoxy was very easy to pump out into the mixing cup, easy to stir and it set up in just a few hours. Sixty degree weather is my favorite to work in but it has been right around 80 this week and of course the inside of the trailer that has sun on it is a little hotter than ambient temperature. A big pitcher of ice tea is a good to have on hand! Taking a break while waiting for paint or epoxy to dry no hardship on such a day.
Tomorrow it is time to get back underneath the trailer and get the areas of the frame where the bolts go through cleaned up and painted at least a few inches on each side of most of the bolt locations. I won't get it all done in one day because I can only stand so many hours of rust grime and old paint raining down on me but at least I will make a start on this task I truly dislike doing. once all the bolts are in my reward will be getting to start framing cabinets ")
|
|
|
|
|
06-26-2018, 12:44 AM
|
#309
|
|
Senior Member
Name: Kelly
Trailer: Trails West
Oregon
Posts: 3,046
|
I was under the trailer a couple of days ago cleaning off some flaky old paint, rust, etc preparing the surfaces for some Ospho and then paint. While working by the wheel well I glanced towards the wheel and saw some daylight where it should not have been. The old tire mounting rim obviously sat in the same position for a very long time as there was a small line of break through rust along a curve of the rim. You could not see that break through viewing the rims from the outside as there was not enough contrast of light since they are just pin hole size spots.
I had already purchased new tires and rims so it is not a big deal to find the issue on the old rims. Just waiting until I am done working underneath the trailer before I put the new ones on.
|
|
|
|
|
06-26-2018, 06:50 AM
|
#310
|
|
Senior Member
Name: Patricia
Trailer: 1975 Ventura
Ontario
Posts: 353
|
Quote:
Originally Posted by k corbin
I was under the trailer a couple of days ago cleaning off some flaky old paint, rust, etc preparing the surfaces for some Ospho and then paint. .
|
This is one job I have yet to do. What are you using to take off the old rust, just scraping and sanding? My biggest
concern are the parts on the top of the frame tight up to the bottom of the trailer.
|
|
|
|
|
06-26-2018, 04:53 PM
|
#311
|
|
Senior Member
Name: Kelly
Trailer: Trails West
Oregon
Posts: 3,046
|
Quote:
Originally Posted by Patricia D.
This is one job I have yet to do. What are you using to take off the old rust, just scraping and sanding? My biggest
concern are the parts on the top of the frame tight up to the bottom of the trailer.
|
I am sure there is some rust up on top but my frame was painted before it was installed. There was still a lot of paint on my framing on the sides and bottom and they get a lot more wear than that top surface. I don't think there is a significant issue with the upper surface. On the sides and bottom I removed the loose rust and paint but did not worry if firm paint remained on the surface. Read at the bottom for the steps you need to do for prepping for painting.
As to what I used to remove rust, I used an angle grinder with a paint stripping disc. They come in different grits, you want the coarse one. Different brands come in different colors. You can buy them at hardware stores. Here is a link so you can see what it looks like.
https://www.homedepot.com/p/3M-Sandblaster-4-5-in-x-4-5-in-Coarse-Grit-Clean-N-Strip-Disc-9681/203783542
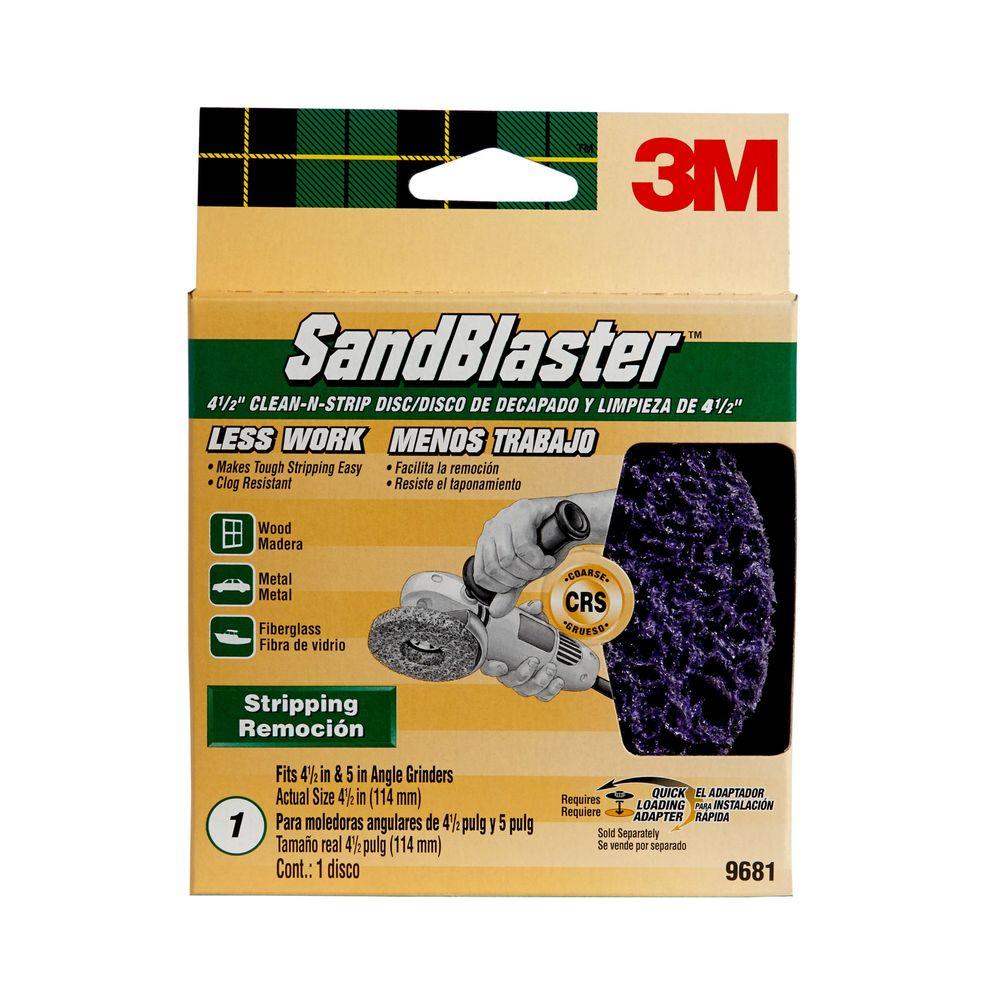
Watch your fingers you can wear leather work gloves but do not wear loose fitting gloves, they need to be a snug fit with no excess material at your finger tips to catch on the grinder. You should also have on a respirator, you absolutely must wear goggles. Your hair must be out of the way, it is best if you cover it. I recommend you get a disposable tyvek hood to keep the debris out of your hair, they are not expensive and you can get them where tools and paint are sold. When you are done bend over and clean debris off the top of your head and face before you remove the goggles. Be sure to clean the top of the goggles of as well before you remove them. My biggest issues were getting grit in my eyes when taking off the protective gear and keeping my fingers clear of the spinning pad.

Once you have gotten most of the rust off then dust the surface. Next coat the surface with Ospho. That is an acid that converts the rust, I bought it in the paint supply aisle of my local Do-it-Best hardware store, wear gloves and use a disposable bristle paint brush to apply it. The Ospho needs to be left on to dry overnight. If there is still a lot of rusty brown color then you need to do a second coat of the Ospho over those areas. If there is grey powder on the surface the next day just wipe it off. Now you can coat it with a paint that is made for rusty surfaces. To paint the metal I use a product called Por-15 and then after that has dried as recommended I put on a top coat of the paint made to work with the Por-15. Por-15 can be used without a top coat of paint in areas that do not get UV exposure but I went ahead and put on the paint for extra protection. I did my trailer tongue this same way.
The Por-15 paint will solidify if some of it is in the rim of the paint can making it impossible to open the can again. However the guys at the auto paint store told me a trick that really does work. Just take a piece of plastic wrap or plastic from a bag and put it under the lid when you put the lid back onto the can. This trick works for many types of paint and it makes it easy to open for the next coat or the next job.
|
|
|
|
|
07-03-2018, 09:11 PM
|
#312
|
|
Senior Member
Name: Kelly
Trailer: Trails West
Oregon
Posts: 3,046
|
I was looking at the photo album on the forum for the Trailswest Campsters. In that album is a snapshot image of an article from the Canby, Oregon newspaper where they were interviewing the guys who were making the Campsters. I have seen it before but this time I noticed something in the article that made me curious. It stated that they were also making the popup for Volkswagon campers so I did a quick search for images to verify that. Sure enough, they did, now we have another resource for vintage parts for the pop up. But of course it would be a fierce battle to get them as the vintage VW camper van market is roaring hot competition for authentic parts.
Link to the article about the Campster from our photo albums
http://www.fiberglassrv.com/forums/m...cture9441.html
Note in the images below of the VW campers that they even used the same yellow canvas as came on the Campsters.


credit for this photos from Wikipedia belongs to: Paul Palmer photographer - Photo taken by author at Texas VW Classic April 2006., CC BY 2.5, https://commons.wikimedia.org/w/index.php?curid=962668
|
|
|
|
|
07-03-2018, 10:20 PM
|
#313
|
|
Senior Member
Trailer: 2009 17 ft Casita Freedom Deluxe
Posts: 857
|
Quote:
Originally Posted by k corbin
I was looking at the photo album on the forum for the Trailswest Campsters. In that album is a snapshot image of an article from the Canby, Oregon newspaper where they were interviewing the guys who were making the Campsters. I have seen it before but this time I noticed something in the article that made me curious. It stated that they were also making the popup for Volkswagon campers so I did a quick search for images to verify that. Sure enough, they did, now we have another resource for vintage parts for the pop up. But of course it would be a fierce battle to get them as the vintage VW camper van market is roaring hot competition for authentic parts.
Link to the article about the Campster from our photo albums
http://www.fiberglassrv.com/forums/m...cture9441.html
Note in the images below of the VW campers that they even used the same yellow canvas as came on the Campsters.
Attachment 121385
Attachment 121386
credit for this photos from Wikipedia belongs to: Paul Palmer photographer - Photo taken by author at Texas VW Classic April 2006., CC BY 2.5, https://commons.wikimedia.org/w/index.php?curid=962668 |
Wow. Thanks for the link. I was always curious but never took the time to do the research.
|
|
|
|
|
07-04-2018, 01:30 AM
|
#314
|
|
Senior Member
Name: Kelly
Trailer: Trails West
Oregon
Posts: 3,046
|
Quote:
Originally Posted by Dave Fish
Wow. Thanks for the link. I was always curious but never took the time to do the research.
|
The article states that their goal was to produce 20,000 of them each year. Seeing the number of Campsters that show up in this forum and in images elsewhere on the internet there is not doubt that they did not get at all close to making that goal. As they were only distributing in the western most states there could not have been even close to enough demand. They did have competition with other companies producing very similar models of 13' pop up fiberglass trailers.
|
|
|
|
|
07-11-2018, 11:57 PM
|
#315
|
|
Senior Member
Name: Kelly
Trailer: Trails West
Oregon
Posts: 3,046
|
Quote:
Originally Posted by k corbin
I was looking at the photo album on the forum for the Trailswest Campsters. In that album is a snapshot image of an article from the Canby, Oregon newspaper where they were interviewing the guys who were making the Campsters. I have seen it before but this time I noticed something in the article that made me curious. It stated that they were also making the popup for Volkswagon campers so I did a quick search for images to verify that. Sure enough, they did, now we have another resource for vintage parts for the pop up. But of course it would be a fierce battle to get them as the vintage VW camper van market is roaring hot competition for authentic parts.
Link to the article about the Campster from our photo albums
Fiberglass RV - Michael Lee's Album: Some History of the Trails West Company - Picture
Note in the images below of the VW campers that they even used the same yellow canvas as came on the Campsters.
Attachment 121385
Attachment 121386
credit for this photos from Wikipedia belongs to: Paul Palmer photographer - Photo taken by author at Texas VW Classic April 2006., CC BY 2.5, https://commons.wikimedia.org/w/index.php?curid=962668 |
Another funny tie in to this story, the new Dub Box fiberglass trailers with popup roofs are made in Oregon. They have a couple of different styles of popups available that you can specify for their trailer one is a similar size to the Campsters but not exact replicas of it. Others are from contemporary VW camper sources plus they have a full size motorized popup roof of their own.
It would be fun to drop in and visit their factory one of these days...
|
|
|
|
|
07-23-2018, 01:02 PM
|
#316
|
|
Senior Member
Name: Kelly
Trailer: Trails West
Oregon
Posts: 3,046
|
time to start working on cabinets
I did not get any work done the last two weeks. Caught a summer cold that has had me almost totally wiped out of energy. Today I did a fairly easy start on the cabinets, the layout.
A fiberglass trailer has sloped side and those sides are not very consistent as far as being straight, mine wave in and out a lot and there are some thick areas as well. So the place you must begin is on the floor and then you build up from there You do want to measure as carefully as you can but do realize that your overall tolerance when you are up at the countertop where it meets the wall is very likely going to be plus or minus a 1/4" due to the variations in shape of the fiberglass shell. However you can get a nice straight face frame.
My Campster floor has a 44" wide plywood panel down the center. So step one is to put a center line on the floor at 22" in from the edges of the plywood panel. For a long straight edge I had a scrap piece of 1/8" plywood left from my wall paneling job that is about 7" wide and the full 8' long. I like that it was very thin as it did not create a lumpy knee knocker while I was crawling around. I put a long piece of wide masking tape down the middle and then using a tape measure put some centerline marks down on the tape then taped the plywood down against those marks and drew a full length center line. Leaving the plywood in place I then measured over on each side and marked the line where the bottom of the kitchen cabinet frames would locate. Then at the forward end a cross wise line for the lower front edge of the bed frame, making sure it was 90 degrees to the centerline. Another cross wise line goes at the forward ends of the wheel wells.
My friend Don is working on making some repair frames that support the roof of a cargo trailer that had a collapse from a snow load. So conventiently for me this week he has cleaned out his garage space for cutting long lengths of iron angle for his project. I will be cutting aluminum angle for my project. But we will be using the same cut off saw that has a carbide blade in it with the proper tooth rake for metal work. So very nice to have a professional, purpose built metal cut off saw available for this project with my trailer parked right in front of the garage door. 
|
|
|
|
|
07-23-2018, 01:08 PM
|
#317
|
|
Senior Member
Name: Kelly
Trailer: Trails West
Oregon
Posts: 3,046
|
time to start working on cabinets
I did not get any work done the last two weeks. Caught a summer cold that has had me totally wiped out of energy. But finally today I did mange to make a fairly easy start on the cabinets that being the layout.
A fiberglass trailer has sloped side and those sides are not very consistent as far as being straight, mine waves in and out a lot and there are some thick areas as well. So the place i must begin is on the floor and then I can build up from there You do want to measure as carefully as you can but also realize that your overall tolerance when you are up at the countertop where it meets the wall is very likely going to be plus or minus a 1/4" or sometimes even more due to the variations in shape of the fiberglass shell. However you can get a nice straight face frame. For each side of the kitchen I will build a long face frame and then add braces and divider panels that tie it to the walls. The same thing will be true of the front face of the bed. I will be showing the actual framing method in stages as it happens.
My Campster floor has a 44" wide plywood panel down the center. So step one is to put a center line on the floor at 22" in from the edges of the plywood panel. For a long straight edge I had a scrap piece of 1/8" plywood left from my wall paneling job that is about 7" wide and the full 8' long. I like that it was very thin as it did not create a lumpy knee knocker while I was crawling around. I put a long piece of wide masking tape down the middle and then using a tape measure put some centerline marks down on the tape then taped the plywood down against those marks and drew a full length center line. Leaving the plywood in place I then measured over on each side and marked the line where the bottom of the kitchen cabinet frames would locate. Then at the forward end a cross wise line for the lower front edge of the bed frame, making sure it was 90 degrees to the centerline. Another cross wise line goes at the forward ends of the wheel wells.
My friend Don is working on making some repair frames that support the roof of a cargo trailer that had a collapse from a snow load. So conventiently for me this week he has cleaned out his garage space for cutting long lengths of iron angle for his project. I will be cutting aluminum angle for my project. But we will be using the same cut off saw that has a carbide blade in it with the proper tooth rake for metal work. So very nice to have a professional, purpose built metal cut off saw available for this project with my trailer parked right in front of the garage door.
|
|
|
|
|
07-23-2018, 06:50 PM
|
#318
|
|
Senior Member
Name: Kelly
Trailer: Trails West
Oregon
Posts: 3,046
|
now I have a portable fridge freezer!
So amazing what turns up around here. This afternoon I scored a free Waeco CF-50, a 12/24v option as well as automatic switching to 110V, portable fridge freezer. It is a lot larger than what I was planning to buy but the price was right. One of the neighbors is relocating and he had been gifted it from another friend who got it from someone at the marina and did not need it. A lot of the guys around here do professional work on marine upgrades and repairs and end up with various items such as this. I figured it might be something he was surplussing in his move so I asked if it was available and he said yes, please take it away. It is supposed to be in good running condition, guess I will find out for sure tomorrow. It looks to be in vry good shape with no damage to the interior or exterior.
So that is the last of the items I had on my list of appliance type of purchases and it was the most expensive thing so I am trilled to have gotten a fridge freezer without spending money for it. Later on I can always trade down in size with someone who is wanting to get a larger unit. But I do have a space it will fit into, even though it is not the exact space I had planned on installing a fridge/freezer. Fortunately I do have a flexible layout.
|
|
|
|
|
07-23-2018, 08:30 PM
|
#319
|
|
Senior Member
Name: Barb
Trailer: Trillium Outback 2004
British Columbia
Posts: 179
|
Waeco Fridge
Is your fridge 3 way Karin? My 2004 Trillium Outback came with a Waeco fridge that only runs on 12V. It has a small freezer compartment with no door that amazingly freezes things. It's Model RPD 1065U/F made in Germany. At one of the fiberglass trailer meets I attended one person told me that they were very good refrigerators. I mostly boondock with two 12V batteries and a 120W portable solar panel. When I went to the Arctic for 3 months only once, after it had rained for 3 days, did I have to find a place to recharge.
Looking forward to seeing your cabinet build. Take photos! How convenient to have all the right tools handy. 
I'm gearing up for the Boler 50th Anniversary Event in Winnipeg in a few weeks. Looked at the list of 700 f.g. trailer attending but didn't see any Campsters!
__________________

|
|
|
|
|
07-24-2018, 12:52 AM
|
#320
|
|
Senior Member
Name: Patricia
Trailer: 1975 Ventura
Ontario
Posts: 353
|
"realize that your overall tolerance when you are up at the countertop where it meets the wall is very likely going to be plus or minus a 1/4" due to the variations in shape of the fiberglass shell."
Exactly what happened to me, my kitchen counter runs along the front of my trailer and part way down the driver's side. The new counter top is snug in the corners and down the side but right in the front middle, there is a gap about a foot long and 3/16 in depth at its widest. ")
Congratulations on the Waeco score. Those portable fridges can be really pricey.
|
|
|
|
|
|
|
Currently Active Users Viewing This Thread: 1 (0 members and 1 guests)
|
|
|
 Posting Rules
|
You may not post new threads
You may not post replies
You may not post attachments
You may not edit your posts
HTML code is Off
|
|
|
|
 » Recent Discussions
 |
|
|
|
|
|
|
|
|
|
|
|
|
|
|
|
|
|
|
|
|
|
|
|
|
|
|
|
|
|
|
|
|
|
» Upcoming Events |
No events scheduled in
the next 465 days.
|
|


 Le Corbeau
 Linear Mode


