 |
|
 05-19-2018, 01:07 PM
|
#181
|
|
Senior Member
Name: Michael
Trailer: Casita 16ft.
California
Posts: 338
|
The under bed drawer is now in. Here she is.
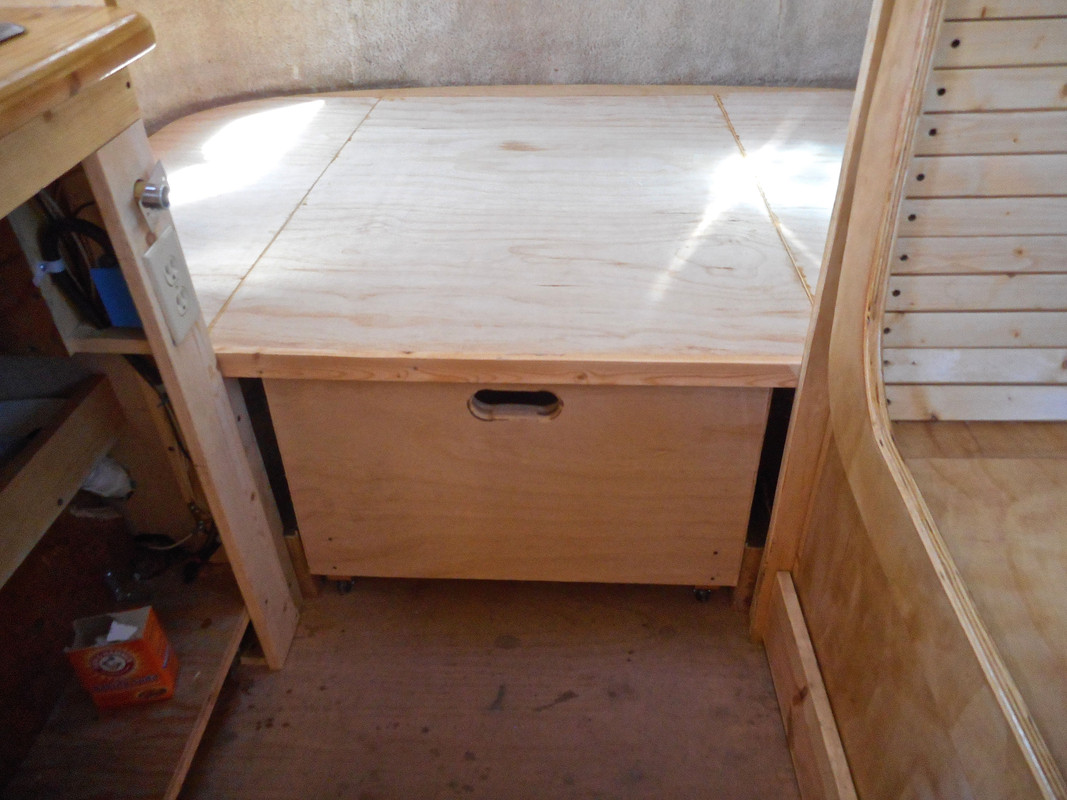

The final dimensions are 28" wide by 48" long by 11" deep. I used 1 1/2" fixed caster wheels front and back. The back wheels roll on the upper floor level. The front wheels on the lower floor. I installed a 3/8" thick strip of wood on the inner side of each rear wheel to guide it on a fixed path. I also put in a pair of fixed guide caster wheels mounted mid mid way up each little pony wall and just behind the bulkheads. They pinch the side of the drawer as it passes to keep the front of the drawer running in a straight line between the galley booth and counters.
|

|

|
|
05-19-2018, 09:46 PM
|
#182
|
|
Senior Member
Name: Eric
Trailer: 1987 Casita 16
Illinois
Posts: 503
|
Nice work! What will you be storing in that space? Stuff you use often, or stuff that you would get out weekly or occasionally? I would think the front would be pretty easy to access regularly, but the back a little less so. That is a ton of good storage!
|
|
|
|
|
05-19-2018, 10:27 PM
|
#183
|
|
Senior Member
Name: Michael
Trailer: Casita 16ft.
California
Posts: 338
|
We haven't yet sorted exactly what we will store where. We figure things will sort out through use we're not in a hurry to delegate spaces right now. I reckon stuff you get at all of the time would find a home in the front cubical for sure. You can get to the rear pretty easily by rolling the drawer past you while sitting in the booth. It rolls pretty easily so pulling it from the booth is doable. Clothing is a logical thing to store under the bed somewhere. I still have to workout some kind of locking mechanism to keep it closed while rolling down the road.
|
|
|
|
|
06-01-2018, 05:20 PM
|
#184
|
|
Senior Member
Name: Michael
Trailer: Casita 16ft.
California
Posts: 338
|
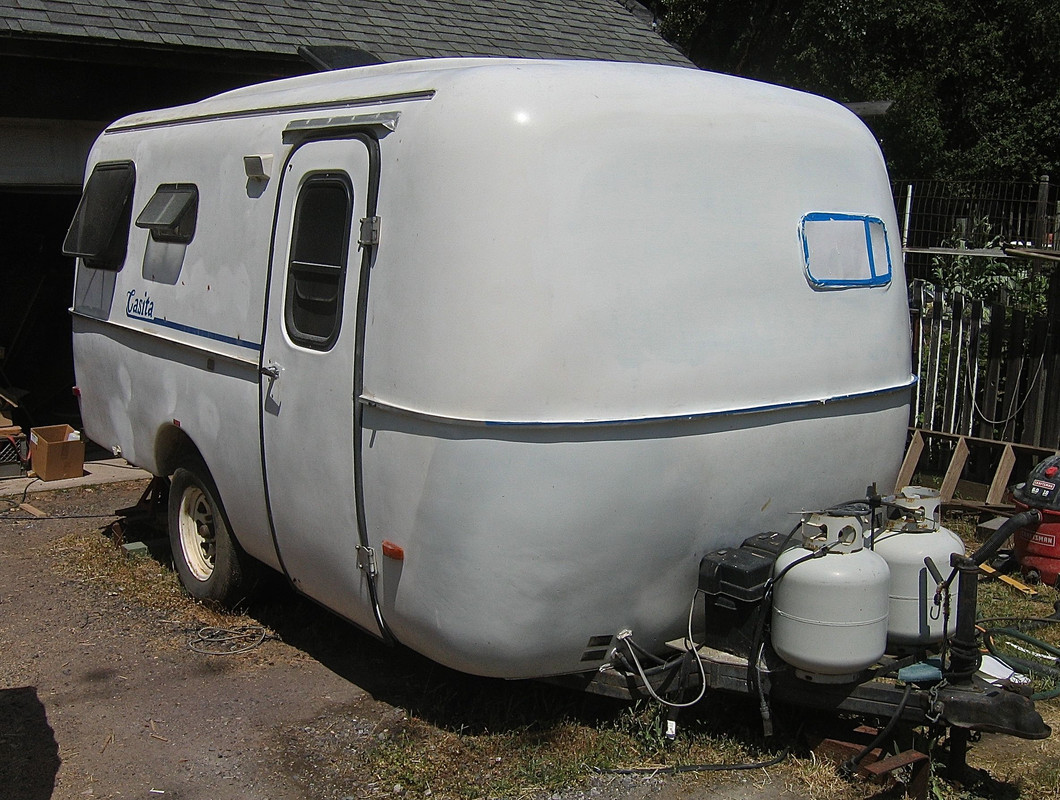
I got back a couple of days ago from a week long backpacking trip with my wife,daughter, son-in-law and a friend on the Lost Coast. After getting reaclimated to being home, I went back out to the Casita project. Time's getting close as I want to take her out on a trip within two weeks. I built and hung the closet and bathroom doors. Unfortunately I took photos with my iPhone and haven't figured out how to get them to Post Image so that I can post them. Not to worry because I also worked on finishing the fiberglass work needed to fill the holes from my changes. Post Image lost all of the links early in this thread so I will quickly recap. I decided to move the front window ( my trailer started life as a standard model without bathroom) around to my newly constructed side dinette. The fiberglass cutout from the new location was moved around to the front to fill in the hole left by removing the window. That is the repair I am working on. Here are the pics:
I filled and sanded the panel where the front window was.
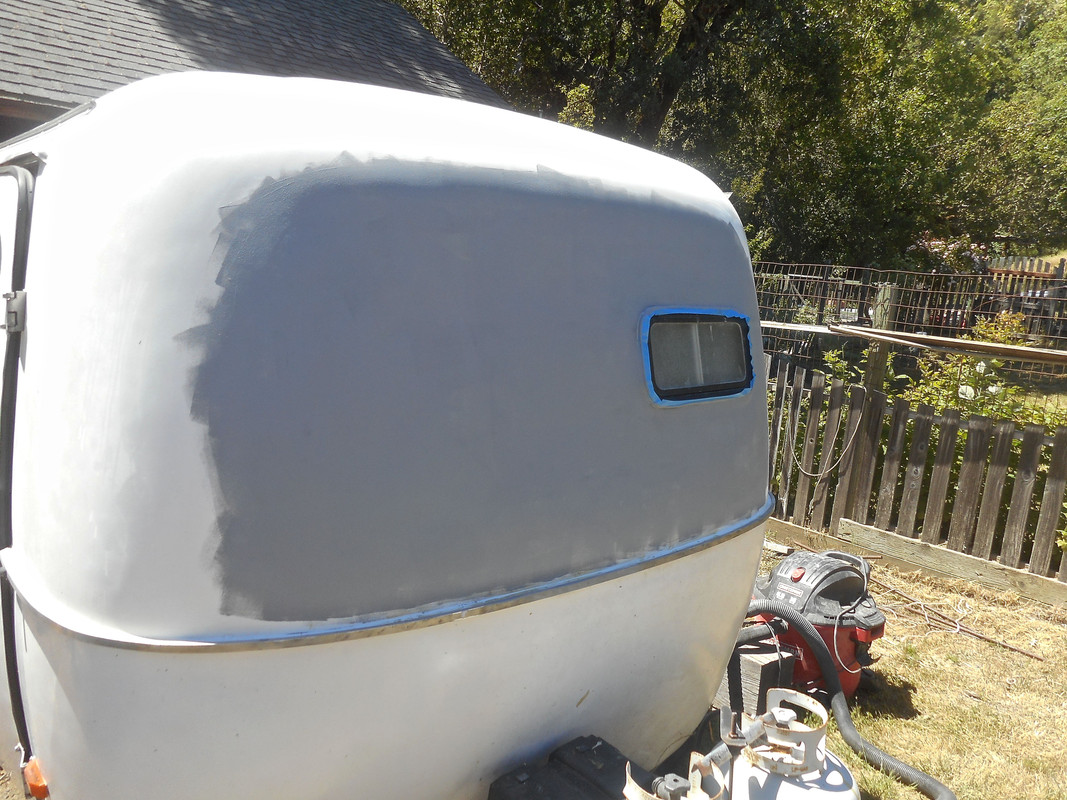
I used Ace Hardware oil based primer to paint the panel. I rolled it on. With the panel now all one color, I can see the imperfections. There aren't that many. In fact, I may call it good'nuff for this year. I bought a quart of Ace gloss white, oil based paint to finish it off for now. I plan to do a proper paint job when I decide all of the body modifications are complete. That won't be until after I use her this summer.
Next up is to move around to finish off the fiberglass panel where the fridge vents once were.
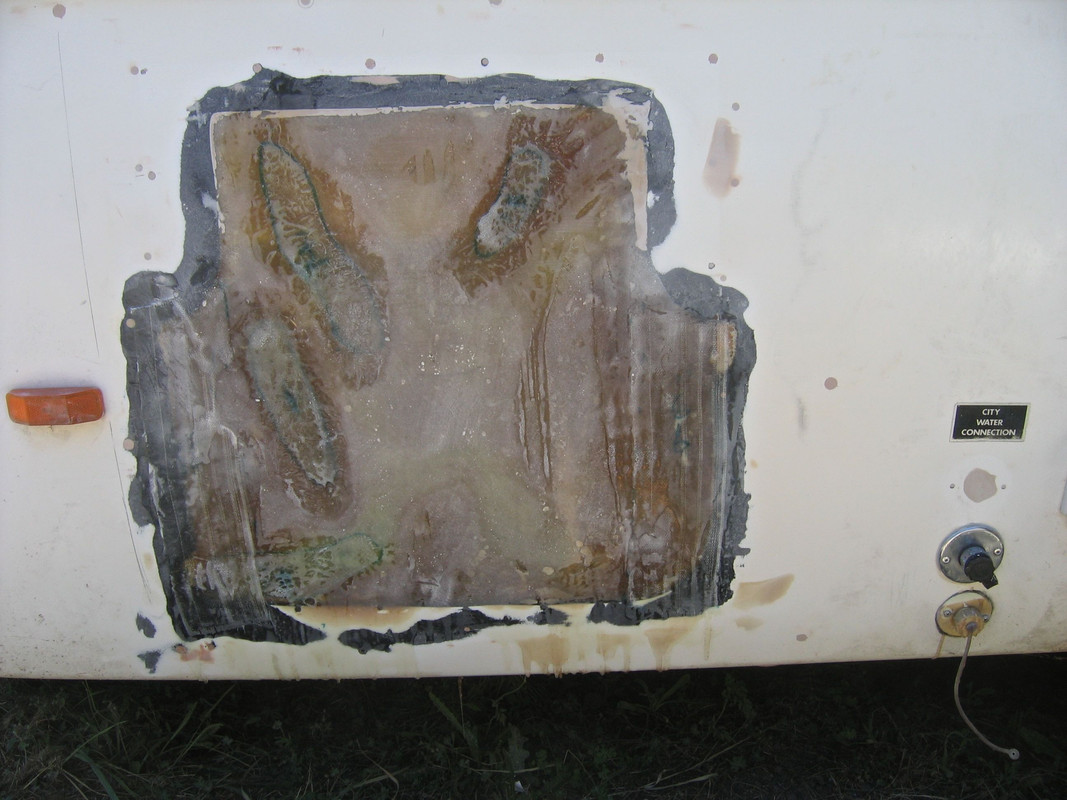
In this pic, I have sadnded the high spots down and filled the low spots with more fiberglass. I may do one more low spot fill with fiberglass before I deem her done, fiberglass wise, and do the final prep work with bondo.
|
|
|
|
|
06-03-2018, 12:29 AM
|
#185
|
|
Senior Member
Name: Mark
Trailer: 13' Boler
British Columbia
Posts: 161
|
Keep on killin' it!
I like your benches and underbed storage
|
|
|
|
|
06-06-2018, 01:09 PM
|
#186
|
|
Senior Member
Name: Michael
Trailer: Casita 16ft.
California
Posts: 338
|
Thank you! She is getting closer. We will take her out on the first trip late next week if all goes as planned. Besides all of the body and paint work, I have been working on inside details while I wait for body filler or primer paint to dry. I added an on/off toggle switch above the USB charge port to kill it when not in use due to the LED idiot light installed to tell you the port has power. I am trying to kill all of the parasitic power consumption on the battery. I installed one of the original interior light fixtures over the dinette but I became frustrated with the cheap 1156 bulb socket that wouldn't make good ground contact. I ordered some modern LED puck lights to replace the fixture.
But here is the biggest change of the day, I got a first coat of white paint on the fiberglass modifications at the front of the trailer and the old fridge vent site. She's starting to look a litle civilized again!
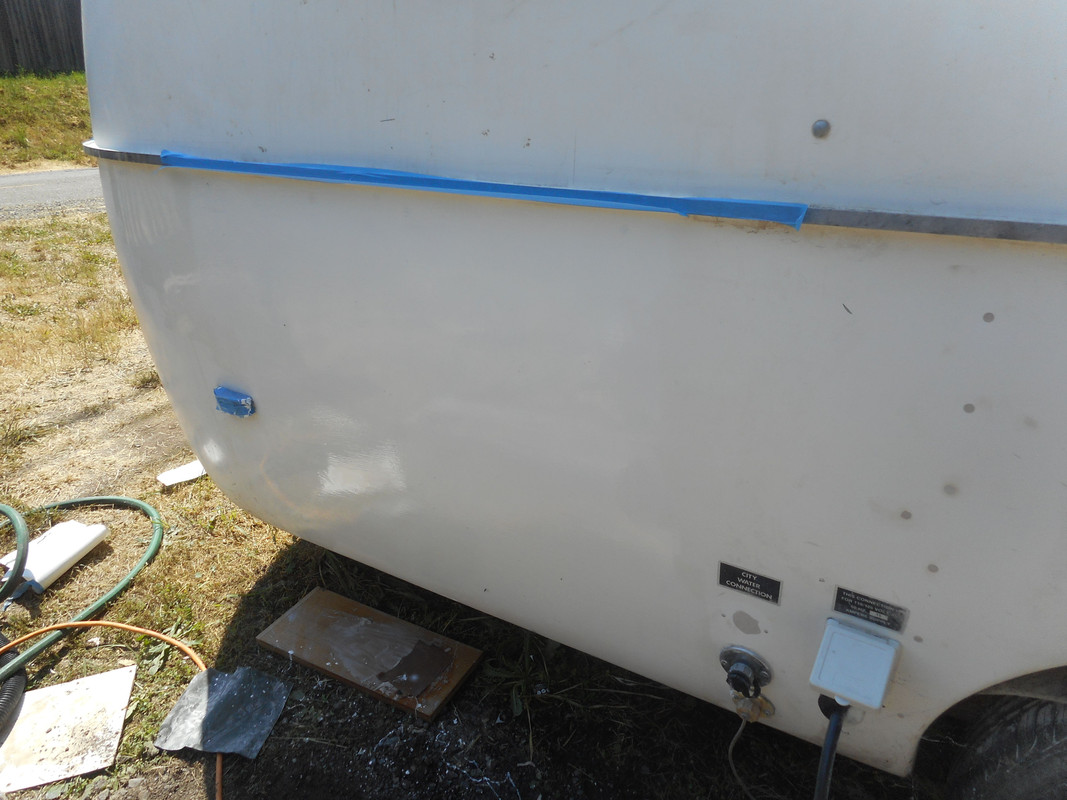
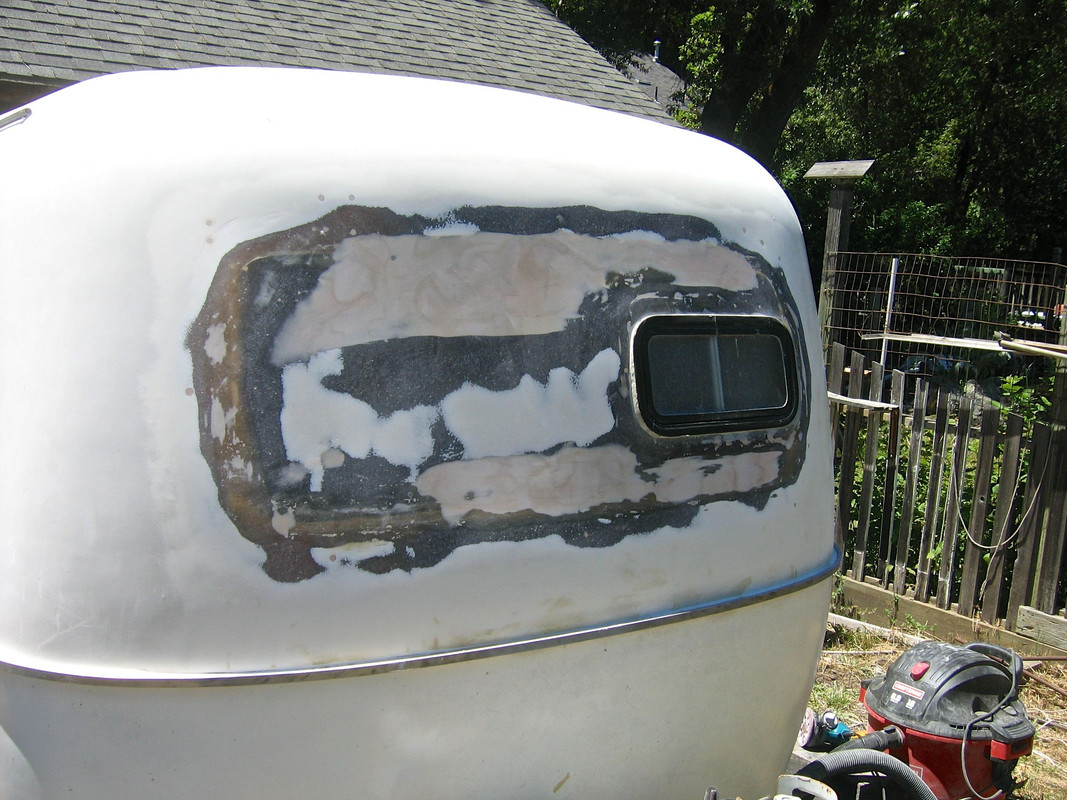
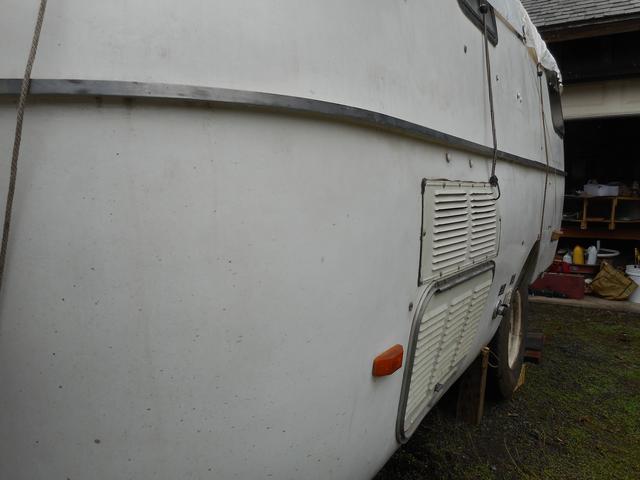
Because my pic links were broken and by the Postimage.org site and lost in my early postings, here is a before picture of the fridge vent side and a picture of the condition was in when I started fixing her in her broke back days.
|
|
|
|
|
06-06-2018, 01:33 PM
|
#187
|
|
Senior Member
Name: Eric
Trailer: 1987 Casita 16
Illinois
Posts: 503
|
Looks fantastic! I hope mine looks that good on the outside. I'm camping in Ohio now, and will do some things when I get back. Had several people stop and ask me about it -- and see it. I expect you'll get the same when you camp. Have fun.
|
|
|
|
|
06-06-2018, 08:23 PM
|
#188
|
|
Senior Member
Name: Michael
Trailer: Casita 16ft.
California
Posts: 338
|
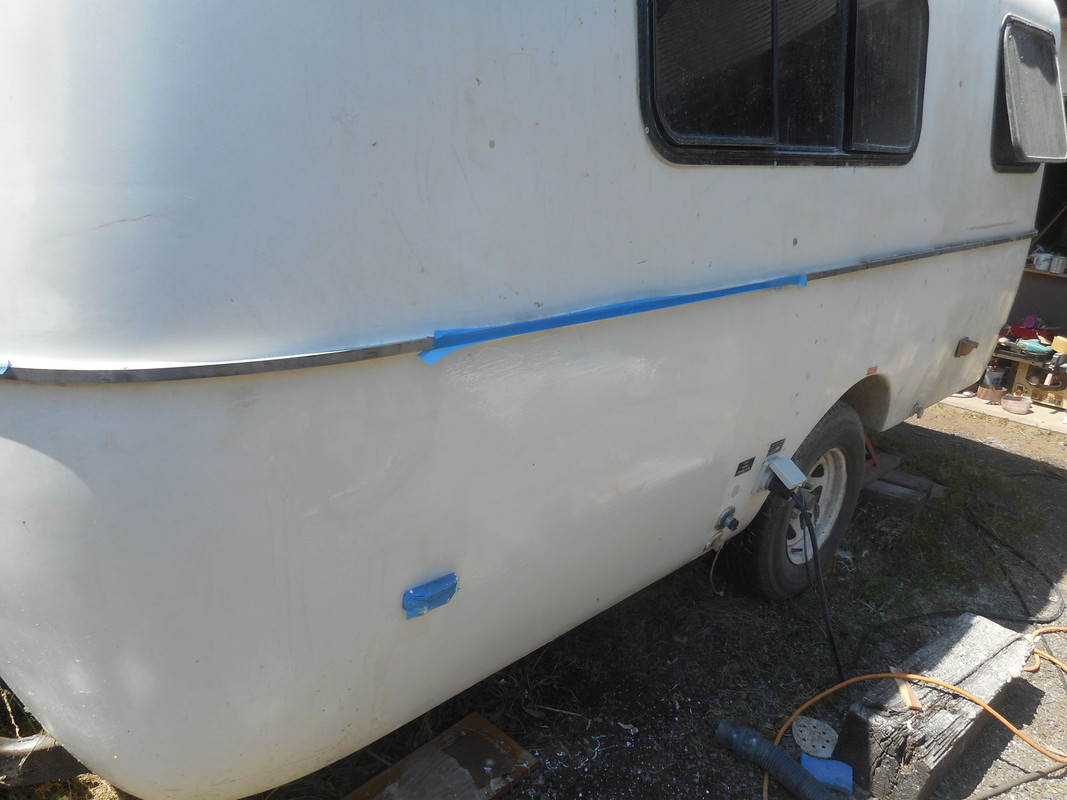
Thanks Eric. I hope to be like you enjoying my trailer in a week or so. Again, I will apply the 15 ft rule on this paint job. I am happy to report that my fiberglass work is pretty much invisible except for one small low spot on the lower edge were of the former fridge vent was filled in. The paint however is not as good.
I used the Ace Hardware equivalent of Rustoleum oil base white paint to cover the exposed fiberglass. I tried the roll and tip method with a roller in one hand and a brush in the other. I thought it was going to be a cool day but the sun came out a little to intensely in the middle of the job so the surface of the paint hardened too fast and wouldn't tip very well with the brush. But that's OK. I really intended this paint to be a temporary color coat to make the trailer all one color again thinking that it would also base coat for a proper paint job with a good marine polyurethane paint late in the fall or next spring. After this paint gets baked in this summer and thoroughly cured, I will hit it with a sanding block to flatten it before the new paint goes on.
|
|
|
|
|
06-23-2018, 11:02 AM
|
#189
|
|
Senior Member
Name: Michael
Trailer: Casita 16ft.
California
Posts: 338
|
We just returned from a five day shakedown run with the Casita. The trip went pretty well. One key question that I had was how well would our little Subaru Forester pull the trailer. My answer was pretty well. We took a lot of steep, curvy bumpy, sometimes dirt mountain roads out to minimally served BLM wilderness campsite out at the mouth of the Mattole River River on the Lost Coast of northern California. We did many miles at no more than 25 mph in 2nd & 3rd gears of our 4 speed automatic transmission. We had plenty of power, great braking controlled by the Takonsha wireless brake controller. We drove home on State Highway 101 to get a take on highway performance. The 2.5L 4cylinder boxer motor pulled pretty well on all but the steepest grades on the highway where she dropped down to 45 mph in 3rd gear to make the grade. The Subie for sure likes the slower back country roads when it comes to climbing grades. During the slow backroads going out to the Lost Coast, we averaged 16.5 mpg. Driving the highway coming home, our mpg went up to 17.7mpg. I would prefer a 6 cylinder car for highway use but until I buy one our little Subaru will do.
The trailer will need a few more tweaks before continuing on the project. The bulkheads need to be attached to the body in more places. I think I will fabricate aluminum angle brackets held in by 1/4 inch through bolts similar to the ones I installed in the booth will be added to the kitchen side bulkheads. The entry door needs some more work I will be going back to look at Eric's door rebuilding project for ideas. Here are some pics.
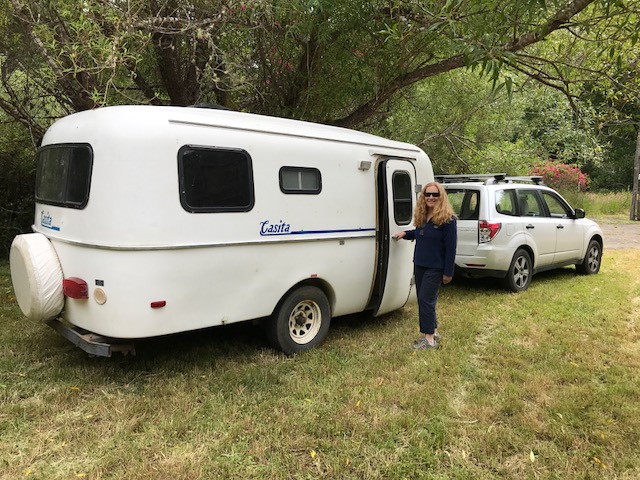
My lovely wife Laura at Old Rockport School, Rockport CA
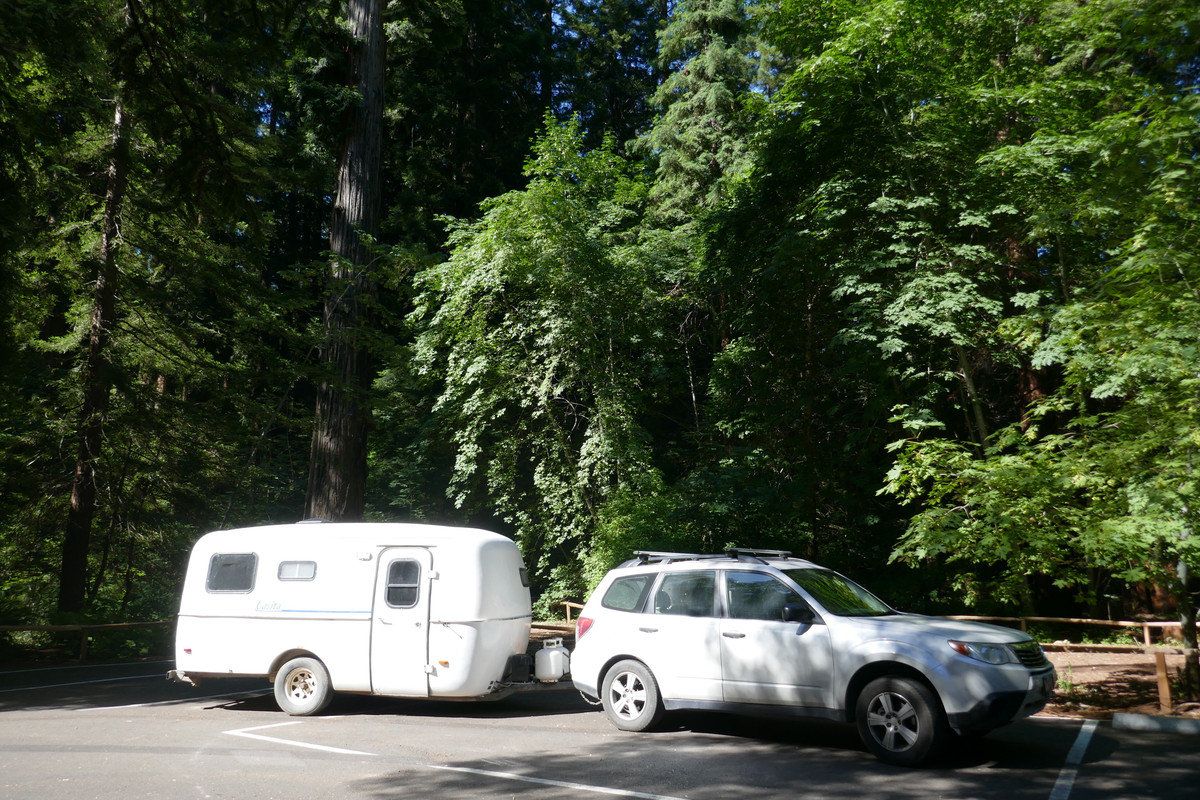
Smithe Redwood Grove
Legget CA
|
|
|
|
|
06-26-2018, 07:38 PM
|
#190
|
|
Senior Member
Name: Eric
Trailer: 1987 Casita 16
Illinois
Posts: 503
|
Looks really good. If we were closer, I could have given you some relatively new tires. I upgraded mine to Radials, and 14 inch since we are going to going on a pretty long trip, and the bias had a little cupping in them, nothing to hurt on shorter trips, but since we'll be doing about 9,000 miles, thought I would do the upgrade now, and have a little more peace of mind.
Going to get some pictures on my thread soon.
|
|
|
|
|
06-27-2018, 12:03 AM
|
#191
|
|
Senior Member
Name: Michael
Trailer: Casita 16ft.
California
Posts: 338
|
Eric, I am glad that you are getting out in your trailer too. We will be headed back to the coast after the 4th of July. We have that place in Rockport to camp gratis whenever we want to be there. It belongs to a friend who hardly ever uses the place.
On my trip to the Lost Coast last week that most of my use of this trailer will be in back country accessed by bumpy dirt roads so I need to really think about bullet proof installations of every stressed member. The bulkhead next to the door partially separated from the wall when a couple #10 screws pulled out of the wood. To make a better fix, I installed a couple of more homemade aluminum brackets to the bulkhead next to the door today using through bolts instead of screws. I put stainless carriage bolts through the hull, one top, one middle. She is stout now. I am going to add through bolts to the bracket tying the bulkhead to the floor too. I used carriage bolts because I figured if you're going to have a protrusion, you might as well have a good solid piece of stainless steel capping off the hole with a little caulk behind it to seal it rather than doing the same with those silly little tin washers with plastic caps to hide them. The rounded stainless heads of the bolts actually look better than those plastic caps too IMHO.
My tires are actually pretty decent. I am sure if you go by the calendar year, they might be aging out but the PO put these tires on new not long before she parked it for eight years. It was stored in a shady spot so the tires didn't get any direct sunlight during that time. The wheels have some rust that I haven't tried to clean up yet.
|
|
|
|
|
09-22-2018, 08:02 PM
|
#192
|
|
Senior Member
Name: Michael
Trailer: Casita 16ft.
California
Posts: 338
|
Well our summer fun got cut short when I noticed the tail end of the Casita was sagging. Further inspection revealed this.

The frame cracked on both sides right along the weld that holds the 1/4" thick axle mounting plates. The opposite side was cracked too but hadn't broken all of the way through. It was bent downward toward the rear. I must say that this is a really poor design. Putting all of the load front the Dexter axle right next to a bend where the factory drops the chassis down from the upper dining to main floor levels.
I pulled the chassis out from under the fiberglass body and then moved the chassis into the shop. I blocked up the main floor of the chassis level. So that I could jack the back half of the chassis level, I put a couple of 2X4's down from a beam in the shop to pin the forward section of the chassis down which allowed me to jack the rear section of the chassis level.

I than cut out a new set of axle mounting plates. To make my new plates, I started out with a pair of 12" X 36" X 1/4" hot roll mild steel plates. The 36" length allowes me to span the new plates over the crack in the frame by 18" fore and aft. The 12" width of the new plates allowed me to drop the axle mounting holes downward by 3 inches. This will give the chassis a 3" lift. That is good given that I want to do some serious boondocking with this thing behind my Jeep Cherokee XJ. The new plate also spans over the forward bend in the chassis which is not broken but it is another weak point IMHO. A similar 3/16" plate gussets the inside

Here you can see the size difference between the old and new axle mounting plates.

While the chassis is out, I will also eliminate this step up in the chassis tongue.
It is required thanks to my 3" lift in the back but I also consider these two bends a weak point.

The tongue slopes upward about an inch in 4 ft which I am sure is due to that weak point. The chassis is level but the bubble on the level shows the slope of the tongue.

|
|
|
|
|
09-23-2018, 12:43 PM
|
#193
|
|
Senior Member
Name: JD
Trailer: Scamp 16 Modified (BIGLY)
Florida
Posts: 2,445
|
Oddly a bend in tubing is actually where it already "failed " during manufacture.
If you weld in reinforcement plates be sure to taper them where the stress is spread over a greater area.
Theoretically there is no bending stress in the center of a beam so tapering and ending in the center would be ideal.
|
|
|
|
|
09-23-2018, 04:56 PM
|
#194
|
|
Senior Member
Name: Michael
Trailer: Casita 16ft.
California
Posts: 338
|
Thanks for the advice. I have thought about spreading out load too. I staggered the ending points of the inner and outer plates so that they don't both let up at the very same place in the tubing with the outer one ending about 8" forward of the last bend and the inner one another 6" forward of that. I think the design of the Dexter axle puts a lot of stress on the forward side in the form of a twisting motion. Add that to the fact that this stress point is only inches from the downward bend in the tubing makes for a very weak area in the design.
|
|
|
|
|
10-06-2018, 10:12 PM
|
#195
|
|
Senior Member
Name: Michael
Trailer: Casita 16ft.
California
Posts: 338
|
After a couple of coats of rattle can Rustoleum black enamel paint, I finally finished the frame repair today next up is to slide it back under the body and commence to bolting her together. Unfortunately, at the end of todays work, I noticed a swollen sack on the back of my right elbow and quickly came to the conclusion that I have bursitis! A quick look online told me that resting the arm is a must. So I guess the chassis will not go back in tomorrow  But anyway, here the some pics.
After the top side was welded, I flipped the chassis over so that the bottom side could be welded. I used chains and a come-along suspended to a beam in the ceiling of my shop. I think operating that come-along is what did in my elbow 

Once that was completed, I bolted the Dexter axle back up permanently with new grade 8 bolts and flipped her back over to her rolling side. The finished product looked like this.


While I was at it, I added some proper body mounting tabs on the outer edges of the frame. There are five on each side.

I think I mentioned that I added 3 inches to the bottom edge of the new axle mounting flange which effectively gives the chassis three inches of lift. Better to mach the height of my Jeep Cherokee XJ which is my tow vehicle.
|
|
|
|
|
10-07-2018, 07:09 AM
|
#196
|
|
Senior Member
Name: JD
Trailer: Scamp 16 Modified (BIGLY)
Florida
Posts: 2,445
|
If you haven't put the frame under yer, I would weld out the tops of the crossbars and gaps in the tops so that water doesn't have entry to the frame or sit in these areas.
Probably not an issue, but it will give your grand children another few years of service, depending where you live.
|
|
|
|
|
10-08-2018, 05:49 AM
|
#197
|
|
Senior Member
Name: Michael
Trailer: Casita 16ft.
California
Posts: 338
|
That probably a good idea Redbarron but the paint has been applied and I am done with welding for now. I may approach that in the future as I elected to not straighten the raised tongue at the front of the chassis right now and will approach that project in the future if it is warranted. Given that the trailer body will now be attached by proper bolts rather than bunches of metal screws through the floor, lifting the body up far enough to do welding projects on the chassis won't be that hard to do.
Here is a pick of the rolling chassis outside of the shop with the fiberglass body in the background ready to be paired once more.

The timber spanning the cribbing was just high enough to drag the chassis out without tires through the front during disassembly. She is three inches taller now so I will likely have to jack the front of the body up by that much to drag her back in. In this pick, she is sitting on her original 14" wheels & tires. Given my newly acquired ground clearance, I will move up to 15 inch wheels.
|
|
|
|
|
10-08-2018, 10:42 AM
|
#198
|
|
Senior Member
Name: JD
Trailer: Scamp 16 Modified (BIGLY)
Florida
Posts: 2,445
|
If you don't have the frame in place you might caulk those areas.
The won't be in the direct rain anyway and >you< will never have a problem with it.
|
|
|
|
|
10-09-2018, 05:14 PM
|
#199
|
|
Senior Member
Name: Michael
Trailer: Casita 16ft.
California
Posts: 338
|
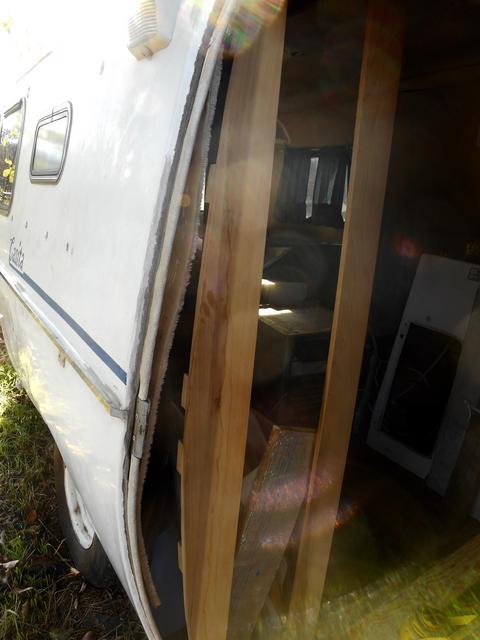
I got the body back on the chassis today. It is just sitting there. No bolts have been installed. I had the body supported on cribbing on each side with a timber spanning between which allowed me to slide the chassis underneath.


After the chassis was under the body I switched to internal cribs (cribbing between chassis rails) and then pulled the timbers out so they wouldn't interfere with lifting the chassis up to meet body.

I lifted the chassis until it supported the body, installed the new 4X4 Ford Ranger 15" steel wheels, took out the cribbing and lowered the entire kit and cabootle to the ground.
 njn
She has a good foot of clearance to the bottom of the chassis now. I have yet to bolt the body up. The trailer has new mounting locations now thanks the tabs that I welded to the outside of the main chassis rails so new 3/8" holes will have to be drilled up through the the trailer floor followed by bolts.
|
|
|
|
|
10-13-2018, 11:07 AM
|
#200
|
|
Senior Member
Name: Michael
Trailer: Casita 16ft.
California
Posts: 338
|
I took the now not broken back Casita out for her first drive with the rebuilt chassis and 3" lift. She pulls fine. Her stance matches up with the higher profile of my Jeep too. The Jeep has a tiny bit of sag from the tongue weight. Not enough to merit a load equalizing hitch IMO but perhaps a helper spring or an air shock of some kind.
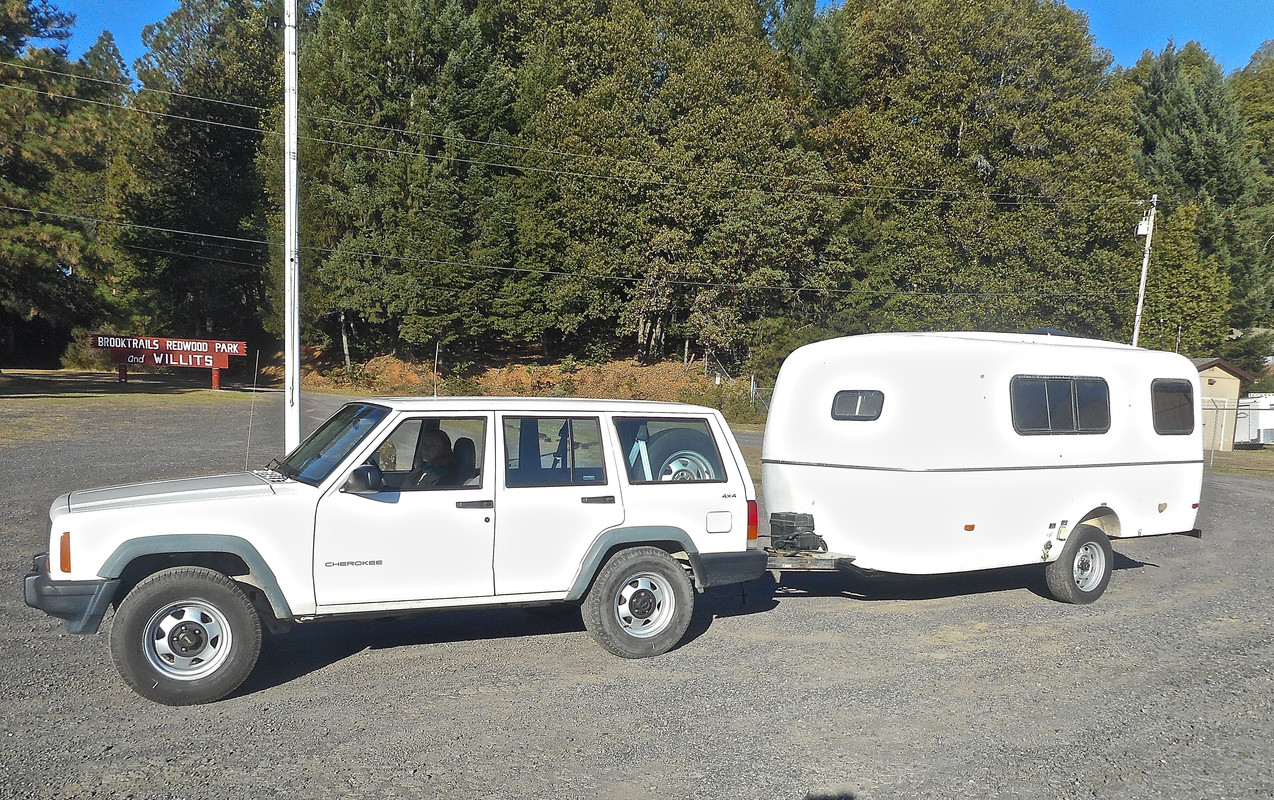
The body also straightened out than before since the back end isn't drooping like it was. I will need a step of some kind now for entry. I will look at my options, perhaps some kind of stand alone stool that is carried in the bathroom while in tow. I don't want to add a built in folding step that would decrease clearance as I plan to do some serious boondocking with this trailer. I have some new taller 15 inch tires on order that should pick her up another inch or so.
|
|
|
|
|
|
|
Currently Active Users Viewing This Thread: 1 (0 members and 1 guests)
|
|
|
 Posting Rules
|
You may not post new threads
You may not post replies
You may not post attachments
You may not edit your posts
HTML code is Off
|
|
|
|
 » Recent Discussions
 |
|
|
|
|
|
|
|
|
|
|
|
|
|
|
|
|
|
|
|
|
|
|
|
|
|
|
|
|
|
|
|
|
|
» Upcoming Events |
No events scheduled in
the next 465 days.
|
|


 Blue Jelly Bean
 Linear Mode


